Torque Tube Mounting Bracket Replacement
Torque Tube Mounting Bracket ReplacementRemoval Procedure
1. Raise and support the vehicle. Refer to Vehicle Lifting.
2. Place a jack stand under the torque tube.
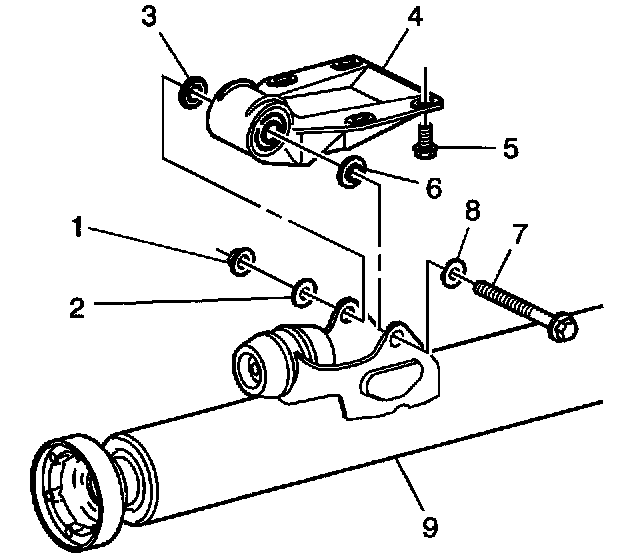
3. Remove the torque tube-to-bracket through bolt (7), nut (1), washers (2, 8), and spacers (3, 6).
4. Remove the mounting bracket-to-body bolts (5) from the torque tube bracket (4).
5. Lower the jack stand slightly in order to gain access to the torque tube bracket.
6. Remove the torque tube bracket.
Installation Procedure

Important: Do not tighten the torque tube bracket through bolt. Hand tighten only until the bracket is secured to the vehicle body.
1. Install the torque tube-to-bracket through bolt (7), nut (1), washers (2, 8), and spacers (3, 6).
2. Raise the jack stand in order to install the torque tube mounting bracket to the vehicle body.
Notice: Refer to Fastener Notice in Service Precautions.
3. Install the mounting bolts (5) to the torque tube bracket (4).
^ Tighten the torque tube mounting bracket-to-body bolts to 55 Nm (41 ft. lbs.).
^ Tighten the torque tube-to-bracket through bolt to 64 Nm (47 ft. lbs.).
4. Remove the jack stand.
5. Lower the vehicle.