Trunk / Liftgate Weatherstrip: Service and Repair
Weatherstrip Replacement - Rear Compartment Opening
Removal Procedure
1. Open the rear compartment.
2. Remove the rear compartment sill plate. Refer to Trim Panel Replacement - Cargo Area Rear (Trim Panel Replacement - Cargo Area Rear) in Interior Trim.
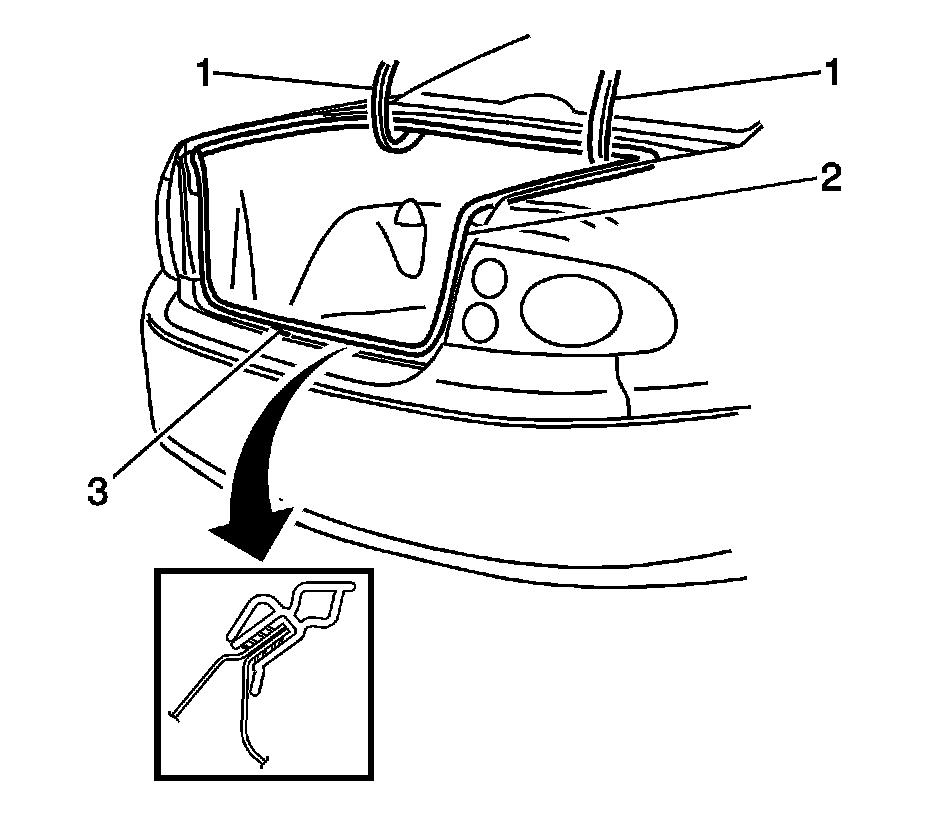
3. Grasp the rear compartment weather-strip (2).
4. Pull up on the weather-strip (2) to release the weather-strip from the pinch-weld flange.
5. Remove the rear compartment weather-strip (2) from the pinch-weld flange.
Installation Procedure
1. Install the rear compartment weather-strip (2) to the pinch-weld flange.
2. Locate the color mark on the rear compartment weather-strip (2) to body centerline at the front of the rear compartment lid opening.
3. Engage the rear compartment weather-strip (2) onto the pinch-weld flange. Start at the top center (3) of the lid opening. Work toward the bottom center.
Allow crowding of the weather-strip in each corner (1) to avoid short cutting of the corners.
Use a rubber mallet to ensure the full engagement of the rear compartment weather-strip to the pinch-weld flange.
4. Remove the rear compartment sill plate. Refer to Trim Panel Replacement - Cargo Area Rear (Trim Panel Replacement - Cargo Area Rear) in Interior Trim.
5. Close the rear compartment.