Defroster Duct Replacement - Windshield
DEFROSTER DUCT REPLACEMENT - WINDSHIELDRemoval Procedure
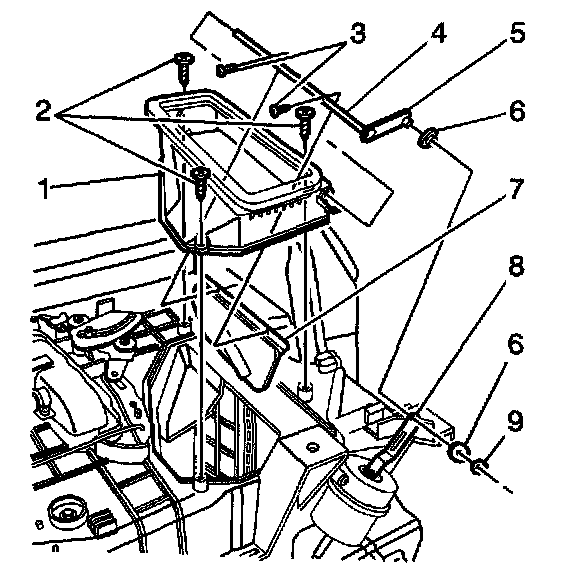
1. Remove the HVAC module.
2. Remove the clip (9), actuator rod (8) and spacers (6) from the defroster door lever (5).
3. Remove the screws (2) from the defroster duct (1) to HVAC module.
4. Remove the defroster duct and door assembly from the HVAC module.
5. Remove the screws (3) from the defroster door (7) to door shaft (4).
6. Remove the defroster door from the defroster duct.
Installation Procedure
NOTICE: Refer to Fastener Notice in Service Precautions.
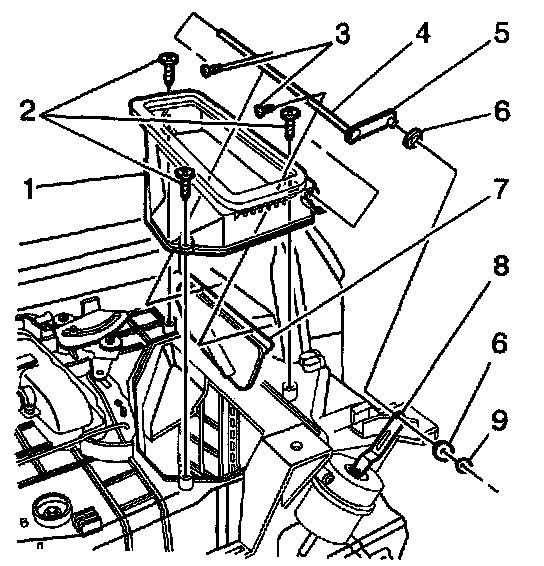
1. Install the defroster door (7) to the defroster duct (1) and door shaft (4). Secure the door with the screws (3).
Tighten
Tighten the screws to 0.8 Nm (7 Ib in).
2. Install the defroster duct and door assembly to the HVAC module. Secure the defroster duct with the screws (2).
Tighten
Tighten the screws to 4 N.m (35 Ib in).
3. Install the actuator rod (8), spacers (6) and clip (9) to the defroster door lever (5).
4. Install the HVAC module.