Differential Mount: Service and Repair
Differential Carrier Assembly Mount Replacement^ Tools Required
- J 45059 Angle Meter
Removal Procedure
1. Raise and support the vehicle.
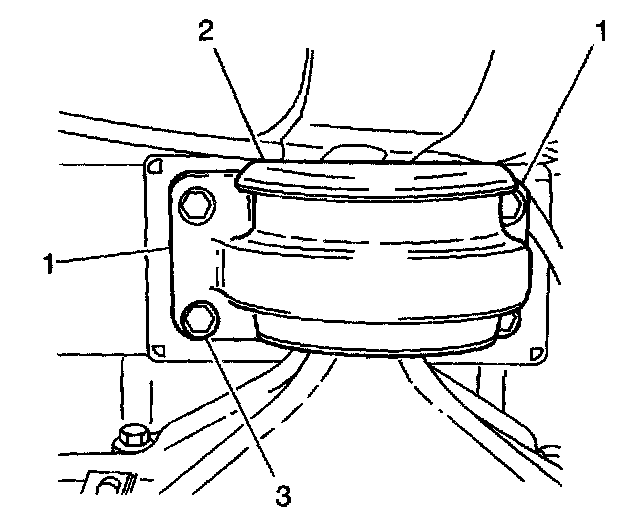
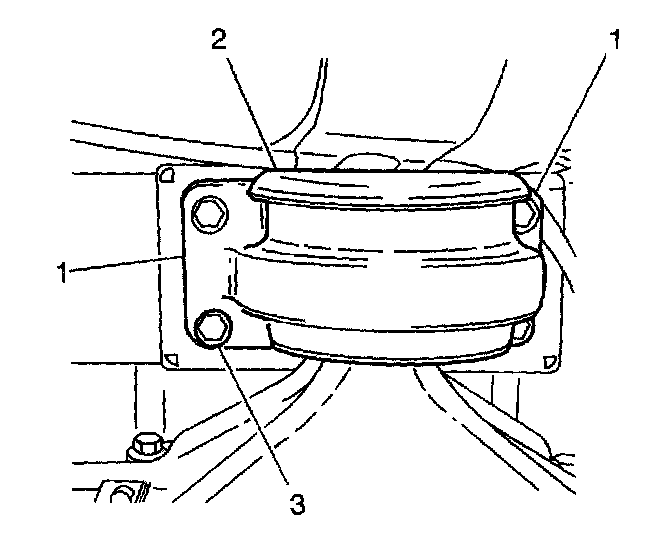
2. Mark the relationship of the rear differential mount to the underbody (A).
3. Support the differential carrier.
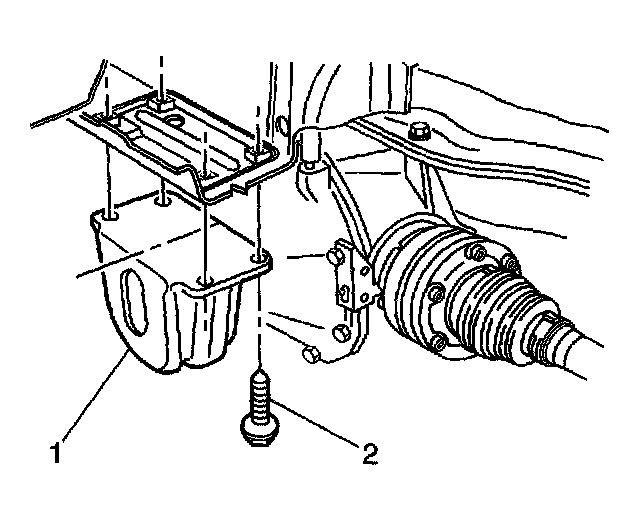
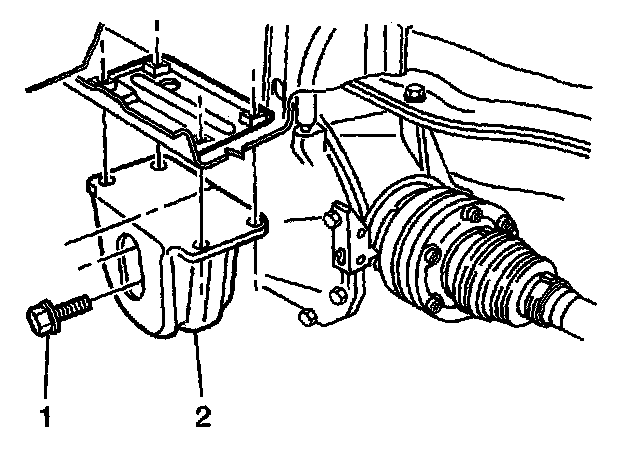
4. Remove the rear mount to underbody bolts (2) and discard.
Important: Do not allow the propeller shaft or the left drive shaft to rest on the exhaust system.
5. Lower the differential carrier and rear suspension crossmember at least 60 mm (2.4 inch).
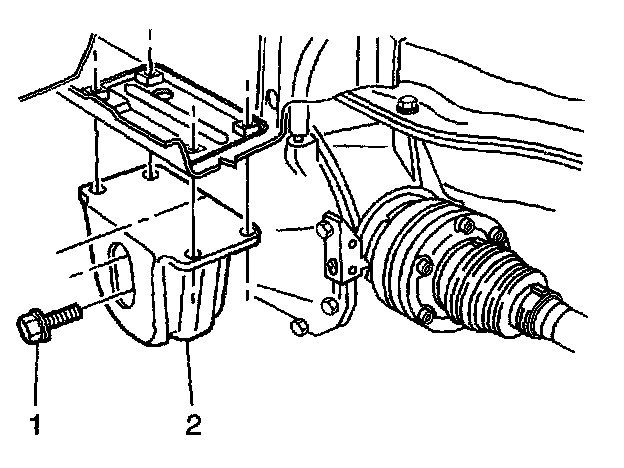
6. Remove the rear mount to differential carrier bolts (1) and discard.
7. Remove the rear mount.
Installation Procedure
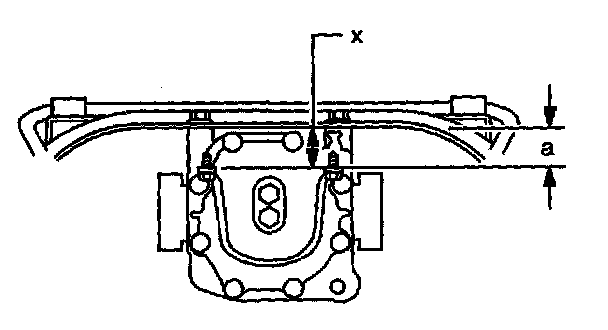
Important: When tightening the mount bolts' ensure the mount does not twist. The mount should remain parallel (X) with the rear suspension support.
1. Using new bolts, (1) install the rear mount to the differential cover.
Notice: Refer to Fastener Notice in Service Precautions.
2. Tighten the differential mount bolts.
^ Tighten the bolts to 95 Nm (70 ft. lbs.).
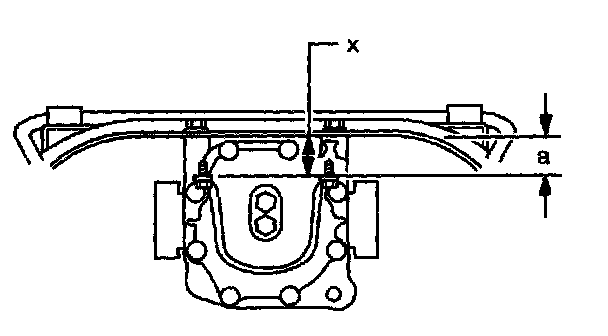
Important: Ensure the underbody and the rear mount are parallel. Dimension (a) should be 56.7 mm (2.2 inch).
3. Raise the differential until it contacts the underbody.
4. Align the marks (A) and install the mount bolts finger tight.
5. Align the rear suspension support.
5.1. Tighten mount bolts to 90 Nm (66 ft. lbs.).
5.2. Using the J 45059, apply an additional 67 degrees of torque.
6. Lower the vehicle.