Control Valve Body Assemble
Control Valve Body Assemble
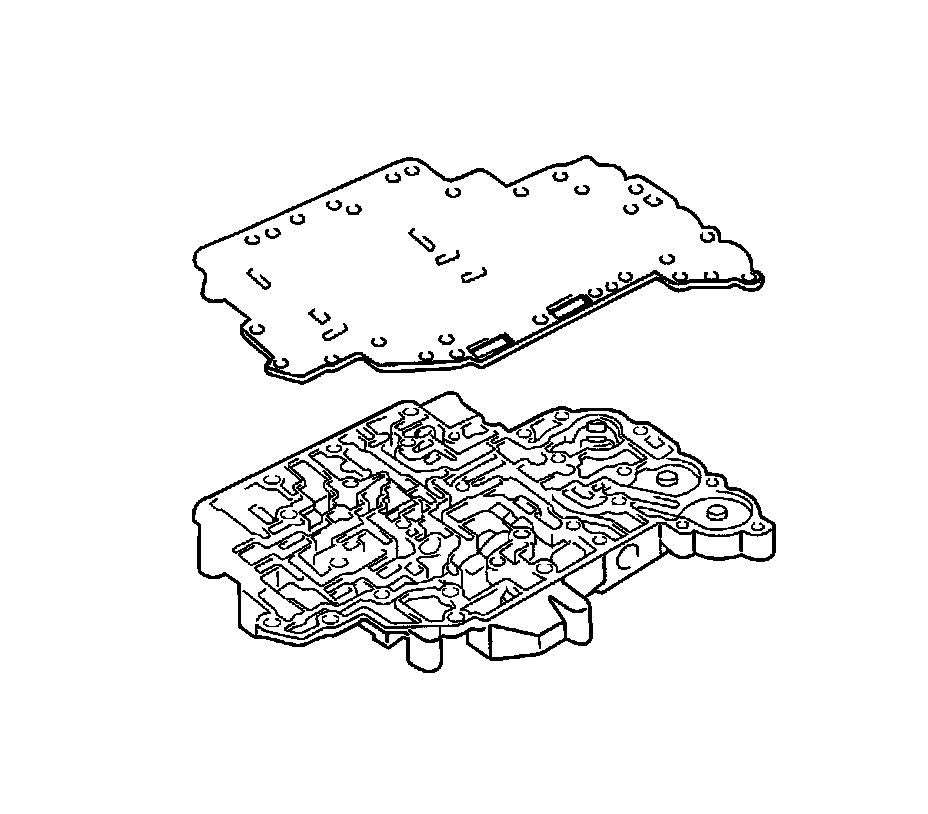
1. Install the valve body plate to the lower valve body.
2. Install the upper valve body to the lower valve body with the plate.
3. Notice:
Refer to Fastener Notice in Service Precautions.
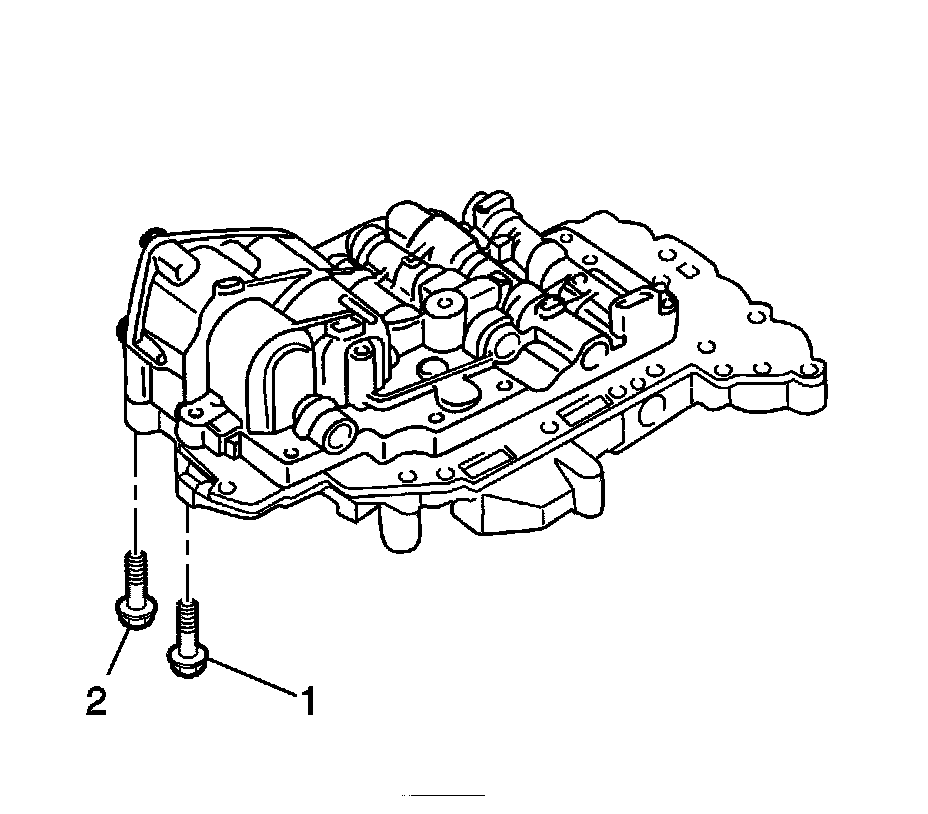
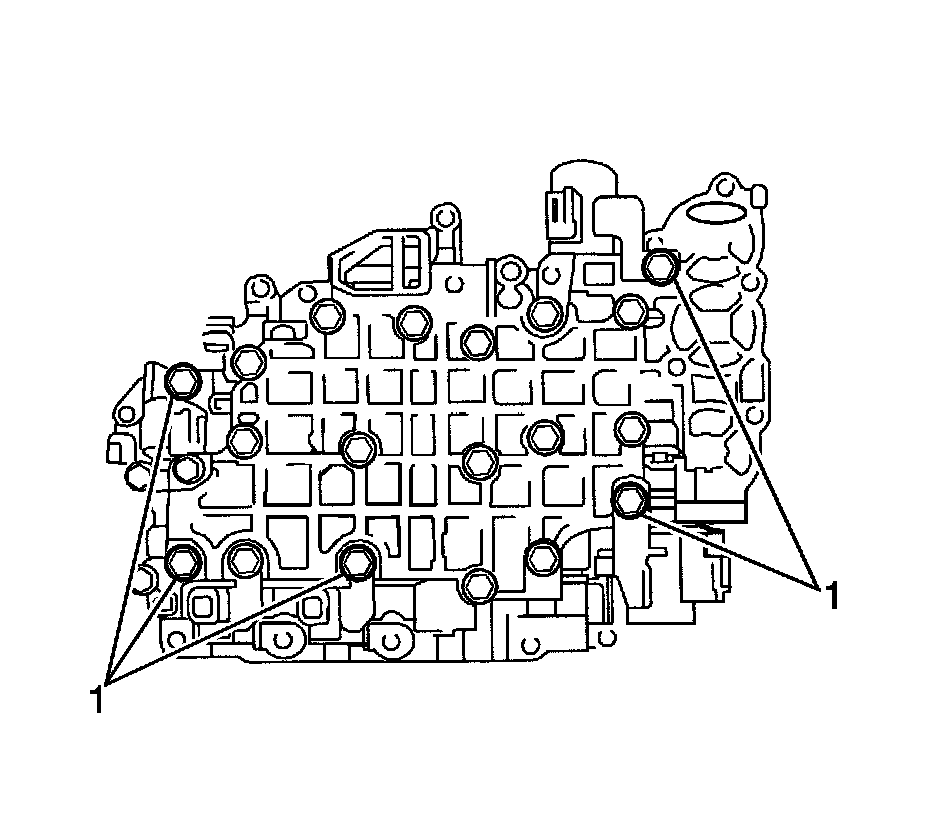
Install the 2 bolts to the valve body. The bolt lengths are 49 mm (1.93 inch) (1) and the 36 mm (1.42 inch) (2).
Tighten the bolts to 11 Nm (97 inch lbs.).
4. Turn the valve body.
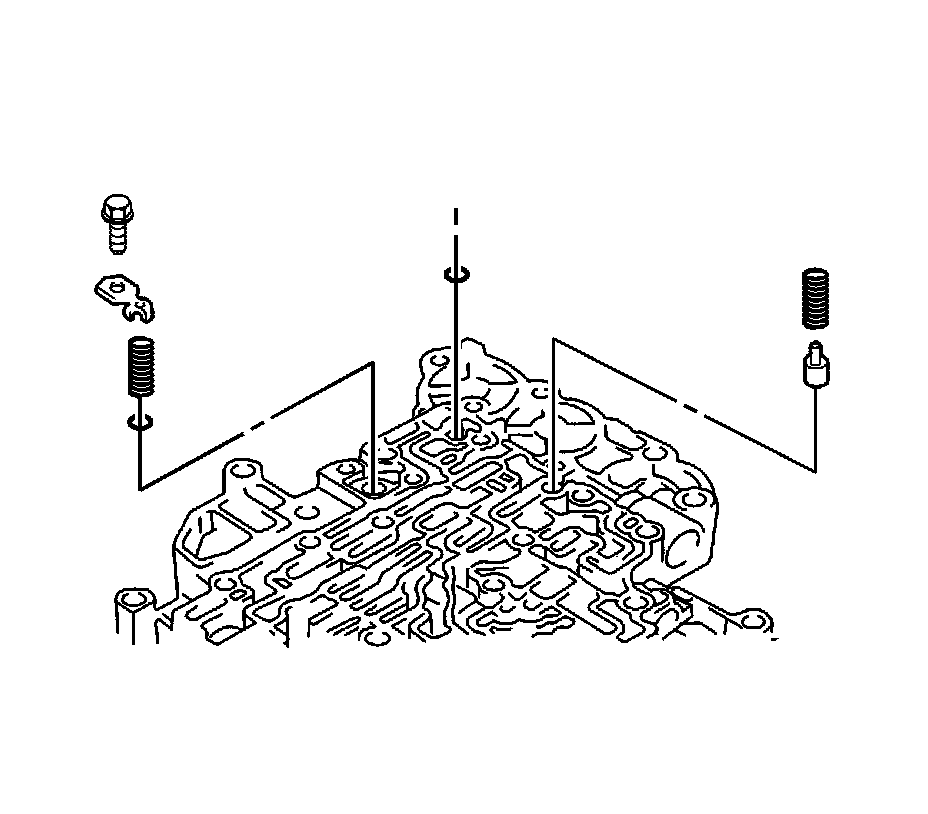
5. Install the check valve, spring, and check ball.
6. Install the ball, spring, spring seat, and bolt.
Tighten the bolts to 6.5 Nm (57 inch lbs.).
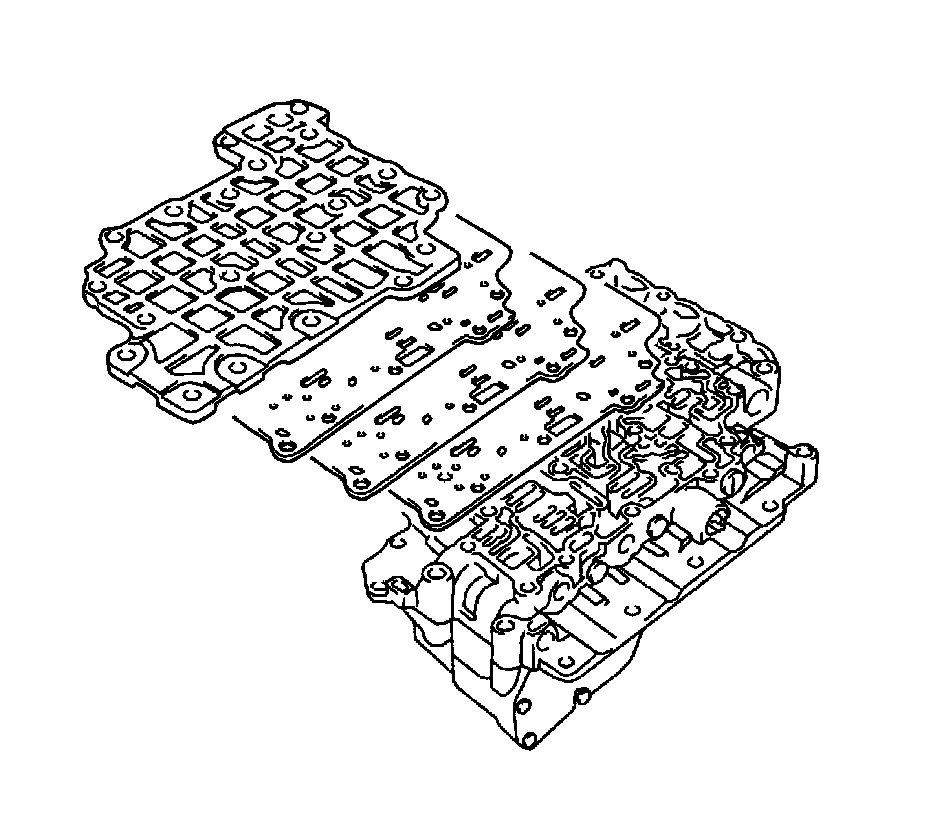
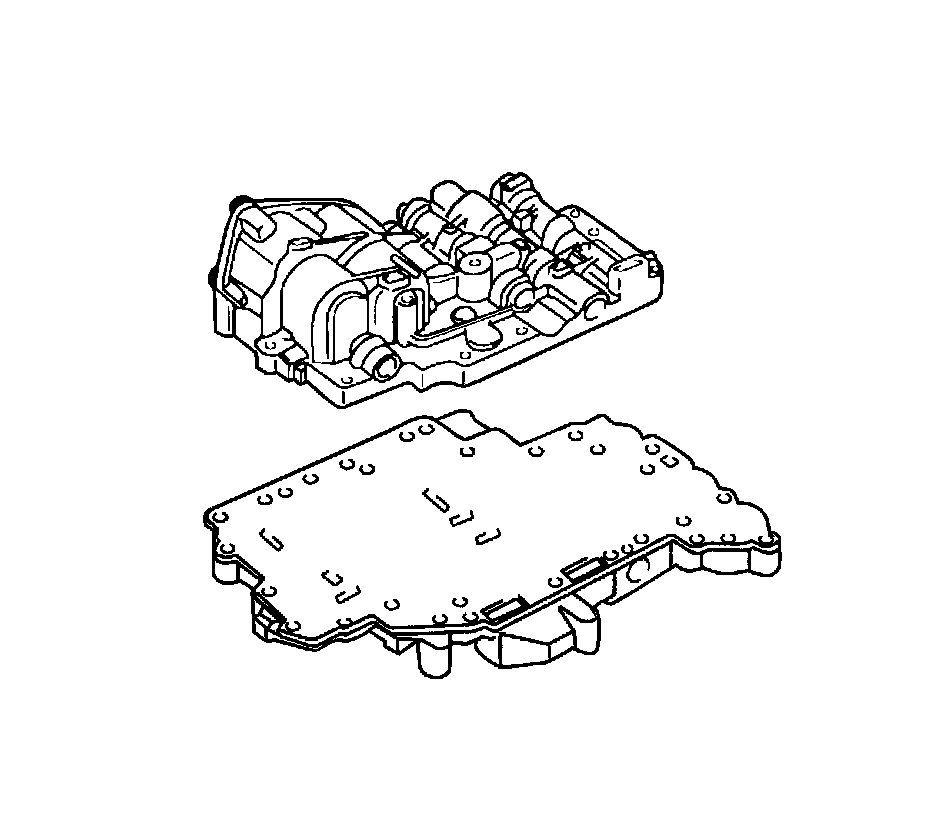
7. Install the 2 gaskets, the plate, and the lower valve body cover.
8. Tighten the bolts temporarily.
9. Tighten the bolts completely. The bolt lengths are 49 mm (1.93 inch), 20 mm (0.79 inch), and 60 mm (2.36 inch).
Tighten the bolts to 11 Nm (97 inch lbs.).
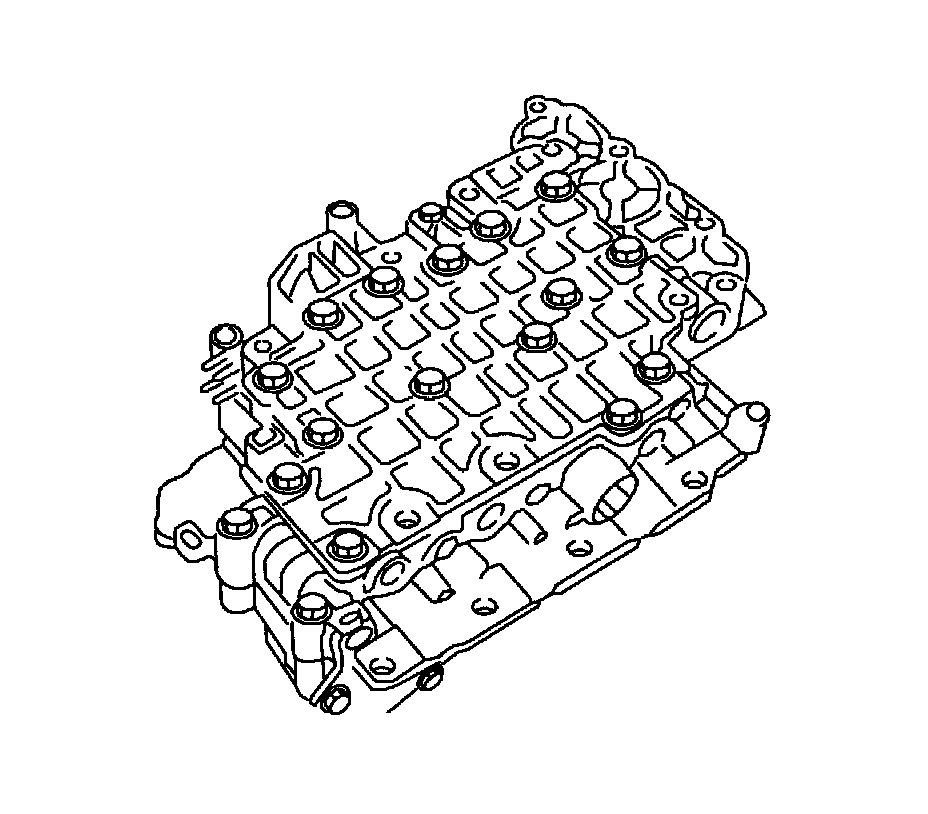
10. Install the 5 shift solenoid valves with the 5 bolts (1). The bolt lengths are 49 mm (1.93 inch) and 20 mm (0.79 inch).
Tighten the bolts to 11 Nm (97 inch lbs.).
11. Install the manual valve.
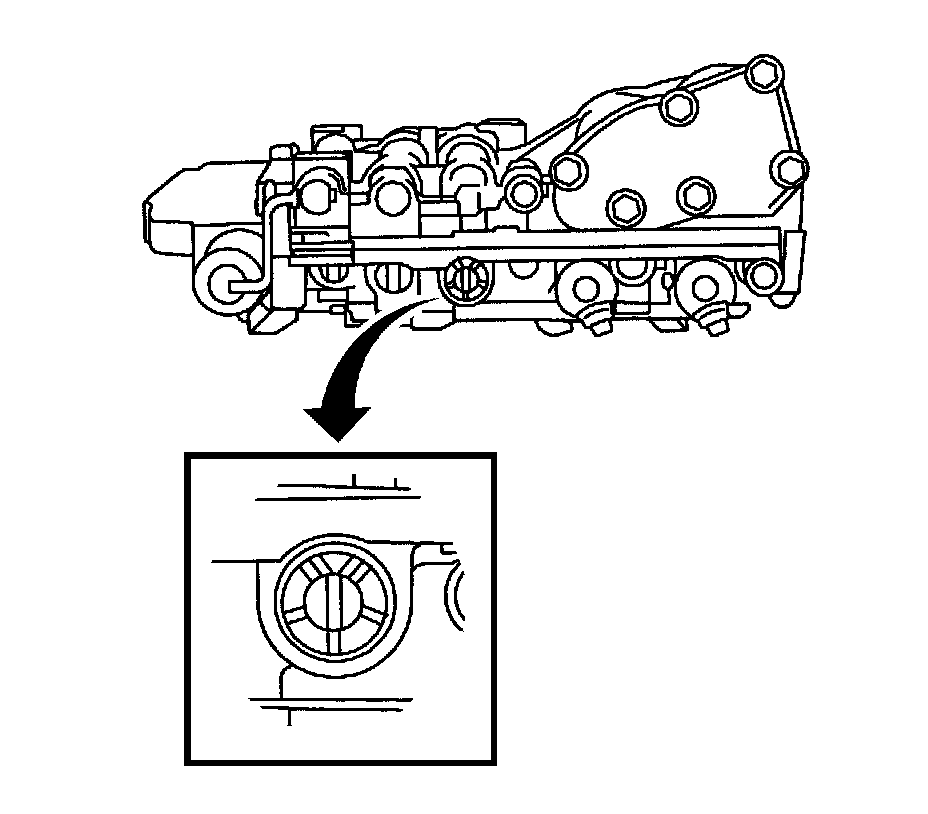
12. Make sure that the primary regulator valve is positioned in the same place where it was removed.