Rear Brake Shield Replacement
Rear Brake Shield Replacement (All Wheel Drive)
Removal Procedure
1. Remove the rear knuckle. Refer to Knuckle Replacement (All Wheel Drive) (Knuckle Replacement)Knuckle Replacement (GT) (Knuckle Replacement (GT)).
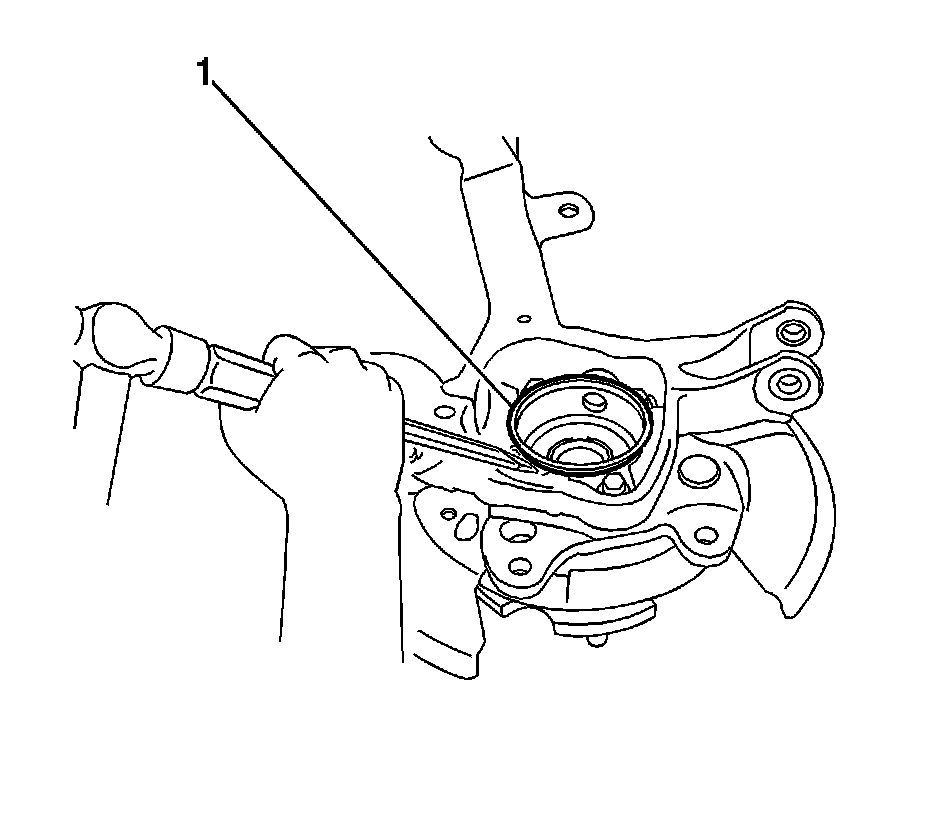
2. Remove the wheel bearing dust deflector (1).
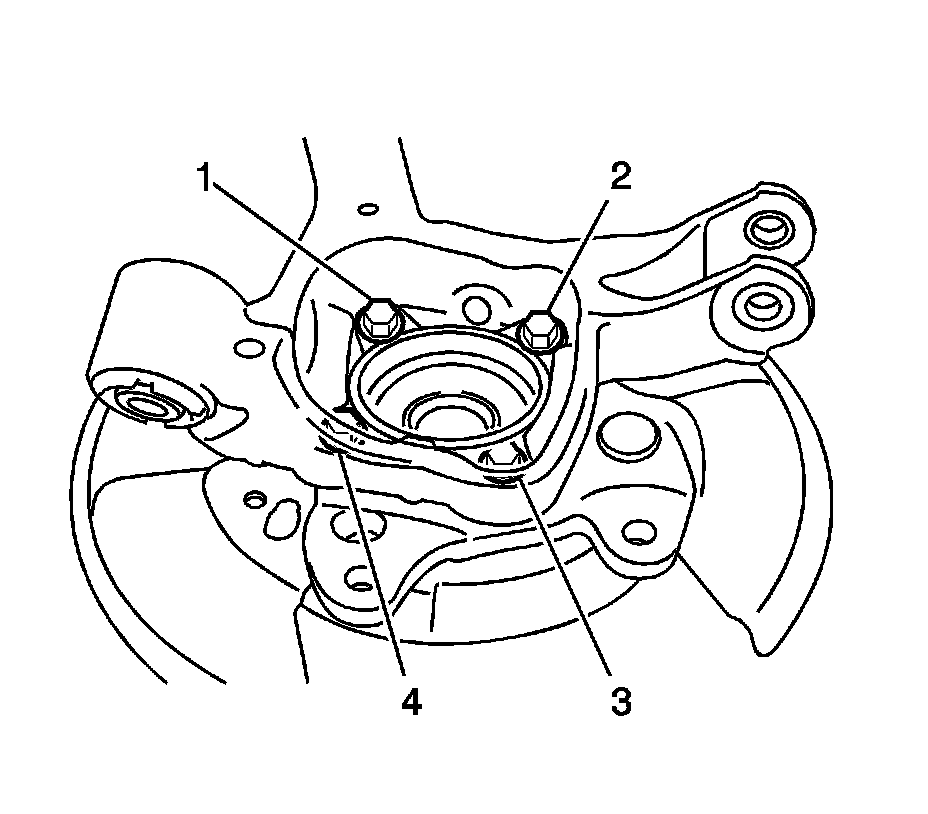
3. Remove the 4 bolts (1, 2, 3, 4).
4. Remove the wheel bearing and hub assembly from the knuckle.
5. Remove the rear brake shield from the knuckle.
Installation Procedure
1. Install the rear brake shield to the knuckle.
2. Install the wheel bearing and hub assembly to the knuckle.
Caution: Refer to Fastener Caution (Fastener Caution).
3. Install the 4 bolts (1, 2, 3, 4) to the knuckle and tighten to 56 Nm (41 lb ft).
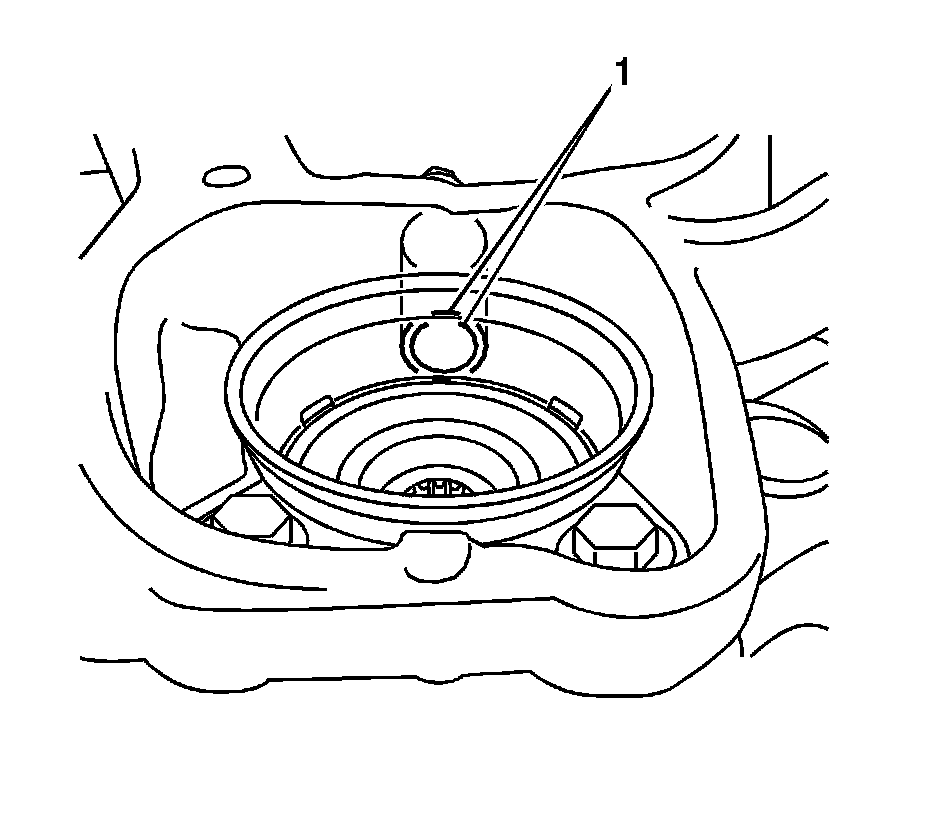
4. Align the hole (1) for the rear wheel speed sensor in a NEW dust deflector with the hole in the knuckle.
5. Use a hydraulic press and press tools in order to install a NEW dust deflector.
6. Install the rear knuckle. Refer to Knuckle Replacement (All Wheel Drive) (Knuckle Replacement)Knuckle Replacement (GT) (Knuckle Replacement (GT)).