Evaporator Case: Service and Repair
Rear A/C Unit (Rear A/C Evaporator) Removal and InstallationRemoval
1. Disconnect negative (-) cable at battery.
2. Recover refrigerant by using recovery and recycling equipment. Be sure to follow the instruction manual for the equipment.
The amount of compressor oil removed must be measured and the same amount added to the system.
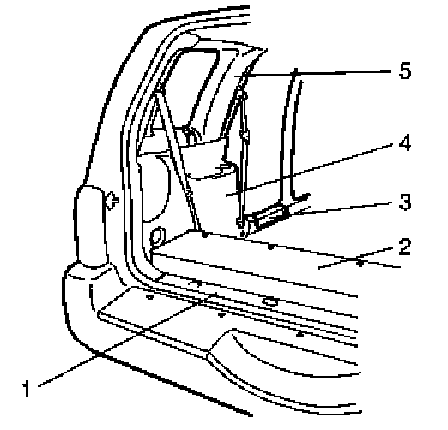
3. Remove rear luggage mat end garnish (1), rear luggage box (2), rear side sill scuff (3) rear quarter lower trim (4) and rear quarter upper trim (5).
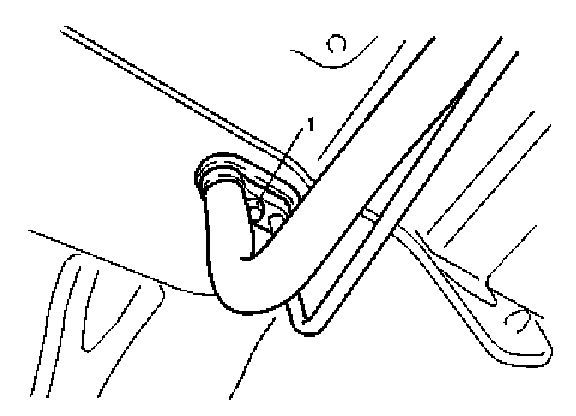
4. Loosen floor suction pipe and floor liquid pipe mounting bolt (1).
5. Remove rear A/C No.1 duct (1).
6. Disconnect rear A/C unit wire coupler (2).
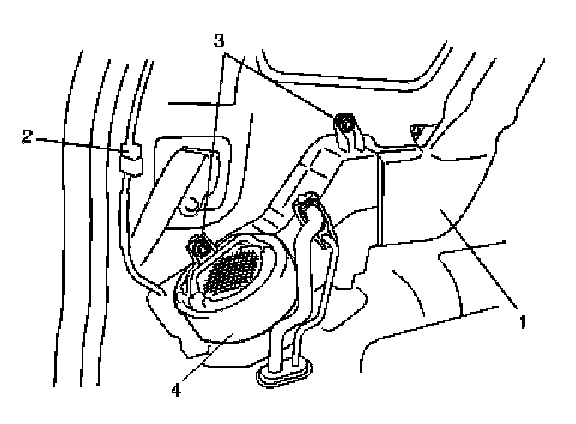
7. Remove rear A/C unit mounting bolts (3), and then remove rear A/C unit (4).
NOTE: Cap open fitting immediately to keep moisture out of system.
Installation
1. Reverse removal procedure to install rear A/C unit noting the following points.
- Evacuate and charge system. Refer to Recovery and Evacuating of A/C System in Operation Procedure for Charging A/C with Refrigerant.
- If rear A/C unit or rear A/C evaporator is replaced, pour 50 cc of refrigerating oil to compressor suction-side.