Seals and Gaskets: Service and Repair
Rear Oil Seal: Removal and Installation
Removal
For 2WD Models
1) Remove rear propeller shaft. Refer to [Rear Propeller Shaft: Removal and Installation] 3S1310 Type (3S1310), [Rear Propeller Shaft: Removal and Installation] 3S1330 Type (3S1330), [Rear Propeller Shaft: Removal and Installation] 3S1330-2BJ100 Type (3S1330-2BJ100).
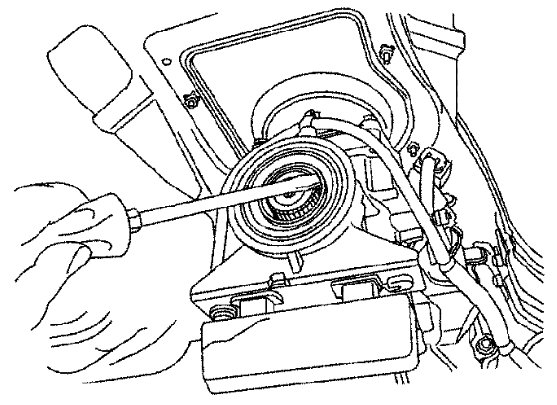
2) Remove dust seal and rear oil seal using suitable tool.
CAUTION:
Do not damage rear extension.
For 4WD Models
3) Remove front and rear propeller shafts. Refer to [Propeller Shaft: Removal and Installation] 2F1310 Type (front) and [Propeller Shaft: Removal and Installation] 2S1330 Type (2S1330), [Rear Propeller Shaft: Removal and Installation] 3S1330-2BJ100 Type (3S1330-2BJ100) (rear).
4) Remove transfer assembly. Refer to [Transfer Assembly: Removal and Installation] Removal and Installation.
5) Remove rear oil seal using Tool.


CAUTION:
Do not damage OD gear case.
Installation
Installation is in the reverse order of removal.
For 2WD Models
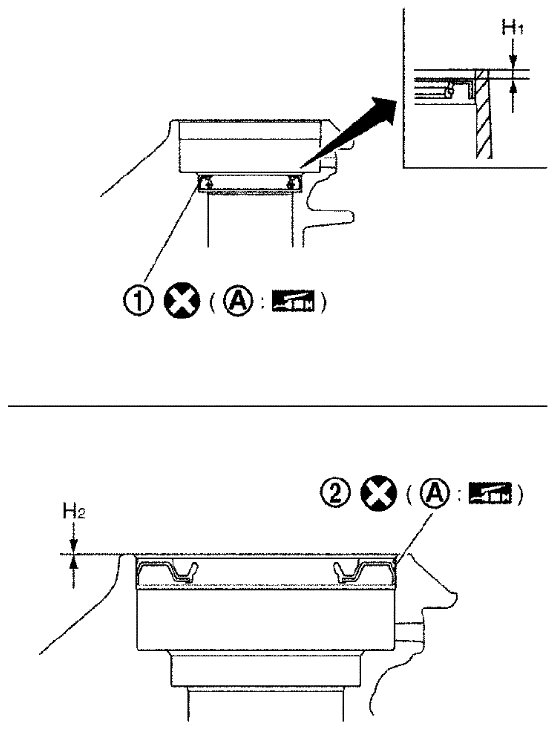
- Drive the new rear oil seal (1) and new dust seal (2) using Tools.


CAUTION:
- Do not reuse rear oil seal.
- Do not incline the dust seal and rear oil seal during installation.
(A): Seal lip
For 4WD Models
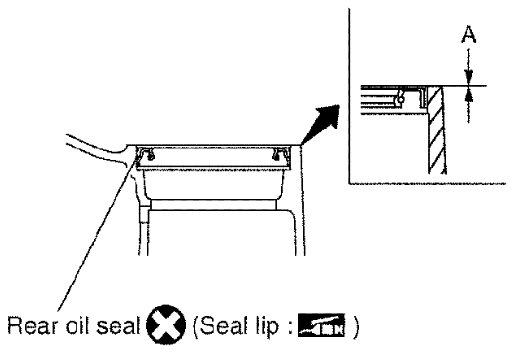
- Drive the rear oil seal using Tool.


CAUTION:
- Do not reuse rear oil seal.
- Do not incline the rear oil seal during installation.
- Check the transmission oil level after installation. Refer to [M/T Oil: Checking] Procedures.