Antenna: Testing and Inspection
INSPECTION1. GLASS PRINTED ANTENNA INSPECTION PROCEDURE
NOTE:
- When cleaning the glass, use soft dry cloth, and wipe the glass in the direction of the wire.
Take care not to damage the wires.
- Do not use detergents or glass cleaners with abrasive ingredients.

NOTE:
In order not to damage the glass printed antenna, wrap up the tip of the tester stick with aluminum foil as shown in the illustration and check by holding the aluminum foil with a finger.

By placing and moving the tester stick along the glass printed antenna, check if continuity exists.
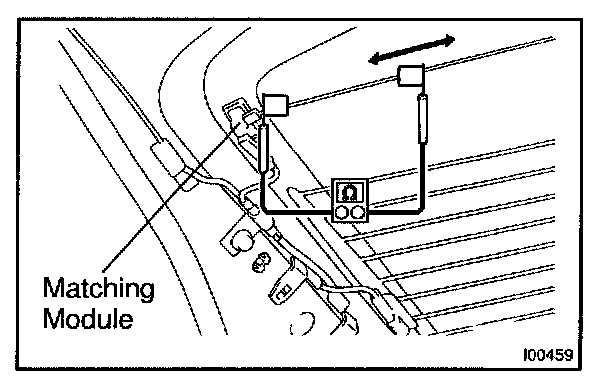
HINT: Matching module is built in the bus bar of the glass printed antenna (main terminal side) of CELICA and no continuity exists between the terminal and the antenna. Therefore, for the continuity checking of the glass printed antenna on the main antenna side of CELICA, place one probe of the tester on the position beside the bus bar (position shown in the illustration) and check by making the other probe of the tester move along.
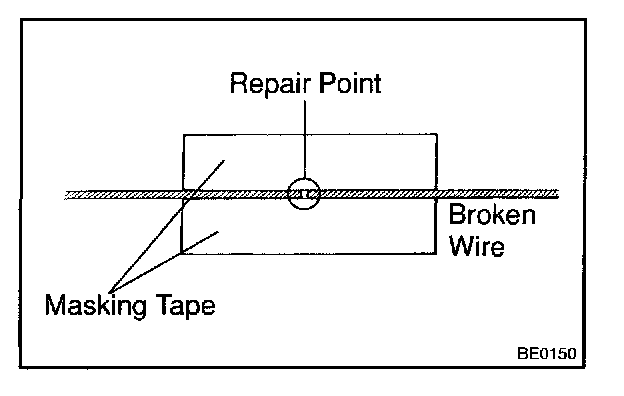
2. GLASS PRINTED ANTENNA REPAIR PROCEDURE
a. Clean the broken wire tips with grease, wax and silicone remover.
b. Place the masking tape along both sides of the wire for repair.
c. Thoroughly mix the repair agent (Dupont paste No. 4817).

d. Using a fine tip brush, apply a small amount of the agent to the wire.
e. After a few minutes, remove the masking tape.