Removal and Installation
Door Side Airbag Sensor:
REMOVAL
NOTE:
- If the wiring connector of the SRS is disconnected with the ignition switch at ON position, DTCs will be recorded.
- Never use SRS parts from another vehicle. When replacing parts, replace them with new parts.
- Never reuse the sensor involved in a collision when the SRS has deployed.
- Never repair a sensor in order to reuse it.
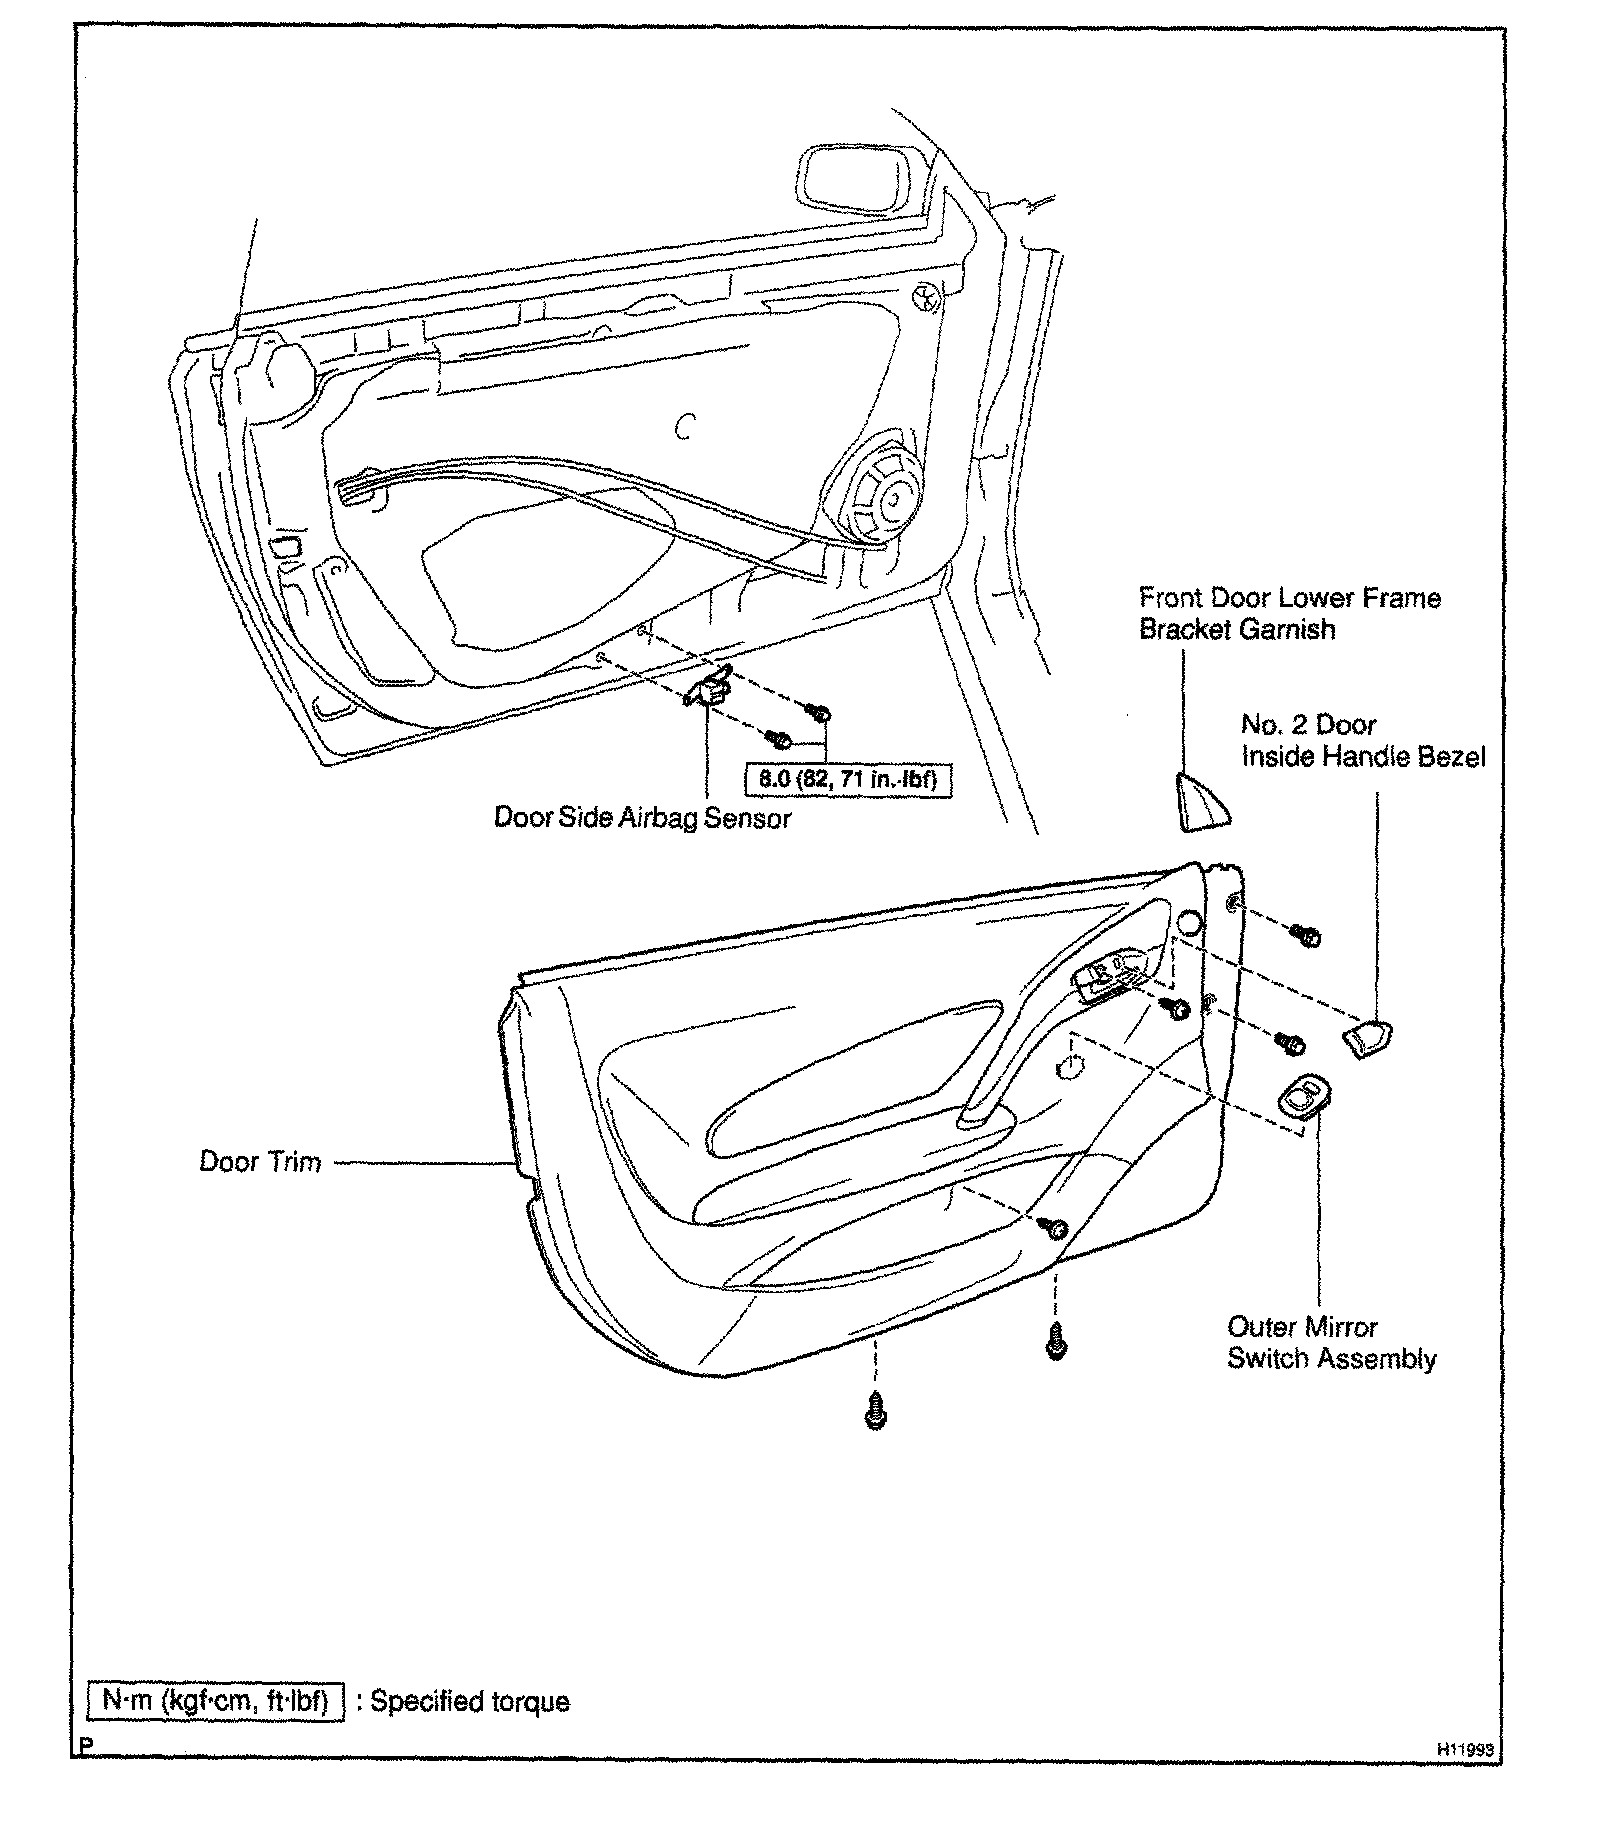
1. REMOVE NO.2 DOOR INSIDE HANDLE BEZEL
2. REMOVE OUTER MIRROR SWITCH ASSEMBLY
3. REMOVE FRONT DOOR LOWER FRAME BRACKET GARNISH
4. REMOVE DOOR TRIM

5. REMOVE DOOR SIDE AIRBAG SENSOR
a. Disconnect the door side airbag sensor connector.
NOTE: Disconnect the connector with sensor assembly installed.
b. Remove the 2 bolts and door side airbag sensor.
INSTALLATION
1. INSTALL DOOR SIDE AIRBAG SENSOR
a. Install the door side airbag sensor with the 2 bolts
Torque: 8.0 N.m (82 kgf.cm, 11 in.lbf)
NOTE:
- Connection of the connector is done after the sensor has been installed.
- Make sure the sensor is installed with the specified torque.
- If the sensor has been dropped, or there are cracks, dents or other defects in the case, brackets or connector, replace the removed sensor with new one.
- The door side airbag sensor is equipped with an electrical connection check mechanism. Be sure to lock this mechanism securely when connecting the connector. If the connector is not securely locked, a malfunction code will be detected by the diagnostic system.

HINT: Install the door side airbag sensor with the arrow on the sensor facing toward the front of the vehicle.
b. Connect the front airbag sensor connector.
2. INSTALL DOOR TRIM
3. INSTALL FRONT DOOR LOWER FRAME BRACKET GARNISH
4. INSTALL OUTER MIRROR SWITCH ASSEMBLY
5. INSTALL NO.2 DOOR INSIDE HANDLE BEZEL