ABS/TCS - VSC Lamp ON/DTC C1231 Set
BRAKESBR003-03
REVISED
Title:
VSC COMPUTER LOGIC MODIFICATION
FOR DTC C1231
Models:
'03 Sequoia
November 18, 2003
TSB REVISION NOTICE:
May 13, 2004: The Diagnostic Tester screen flows have been changed.
All previous versions of this TSB should be discarded.
Introduction
Some 2003 model year Sequoia vehicles may experience a VSC light ON condition with
DTC C1231 in the Skid Control Computer memory. A modification to the Skid Control Computer logic has been made to prevent this condition.
Applicable Vehicles
^ 2003 model year Sequoia vehicles produced BEFORE the Production Change Effective VIN shown below.

Production Change Information
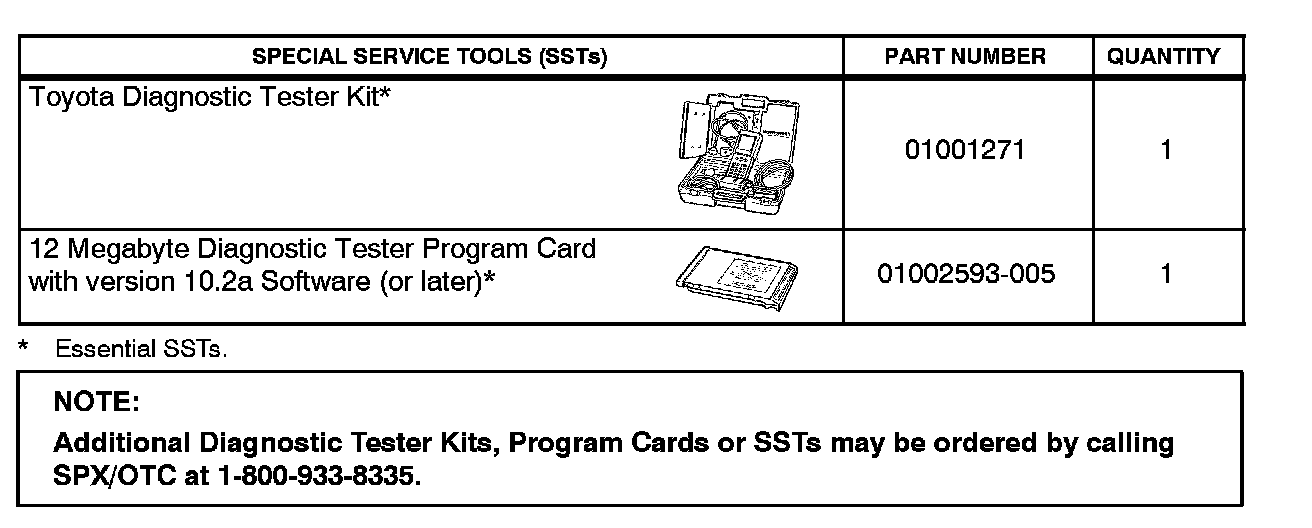
Required SSTs
Warranty Information
Applicable Warranty*:
This repair is covered under the Toyota Comprehensive Warranty. This warranty is in effect for 36 months or 36,000 miles, whichever occurs first, from the vehicle's in-service date.
* Warranty application is limited to correction of a problem based upon a customer's specific complaint.

Parts Information
Repair Procedure
In the event that no problem can be identified in the diagnostic procedure for DTC C1231, replace the Skid Control Computer.
NOTE:
2003 model year Sequoia vehicles produced after the VIN in the Production Change Information table, or the vehicles of which the Skid Control ECU has been changed to the new part will also have changes in the operation procedure of the calibration. Calibrate according to the following procedure.
Calibration Procedure
NOTE:
Whenever replacing the master cylinder pressure sensor, yaw rate and deceleration sensor, or the Skid Control ECU, make sure to perform zero point calibration.
While performing the zero point calibration:
^ Do not tilt, move, or shake the vehicle.
^ The vehicle must maintain a stationary position.
^ Do not start the engine.
^ Be sure to perform calibration on a level surface (within an inclination of 1%).
1. Whenever replacing the Skid Control ECU, registration of the new ECU must first be performed.
A. For 2WD models: registration is complete. Proceed to step 2.
B. For 4WD models:
a. After turning the ignition switch ON, with the shifter in the "P" position, move the transfer lever to the "L4" position.
b. At this time, the VSC system buzzer will sound for 3 seconds indicating that registration is complete. Now turn the ignition switch OFF. Proceed to step 2.
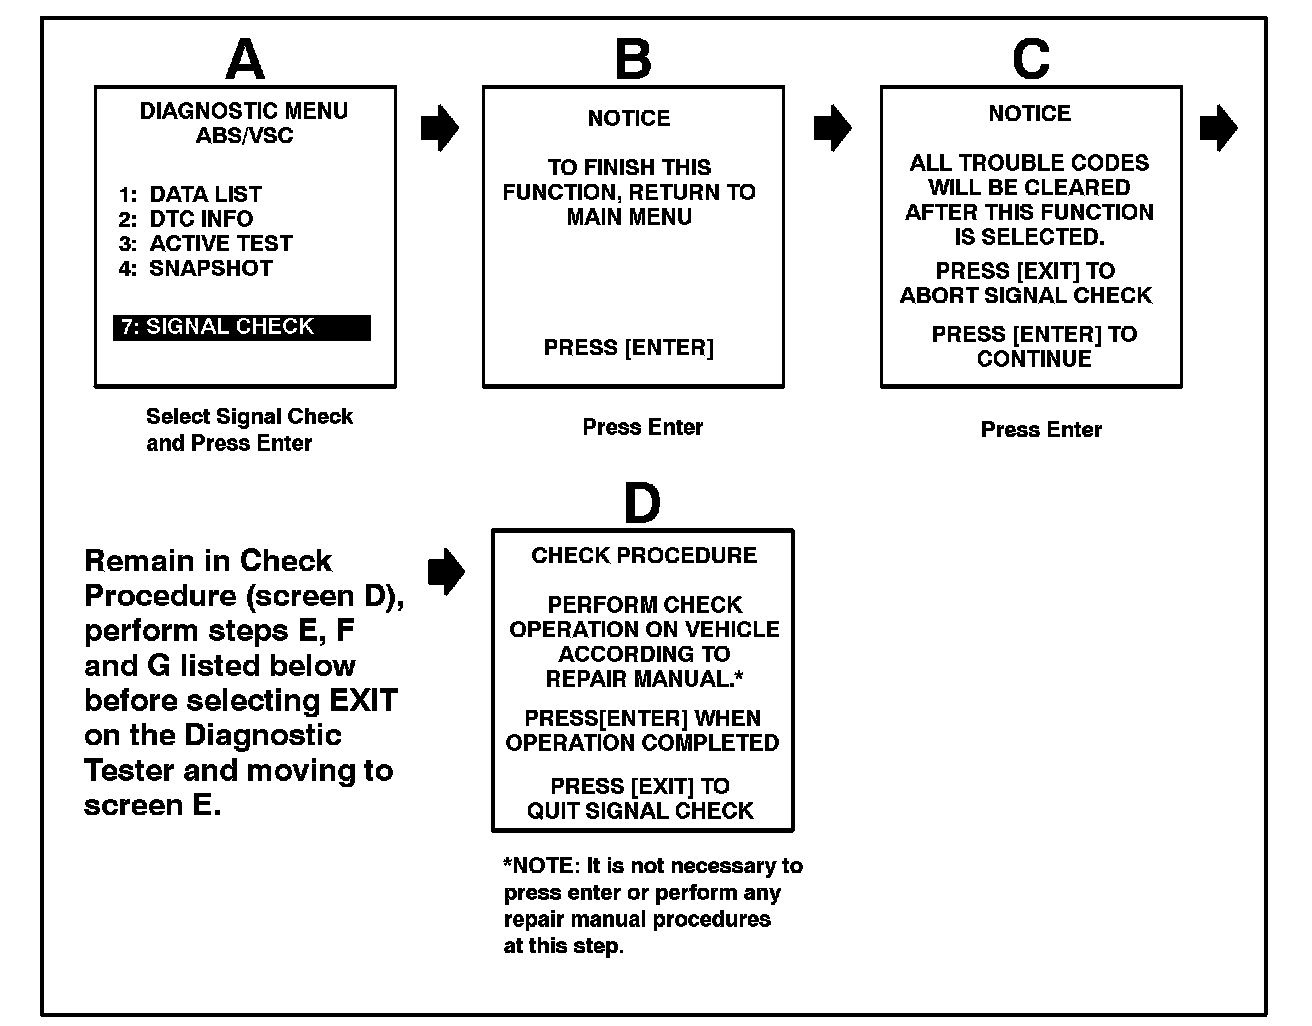
2. Perform master cylinder pressure, yaw rate and deceleration sensor zero point calibration.
A. Connect Diagnostic Tester to DLC3.
B. Move the shift lever to the "P" position.
C. Start the engine.
D. Place the Diagnostic Tester into Signal Check mode under the ABS/VSC menu.
E. Keep the vehicle in a stationary position on a level surface for 4 seconds or more.
F. For 2WD models: press the TRAC OFF switch 3 times within 3 seconds without pressing the brake pedal.
G. For 4WD models: press the center differential lock switch 3 times within 3 seconds without pressing the brake pedal.
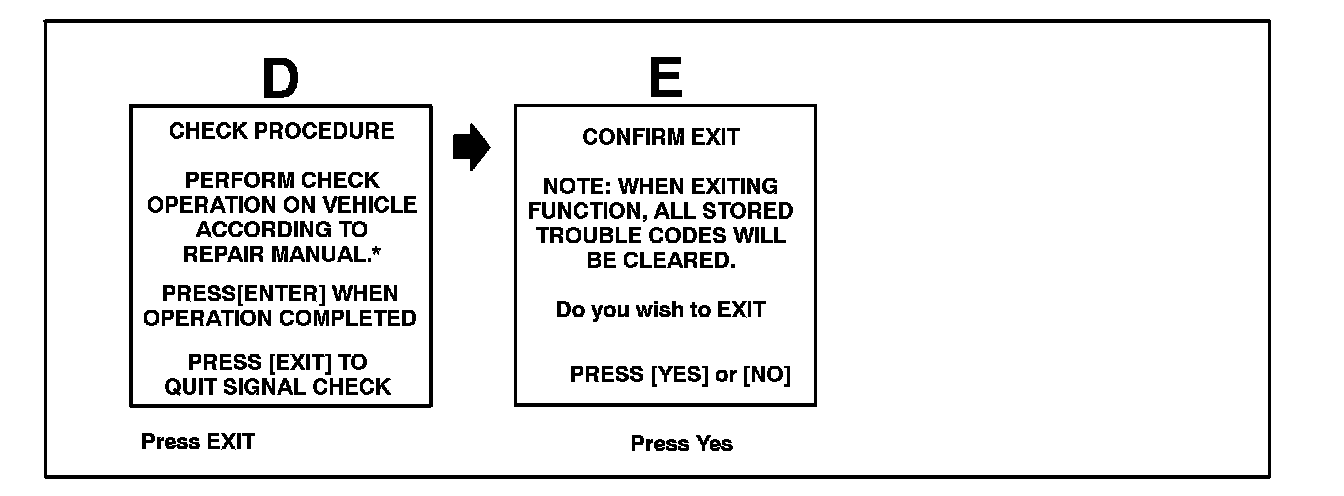
H. Check that the VSC buzzer sounds for 3 seconds.
NOTE:
If the VSC buzzer does not sound:
^ Repeat the zero point calibration procedures listed in Step 2.
^ Check the VSC buzzer circuit.
I. Zero point of master cylinder pressure, yaw rate and deceleration sensor is complete. Proceed to step 3.
3. Perform steering angle sensor zero point calibration.
A. Disconnect the Diagnostic Tester.
B. Calibrate the steering angle sensor by driving the vehicle above 28 mph (45 km/h).
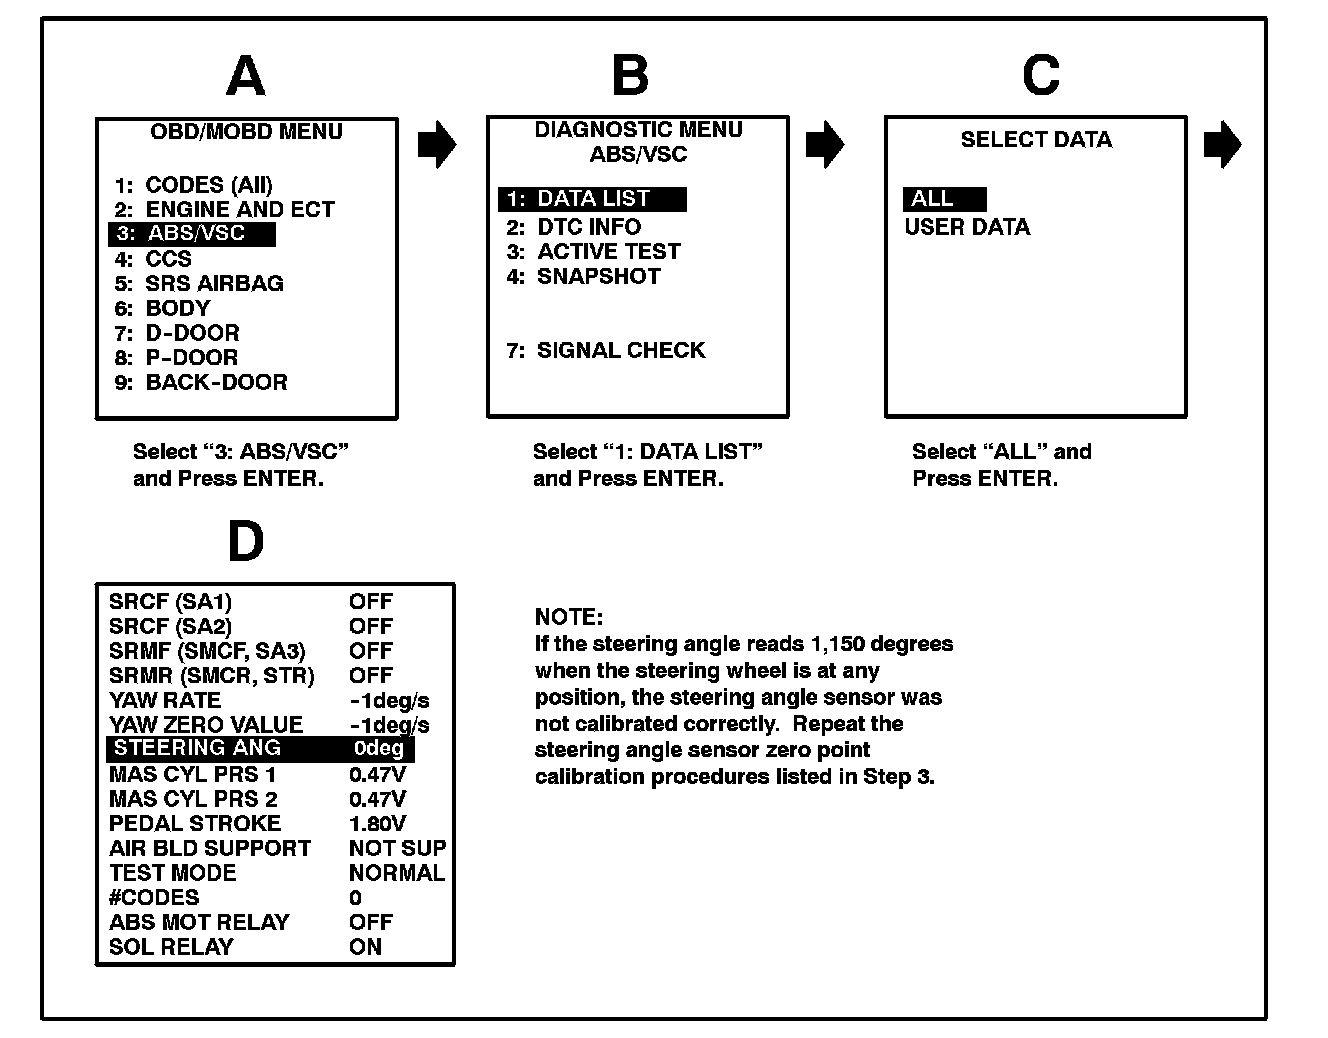
4. Confirm zero point calibration.
A. Stop the vehicle.
B. Place the shifter in the "P" position.
C. Connect the Diagnostic Tester to DLC3.
D. View the ABSNSC Data List to see that the steering angle value changes when turning the steering wheel.
5. Disconnect the Diagnostic Tester and turn the ignition switch OFF.