Shift Interlock Cable: Service and Repair
Automatic Transmission Selector Lever Locking Cable:
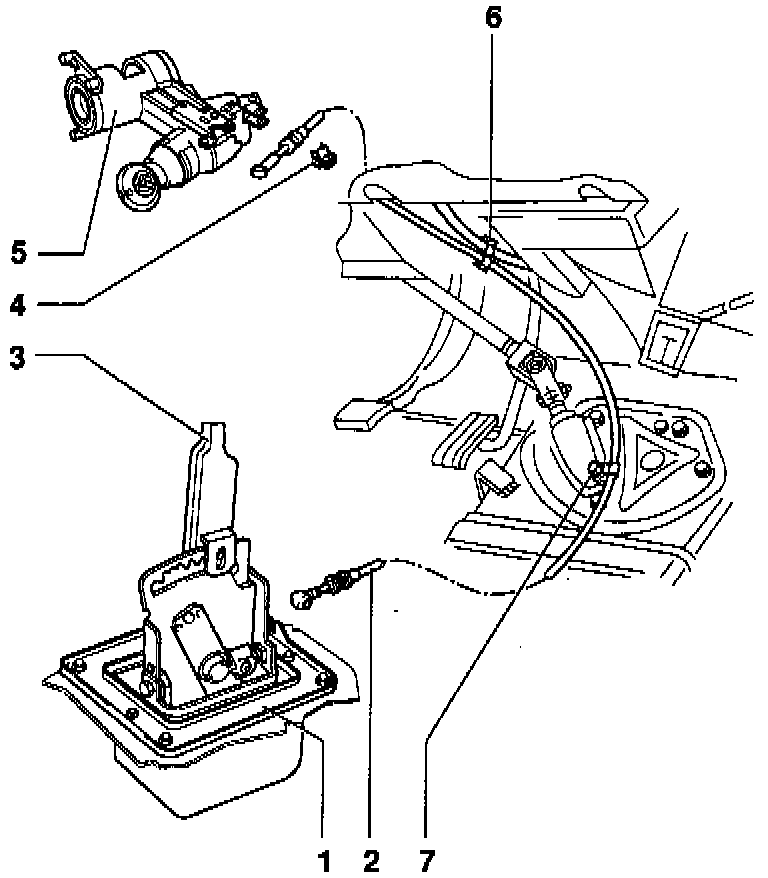
Locking Cable - Removal and Installation Information
Note: After installing, locking cable must be adjusted.
1. Frame
2. Locking cable
^ Must not be kinked
3. Selector lever
4. Clip
^ To secure locking cable
^ Always replace
5. Ignition/starter switch
6. Mounting
^ For locking cable
^ Secure to heater hose
7. Mounting
^ For locking cable
^ Secure to base plate and pull locking cable through mounting eye
Removing Locking Cable
1. Remove selector lever handle, cover, cover strips, and selector lever console.
2. Remove locking cable from support bracket and remove from locking lever ball head.
3. Remove ignition/starter switch trim.
4. Press locking cable clip out of ignition/starter switch support bracket and remove locking cable from ball head.
5. Remove footwell vent console.
6. Remove locking cable.
Installing Locking Cable
1. Installation is performed in the reverse order.
2. Ensure proper routing of locking cable when installing.
3. Adjust locking cable after installing.