Subframe Bonded Rubber Bushing, Rear
Subframe Bonded Rubber Bushing, Rear
Removing
- Install tools as shown in the illustration.
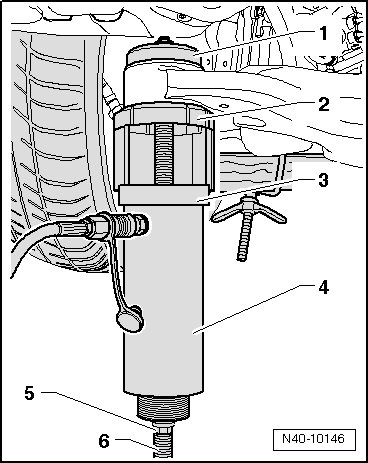
1. Press piece (T10301/5)
2. Support ring (T10301/8)
3. Tube (T10301/3)
4. Hydraulic press (VAS 6178) with pressure head (T10205/13)
5. Nut (T10301/2)
6. Spindle (T10301/1)
- Press out bonded rubber bushing.
CAUTION!
Secure hydraulic cylinder (VAS 6178) while pressing out.
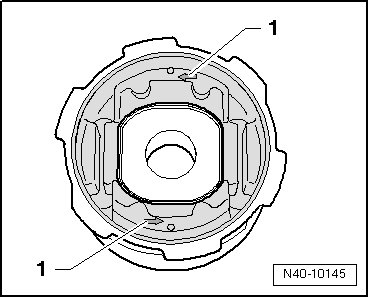
Installation position
One of the arrows - 1 - must point in direction of travel
Installing
- Install tools as shown in the illustration.
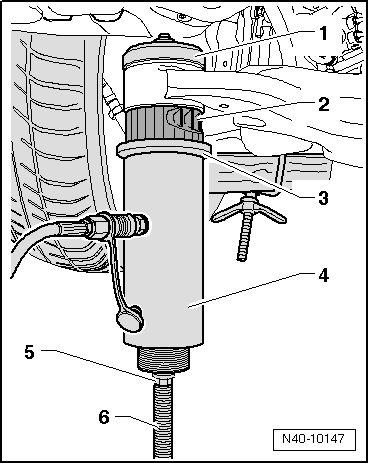
1. Press piece (T10301/7)
2. Bonded rubber bushing
3. Thrust pad (T10301/6)
4. Hydraulic press (VAS 6178) with pressure head (T10205/13)
5. Nut (T10301/2)
6. Spindle (T10301/1)
- Press in bonded rubber bushing until shoulder lies gap free at subframe sleeve.
- Mount subframe to body. Refer to --> [ Mount subframe on body and remove (second mechanic required). ] Subframe Servicing.