Front Door Opening Weatherstrip Replacement
Front Door Opening Weatherstrip Replacement
Removal Procedure
1. Remove the hinge pillar trim panel.
2. Remove the front door upper pillar garnish molding.
3. Remove the front door lower pillar garnish molding.
4. Remove the front door stepwell mat.

5. Gently pull the door opening weatherstrip from the door opening pinch-weld flange.
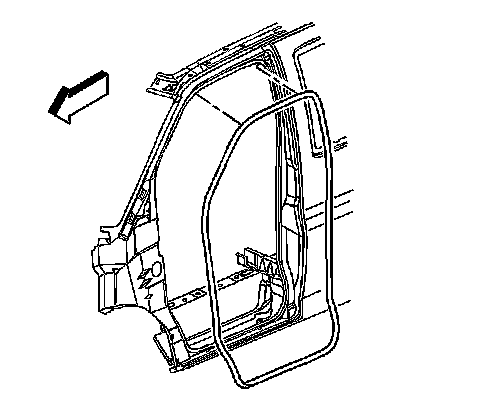
6. Remove the door opening weatherstrip from the vehicle.
Installation Procedure
1. Apply GM P/N 12345097 (Canadian P/N 10953479) or the equivalent, into the channel on the weatherstrip.
2. Install the weatherstrip to the vehicle.
3. Start at the corners in order to align the door opening weatherstrip to the door opening pinch-weld flange. When pressing the weatherstrip on to the pinch-weld flange ensure that the weatherstrip does not pull away at the corners.
4. Starting with the corners of the door opening, press the weatherstrip on to the door opening pinch-weld flange.
5. Install the front door stepwell mat.
6. Install the front door lower pillar garnish molding.
7. Install the front door upper pillar garnish molding.
8. Install the hinge pillar trim panel.