Side Front Door Weatherstrip Replacement
Side Front Door Weatherstrip Replacement
Removal Procedure
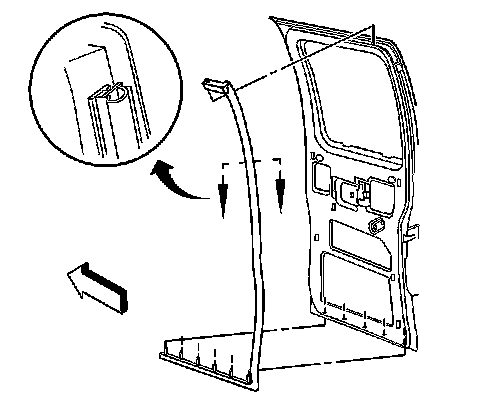
1. Remove the retainer at the top of the side front door weatherstrip.
2. Remove the side front door weatherstrip from the top of the door. Use 3M Release Agent or the equivalent.
3. Pull the side front door weatherstrip in order to remove the weatherstrip from the channel on the side of the door.
4. Remove the side front door weatherstrip and the retainers from the bottom of the door.
5. Clean the door of all of the old adhesive.
Installation Procedure
1. Use the following method in order to install the side front door weatherstrip to the channel on the side of the door:
1. Apply a mild soap and water solution to the side front door weatherstrip.
2. Start the installation at the bottom of the channel in the door.
3. Slide the side front door weatherstrip up the channel to the top of the door.
2. Install the side front door weatherstrip to the top of the door.
If you are reusing the old weatherstrip, use GM Weatherstrip Adhesive GM P/N 12345097 (Canadian P/N 10953479) or the equivalent, in order to retain the top of the weatherstrip to the door.
3. Install the retainer in the top of the weatherstrip to the door.
4. Install the side front door weatherstrip to the bottom of the door.
5. Press the retainers in the side front door weatherstrip into the holes in the door.