Defroster Door Replacement
Defroster Door Replacement
Removal Procedure
1. Remove the HVAC module. Refer to Air Conditioning and Heater Module Assembly Removal and Installation (Service and Repair).

2. Remove all retaining screws from the HVAC module case halves (1 and 4).
3. Separate the HVAC module case (1 and 4).
4. Remove the screw from the mode cam.
5. Remove the mode cam.
6. Remove the defrost door linkage from the defrost door.
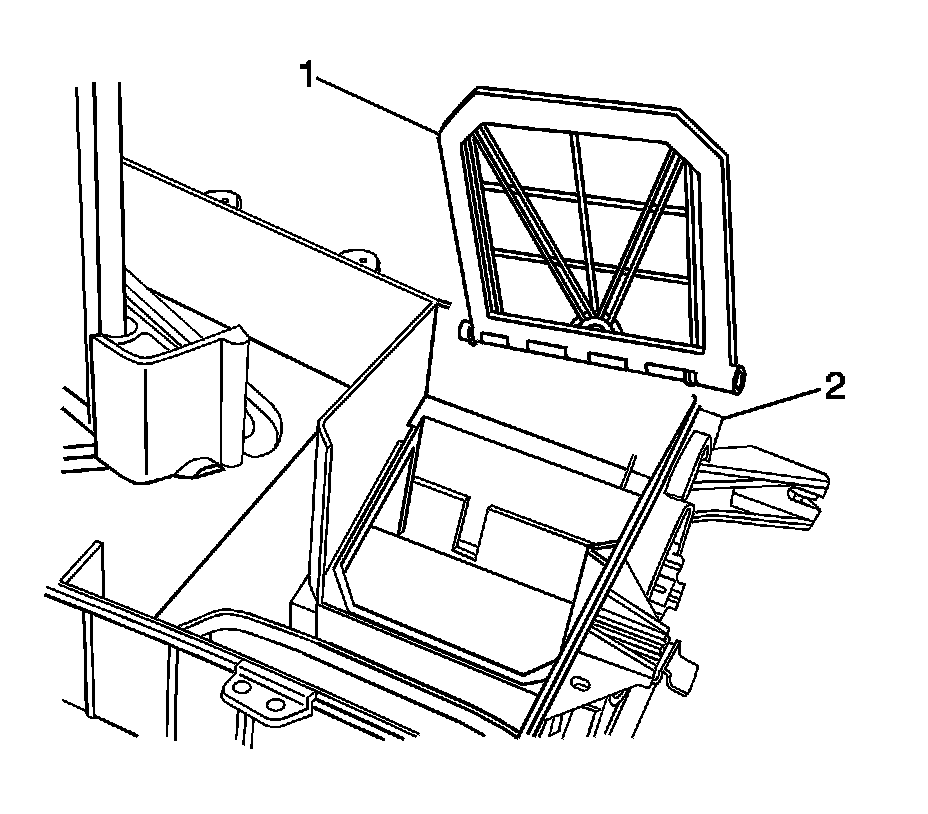
7. Remove the defroster door (1) from the HVAC module assembly (2).
Installation Procedure
1. Install the defroster door (1) from the HVAC module assembly (2).
2. Install the defrost door linkage from the defrost door.
3. Install the mode cam.
Caution: Refer to Fastener Caution (Fastener Caution).
4. Install the screw to mode cam. Tighten the screw to 1.9 Nm (18 lb in).
5. Assemble the HVAC module case (1 and 4).
6. Install the screws to the HVAC module case. Tighten the screws to 1.9 Nm (18 lb in).
7. Install the HVAC module. Refer to Air Conditioning and Heater Module Assembly Removal and Installation (Service and Repair).