Condenser HVAC: Service and Repair
Removal and Installation of CondenserREMOVAL
1. Use a refrigerant collecting equipment (for HFC-134a) to discharge the refrigerant.
2. Remove cooling fan. Refer to "COOLING FAN" (VK45DE).
3. Remove radiator cooling fan assembly. Refer to "RADIATOR" (VQ35DE).
4. Remove radiator shroud. Refer to "RADIATOR" (VK45DE).
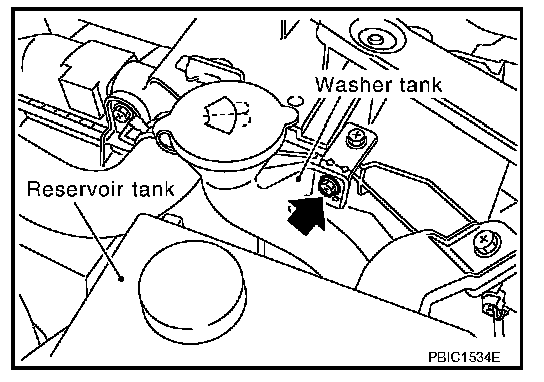
5. Remove washer tank mounting bolt.
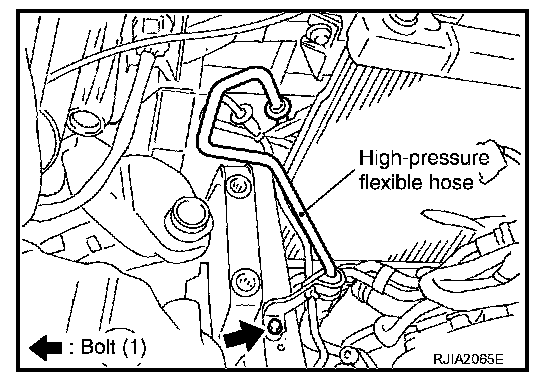
6. Remove high-pressure flexible hose bracket mounting bolt.
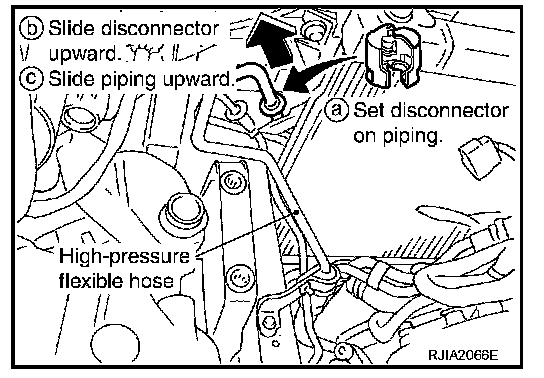
7. Disconnect high-pressure flexible hose and high-pressure pipe 1 from condenser.
a. Set a disconnector [condenser outlet (SST: 9253089908), condenser inlet (SST: 9253089912)] on A/C piping.
b. Slide a disconnector upward until it clicks.
c. Slide A/C piping upward and disconnect it.
CAUTION: Cap or wrap the joint of condenser, high-pressure flexible hose and high-pressure pipe 1 with suitable material such as vinyl tape to avoid the entry of air.
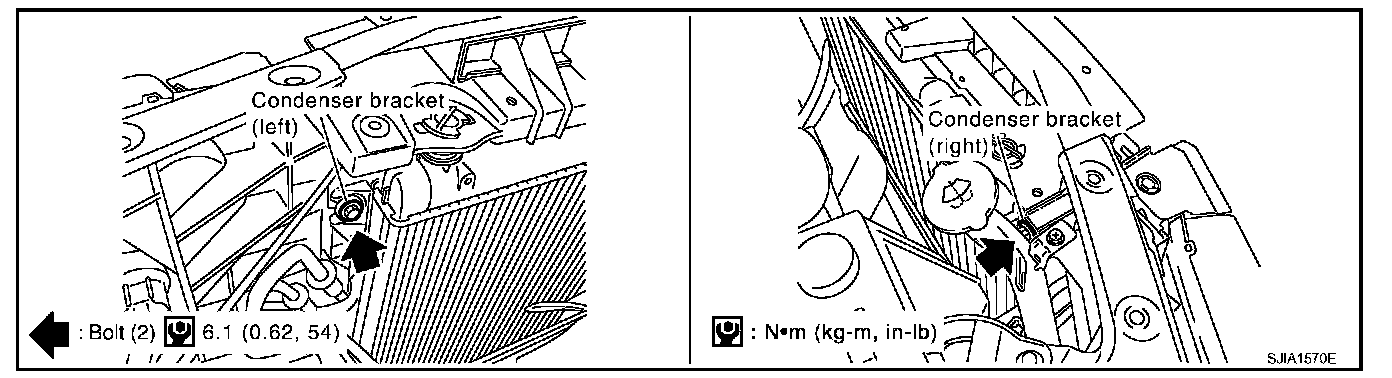
8. Remove condenser mounting bolts.
9. Remove radiator upper mount, move radiator and condenser to the engine side.
10. Remove condenser.
CAUTION: Be careful not to damage the core surface of the condenser and the radiator.
INSTALLATION
Installation is basically the reverse order of removal.
CAUTION:
- Replace O-rings of high-pressure flexible hose and high-pressure pipe 1 with new ones, and then apply compressor oil to it when installing it.
- Female-side piping connection is thin and easy to deform. Slowly insert the male-side piping straight in axial direction.
- Insert piping securely until a click is heard.
- After piping connection is completed, pull male-side piping by hand to make sure that connection does not come loose.
- When recharging refrigerant, check for leaks.
High-pressure flexible hose bracket mounting bolt
Torque: 5.5 N.m (0.56 kg-m, 49 in-lb)