Evaporator Temperature Sensor / Switch: Service and Repair
INTAKE SENSORRemoval and Installation
REMOVAL
1. Remove low-pressure pipe 2 and high-pressure pipe 3. Refer to "Removal and Installation of Low-pressure Pipe 2 and High-pressure Pipe 3".
CAUTION: Cap or wrap the joint of evaporator, low-pressure pipe 1 and high-pressure pipe 2 with suitable material such as vinyl tape to avoid the entry of air.
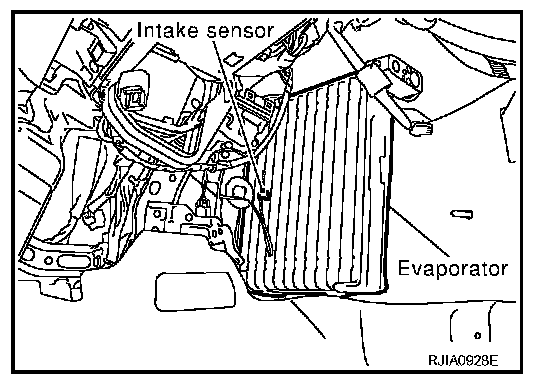
2. Slide evaporator to passenger side, and then remove intake sensor.
INSTALLATION
Installation is basically the reverse order of removal.
CAUTION:
- Replace O-rings of low-pressure pipe 1, 2 and high-pressure pipe 2, 3 with new ones, and then apply compressor oil to it when installing it.
- Mark the mounting position of intake sensor bracket prior to removal so that the reinstalled sensor can be located in the same position.
- Female-side piping connection is thin and easy to deform. Slowly insert the male-side piping straight in axial direction.
- Insert piping securely until a click is heard.
- After piping connection is completed, pull male-side piping by hand to make sure that connection does not come loose.
- When recharging refrigerant, check for leaks.