 |
ac5wzw00014199
LIFTGATE HINGE REMOVAL/INSTALLATION
id091100521300
1. Disconnect the negative battery terminal. (See NEGATIVE BATTERY TERMINAL DISCONNECTION/CONNECTION.)
2. Remove the following parts:
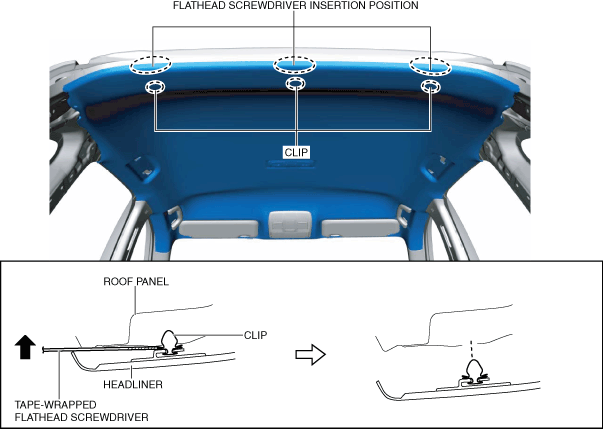
3. Insert a tape-wrapped flathead screwdriver into the positions shown in the figure.
ac5wzw00014199
|
4. Move the tape-wrapped flathead screwdriver in the direction of the arrow shown in the figure and detach the clips from the roof panel.
5. Partially peel back the headliner.
6. Remove the nuts.
ac5wzw00014200
|
7. Remove the liftgate hinge.
8. Install in the reverse order of removal.
9. Perform the 360° view monitor system aiming. (with 360° view monitor system) (See 360°VIEW MONITOR SYSTEM AIMING.)
10. Perform the parking assist system initialization (calibration). (with projected vehicle path line display and without 360° view monitor system) (See PARKING ASSIST SYSTEM INITIALIZATION (CALIBRATION).)
