|
ac8wzw00003095
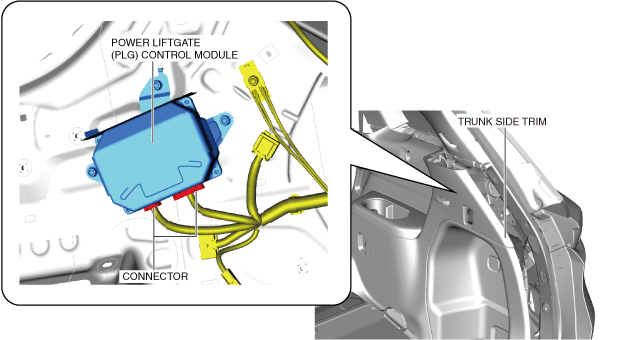
POWER LIFTGATE (PLG) CONTROL MODULE REMOVAL/INSTALLATION
id091100803800
1. When replacing the power liftgate (PLG) control module, measure the power liftgate fully open position.
2. Disconnect the negative battery terminal. (See NEGATIVE BATTERY TERMINAL DISCONNECTION/CONNECTION.)
3. Remove the following parts:
4. Remove the cover.
ac8wzw00003095
|
5. Remove the screw.
ac8wzw00003096
|
6. Remove the fastener.
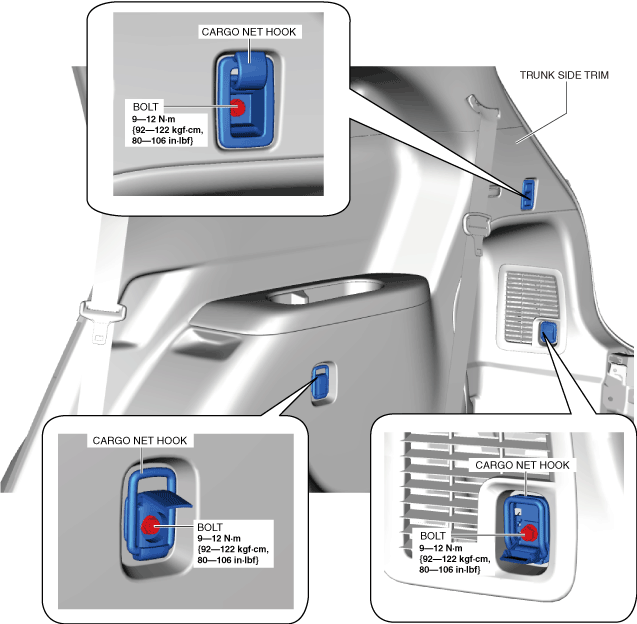
7. Open the cargo net hook covers and remove the bolts.
ac8wzw00004109
|
8. Remove the cargo net hooks.
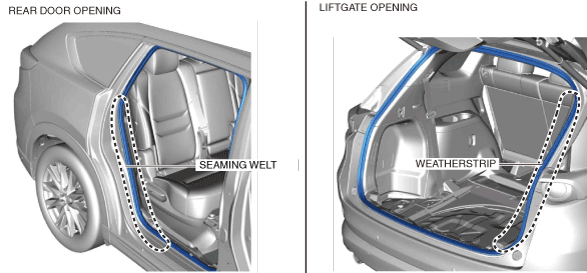
9. Peel back the seaming welt and weatherstrip.
ac8wzw00003098
|
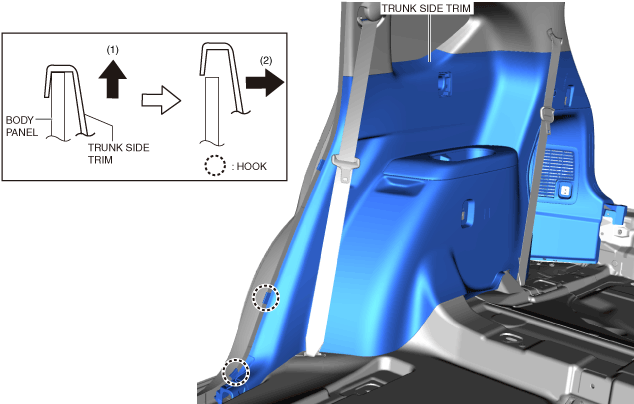
10. Move the trunk side trim in the order of arrows (1) and (2) shown in the figure to detach the hooks from the body panel.
ac8wzw00003099
|
11. Move the trunk side trim in the order of arrows (1), (2), (3), (4), and (5) shown in the figure and remove it while detaching the clips and hooks.
ac8wzw00003100
|
12. Move the trunk side trim in the order of arrows (1) and (2) shown in the figure and peel back the trunk side trim to secure a space for inserting your hand between the body panel and the trunk side trim.
ac8wzw00003101
|
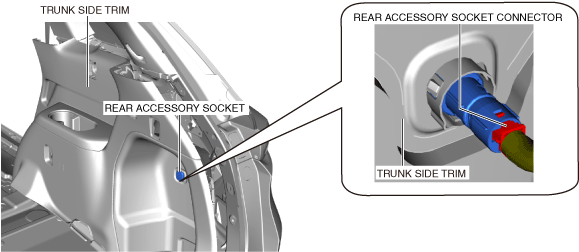
13. Disconnect the rear accessory socket connector.
ac8wzw00003102
|
14. Disconnect the power liftgate (PLG) control module connector.
ac8wzw00003103
|
15. Remove the power liftgate (PLG) control module bolts.
ac8wzw00003104
|
16. Remove the power liftgate (PLG) control module.
17. Install in the reverse order of removal.
18. When the power liftgate (PLG) control module is replaced, perform the automatic configuration using the following procedure.
19. When replacing the power liftgate (PLG) control module, change the power liftgate fully open position to the position measured before replacing the power liftgate (PLG) control module.