 |
ac8wzw00001856
REAR MOUNT CAMERA REMOVAL/INSTALLATION
id092000814900
1. Disconnect the negative battery terminal. (See NEGATIVE BATTERY TERMINAL DISCONNECTION/CONNECTION.)
2. Remove the following parts:
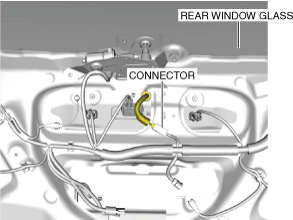
3. Disconnect the connector.
ac8wzw00001856
|
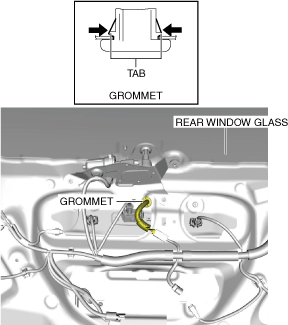
4. Using the remover tool, press the grommet tabs in the direction of arrows (1) shown in the figure and detach them from the liftgate.
ac8wzw00002267
|
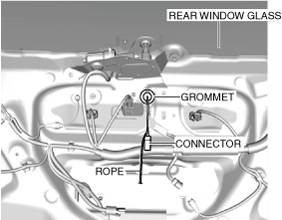
5. Using a rope, attach a guide line to the connector.
ac8wzw00002268
|
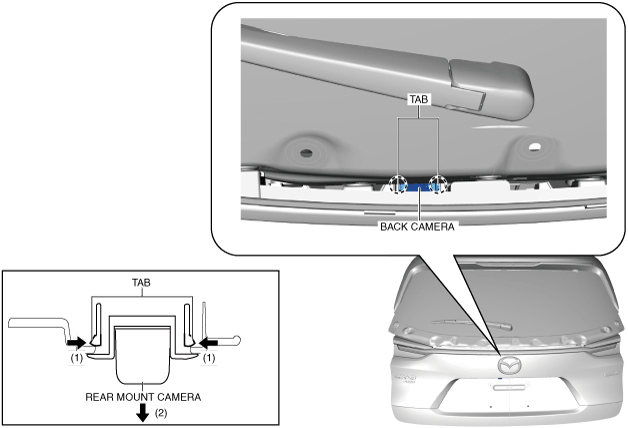
6. While pressing the back camera tabs in the direction of arrows (1) shown in the figure using the remover tool, pull the back camera in the direction of arrow (2) shown in the figure, and disengage the tabs from the rear finisher.
ac8wzw00002269
|
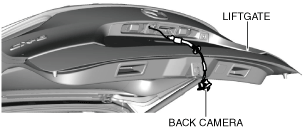
7. Remove the back camera.
ac8wzw00002270
|
8. Install in the reverse order of removal.