 |
ac8wzw00001098
BACKUP POWER SUPPLY REMOVAL/INSTALLATION
id092100909000
1. Operate the door lock actuator using the following procedure and deplete the energy stored in the backup power supply.
2. Disconnect the negative battery terminal. (See NEGATIVE BATTERY TERMINAL DISCONNECTION/CONNECTION.)
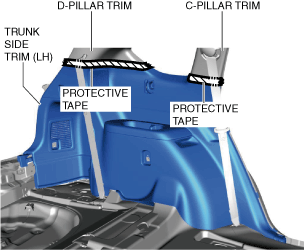
3. To prevent scratches or damage, apply protective tape to the position shown in the figure.
ac8wzw00001098
|
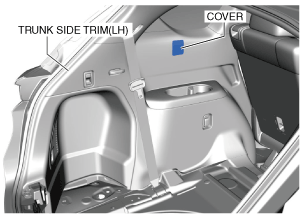
4. Remove the following parts.
5. Remove the cover.
ac8wzw00001099
|
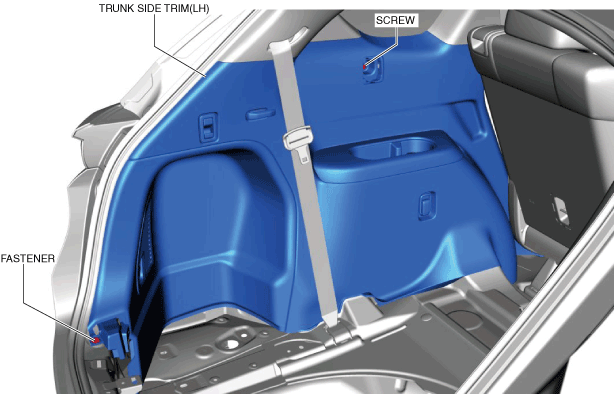
6. Remove the screw.
ac8wzw00001100
|
7. Remove the fastener.
8. Open the cargo net hook cover and remove the bolt.
ac8wzw00001101
|
9. Remove the cargo net hooks.
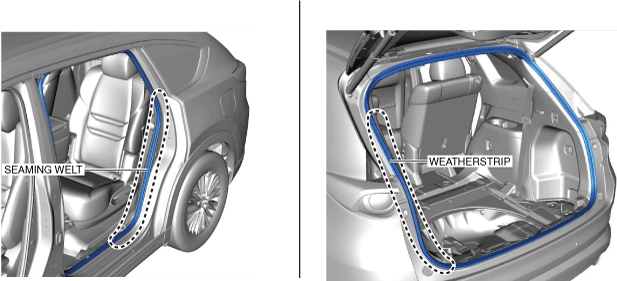
10. Peel back the seaming welt and weatherstrip.
ac8wzw00001102
|
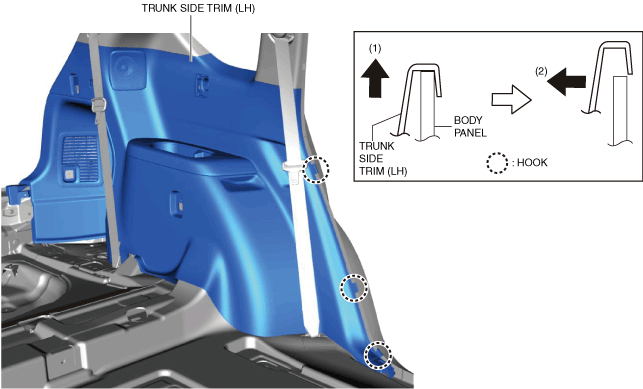
11. Move the trunk side trim (LH) in the order of arrows (1), (2), shown in the figure to detach the body panel from the hooks.
ac8wzw00001103
|
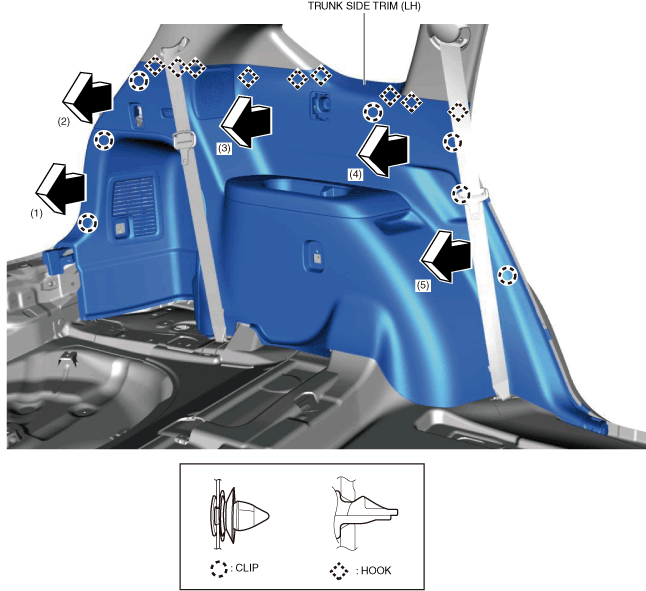
12. Move the trunk side trim (LH) in the order of arrows (1), (2), (3), (4), and (5) shown in the figure while detaching the clips and hooks.
ac8wzw00001104
|
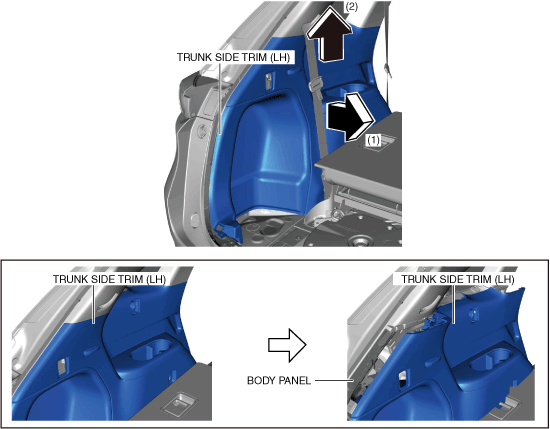
13. Move the trunk side trim (LH) in the order of arrows (1) and (2) shown in the figure, pull away the trunk side trim (LH) enough to secure a space for a hand to be inserted between body panel and trunk side trim (LH).
ac8wzw00001105
|
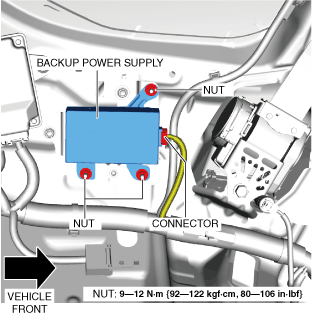
14. Disconnect the connector.
ac8wzw00000391
|
15. Remove the nuts.
16. Remove the backup power supply.
17. Install in the reverse order of removal.