am3zzw00038286
|
MIRROR BASE REMOVAL/INSTALLATION [(E)]
id0912001139x2
Replacement part
|
Cover (lower)
Quantity: 1
Location of use: Power outer mirror
|
Tape
Quantity: 1
Location of use: Power outer mirror
|
Push nut
Quantity: 1
Location of use: Power outer mirror
|
|
Cover (Upper)
Quantity: 1
Location of use: Power outer mirror
|
1. Perform the front door glass preparation. (See FRONT DOOR GLASS REMOVAL/INSTALLATION.)
2. Disconnect the negative battery terminal. (See NEGATIVE LEAD-ACID BATTERY TERMINAL DISCONNECTION/CONNECTION.)
3. Remove the following parts:
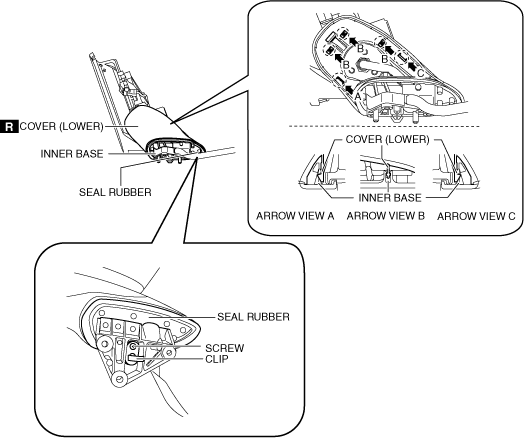
4. Remove the following parts from the inner base.
am3zzw00038286
|
5. Detach the inner base tabs from the cover (lower).
6. Remove the cover (lower).
7. Remove the following parts:
am3zzw00038287
|
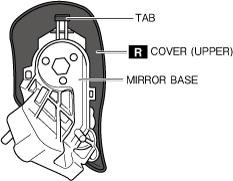
8. Pull out the short cord from the mirror base.
9. Remove the mirror base and cover (upper) as a single unit. (See Mirror Base Installation Note.)
10. Detach the tab.
am3zzw00038288
|
11. Remover the cover (upper).
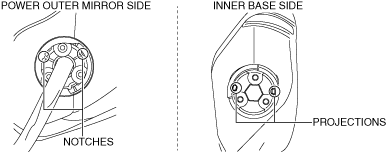
12. Remove the mirror base.
13. Install in the reverse order of removal.
Mirror Base Installation Note
am3zzw00038212
|