 |
a30zzw00002984
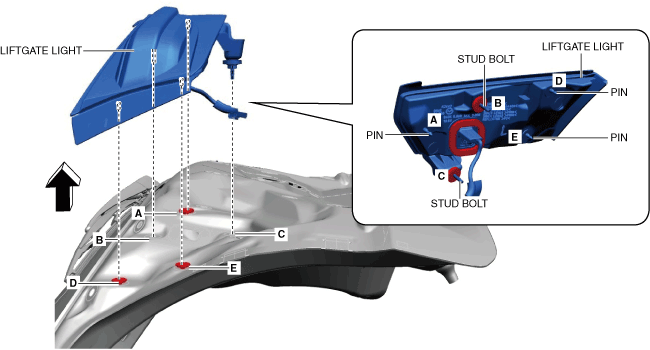
LIFTGATE LIGHT REMOVAL/INSTALLATION
id091800701500
Replacement parts
|
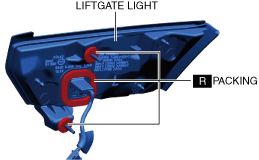
Packing
Quantity: 3
Location of use: Liftgate light
|
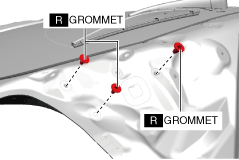
Grommet
Quantity: 3
Location of use: Liftgate panel
|
1. Disconnect the negative lead-acid battery terminal. (See NEGATIVE LEAD-ACID BATTERY TERMINAL DISCONNECTION/CONNECTION.)
2. Remove the following parts.
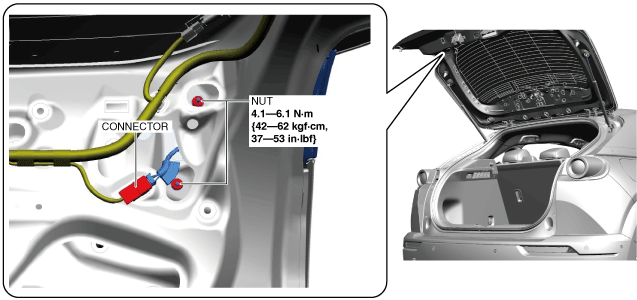
3. Disconnect the connector.
a30zzw00002984
|
4. Remove the nuts.
5. Remove the liftgate light in the direction of the arrow shown in the figure.
a30zzw00002985
|
6. Remove the packing.
a30zzw00002986
|
7. When replacing the grommet, perform the following procedure.
a30zzw00002987
|
8. Install in the reverse order of removal.
9. Perform the 360° view monitor system aiming. (With 360° view monitor system) (See 360°VIEW MONITOR SYSTEM AIMING.)
10. Perform the rear mount camera aiming. (Without 360° view monitor system, With parking assist system (predicted vehicle path assist lines display type)) (See 360°VIEW MONITOR SYSTEM AIMING.)