BACK TRIM REMOVAL/INSTALLATION


id091700609400

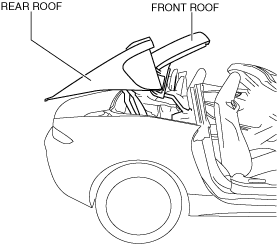
1.  Using the retractable hardtop switch, keep the front roof half-open. (retractable hardtop)

amxzzw00004123

2.  Open the convertible top. (convertible top)

3.  Disconnect the negative battery terminal. (See NEGATIVE BATTERY TERMINAL DISCONNECTION/CONNECTION.)

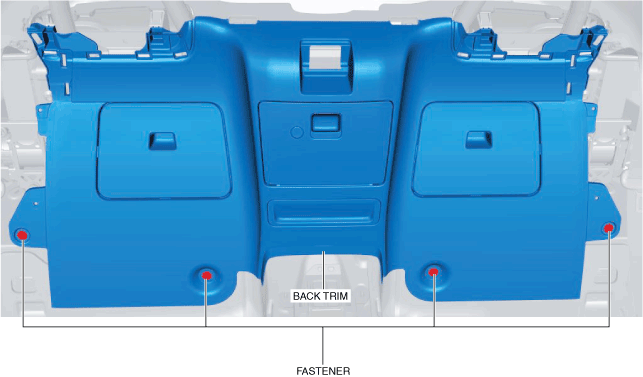
4.  Remove the following parts:

(1)  Selector lever knob (AT) (See AUTOMATIC TRANSMISSION SHIFT MECHANISM REMOVAL/INSTALLATION.)
(2)  Shift lever knob (MT)
(3)  Shift panel component (See SHIFT PANEL REMOVAL/INSTALLATION.)
(4)  Upper panel (See UPPER PANEL REMOVAL/INSTALLATION.)
(5)  Parking brake lever boot panel (See PARKING BRAKE LEVER BOOT PANEL REMOVAL/INSTALLATION.)
(6)  Rear console (See REAR CONSOLE REMOVAL/INSTALLATION.)
(7)  Scuff plate (See SCUFF PLATE REMOVAL/INSTALLATION.)
(8)  Wind blocker (See WIND BLOCKER REMOVAL/INSTALLATION.)
(9)  Front seat back bar garnish (See SEAT BACK BAR GARNISH REMOVAL/INSTALLATION.)
(10)  Quarter trim (See QUARTER TRIM REMOVAL/INSTALLATION.)
(11)  Tire house trim (See TIRE HOUSE TRIM REMOVAL/INSTALLATION.)
(12)  Roof hook lever (convertible top) (See ROOF HOOK REMOVAL/INSTALLATION.)

5.  Remove the fasteners.

amxzzw00004824

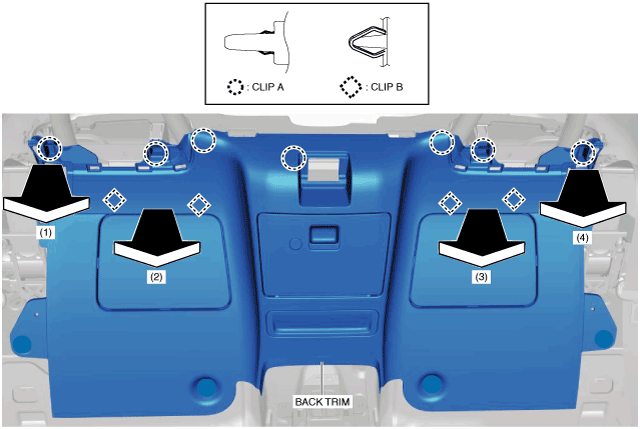
6.  Move the back trim in the order of arrows (1), (2), (3) and (4) while detaching clips A and B using the fastener remover and remove the back trim.

amxuuw00002810

7.  Install in the reverse order of removal. (See Back Trim Installation Note.)


Back Trim Installation Note

Caution
•  When removing the back trim from the seat back crossmember assembly, clip B installation holes may be damaged causing the noise due to loose fit of clips B.
amxzzw00003995

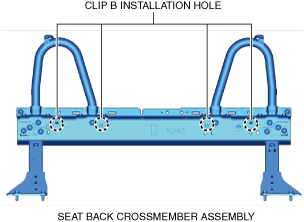
1.  Clean and degrease around clip B installation holes of the seat back crossmember assembly.

amxzzw00004825

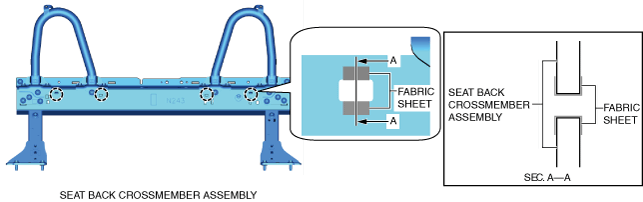
2.  Attach the fablic sheet to the clip B installation holes of the seat back crossmember assembly as shown in the figure.

amxzzw00004826