|
am2ccw00000108
C-PILLAR TRIM REMOVAL/INSTALLATION
id091700459100
4SD
Removal
1. Remove the rear scuff plate. (See REAR SCUFF PLATE REMOVAL/INSTALLATION)
2. Remove the rear seat cushion. (See REAR SEAT CUSHION REMOVAL/INSTALLATION)
3. Remove the tire house trim. (See TIRE HOUSE TRIM REMOVAL/INSTALLATION [4SD])
4. Partially peel back the seaming welt.
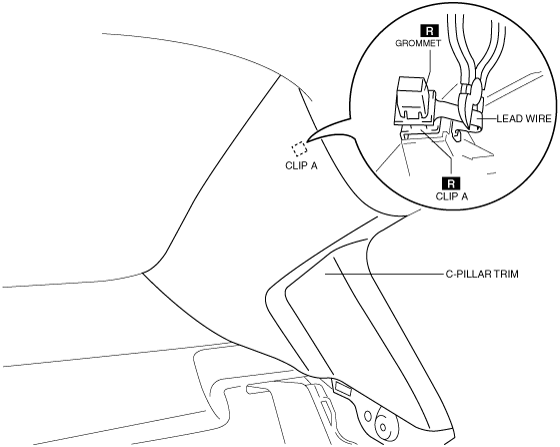
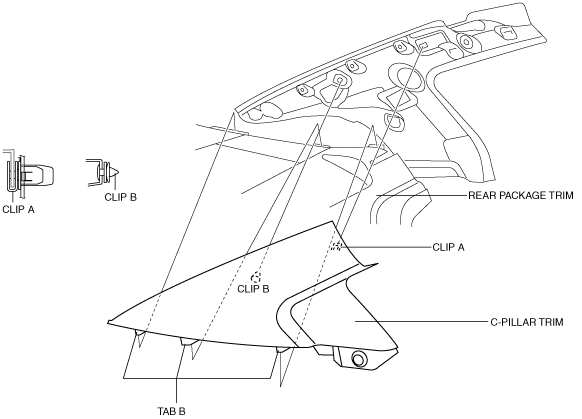
5. Pull the C-pillar trim in the direction of the arrow shown in the figure and remove clip A.
am2ccw00000108
|
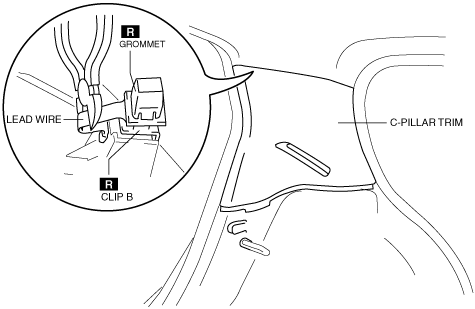
6. Cut the lead wire connecting clip A and grommet using a nipper.
am2ccw00000167
|
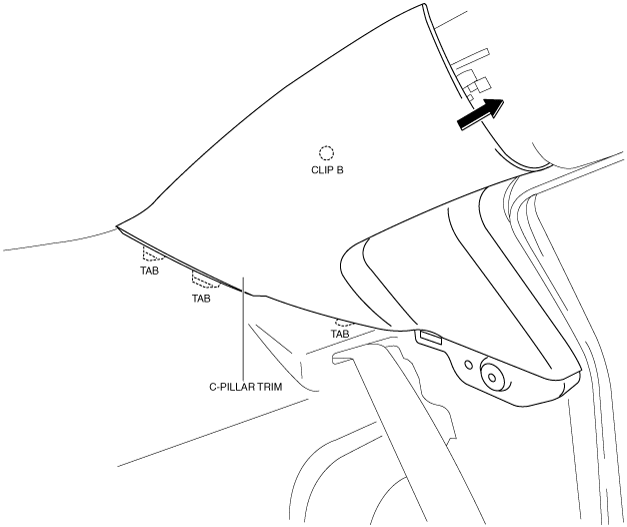
7. Slide the C-pillar trim in the direction shown by the arrow in the figure and remove the C-pillar trim from clip B.
am2ccw00000109
|
8. Remove the C-pillar trim.
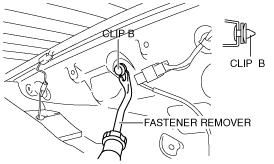
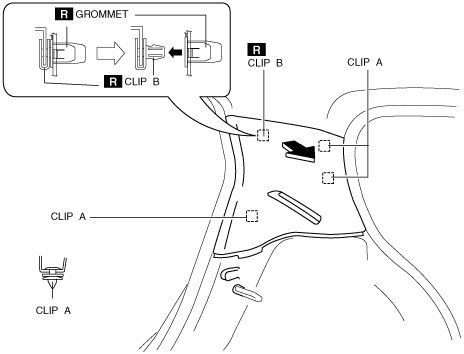
9. Remove clip B from the positions shown in the figure using a fastener remover and install the C-pillar trim.
am2zzw00005030
|
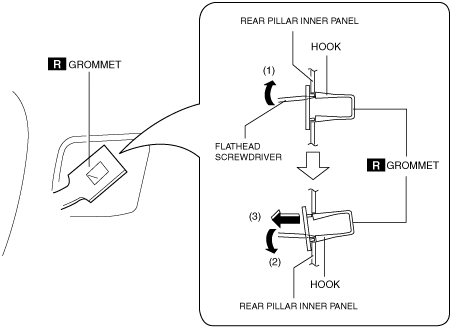
10. Move the hook in the direction of arrows (1) and (2) shown in the figure using a flathead screwdriver and detach it from the rear pillar inner panel.
am2ccw00000168
|
11. Remove the grommet in the direction of the arrow (3) shown in the figure.
12. When installing the C-pillar trim, install the new clip and new grommet to the C-pillar trim in advance.
Installation
1. Insert the tabs into the rear package trim in the positions shown in the figure.
am2zzw00005031
|
2. Install clip A and B to the body.
3. Install the tire house trim. (See TIRE HOUSE TRIM REMOVAL/INSTALLATION [4SD].)
4. Install the rear seat cushion. (See REAR SEAT CUSHION REMOVAL/INSTALLATION)
5. Install the rear scuff plate. (See REAR SCUFF PLATE REMOVAL/INSTALLATION)
5HB
1. Remove the following parts:
2. Partially peel back the seaming welt.
3. Remove the trunk side trim. (See TRUNK SIDE TRIM REMOVAL/INSTALLATION)
4. Pull the C-pillar trim in the direction of the arrow shown in the figure and remove it while detaching clips A and B.
am2zzw00001825
|
5. Cut the lead wire connecting clip B and grommet using a nipper.
am2zzw00003742
|
6. Pull out the rear seat belt lower anchor and remove the C-pillar trim.
7. Move the hook in the direction of arrows (1) and (2) shown in the figure using a flathead screwdriver and detach it from the rear pillar inner panel.
am2zzw00001818
|
8. Remove the grommet in the direction of the arrow (3) shown in the figure.
9. When installing the C-pillar trim, install the new clip and new grommet to the C-pillar trim in advance.
10. Install in the reverse order of removal.