FLOOR COVERING REMOVAL/INSTALLATION [3HB]
id0917004619z3
1. Disconnect the negative battery cable.
2. Remove the following parts:
- (1) Front seat (See FRONT SEAT REMOVAL/INSTALLATION.)
- (2) Rear seat cushion (See REAR SEAT CUSHION REMOVAL/INSTALLATION.)
- (3) Front scuff plate (See FRONT SCUFF PLATE REMOVAL/INSTALLATION [3HB].)
- (4) Front side trim (See FRONT SIDE TRIM REMOVAL/INSTALLATION [3HB].)
- (5) Shift lever knob (MTX) (See MANUAL TRANSAXLE SHIFT MECHANISM REMOVAL/INSTALLATION [F35M-R].) (See MANUAL TRANSAXLE SHIFT MECHANISM REMOVAL/INSTALLATION [B65M-R].)
- (6) Side wall (See SIDE WALL REMOVAL/INSTALLATION.)
- (7) Front console component (See FRONT CONSOLE COMPONENT REMOVAL/INSTALLATION.)
- (8) Rear console (See REAR CONSOLE REMOVAL/INSTALLATION.)
- (9) Steering shaft cover (See STEERING WHEEL AND COLUMN REMOVAL/INSTALLATION [L.H.D.].) (See STEERING WHEEL AND COLUMN REMOVAL/INSTALLATION [R.H.D.].)
- (10) Rear seat back (See REAR SEAT BACK REMOVAL/INSTALLATION.)
- (11) Trunk end trim (See TRUNK END TRIM REMOVAL/INSTALLATION.)
- (12) Trunk side trim (See TRUNK SIDE TRIM REMOVAL/INSTALLATION [3HB].)
- (13) Lower anchor installation bolts on the front seat belt (See FRONT SEAT BELT REMOVAL/INSTALLATION.)
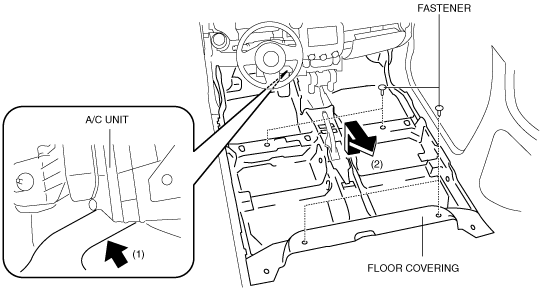
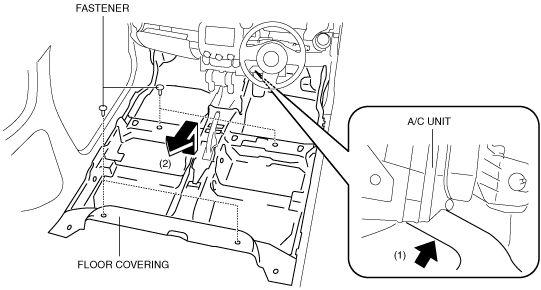
3. Remove the nuts, then remove the rear console bracket in the direction of the arrow shown in the figure.
4. Cut the floor covering at the position indicated by the arrow (1) in the figure using scissors, detach the fasteners, then remove the floor covering in the direction of the arrow (2).
L.H.D.
R.H.D.
-
Note
-
• The cut part does not need to match up when installing the floor covering.
5. Take the floor covering out from the opened liftgate.
6. Install in the reverse order of removal.