 |
am3zzw00019654
FRONT CONSOLE REMOVAL/INSTALLATION
id091700457400
Without Electric Parking Brake
1. Set the wheel blocks for both the front and rear wheels.
2. Disconnect the negative battery cable. (See NEGATIVE BATTERY CABLE DISCONNECTION/CONNECTION [MZR 1.6].) (See NEGATIVE BATTERY CABLE DISCONNECTION/CONNECTION [SKYACTIV-G 1.5, SKYACTIV-G 2.0, SKYACTIV-G 2.5].) (See NEGATIVE BATTERY CABLE DISCONNECTION/CONNECTION [SKYACTIV-D 1.5].) (See NEGATIVE BATTERY CABLE DISCONNECTION/CONNECTION [SKYACTIV-D 2.2].)
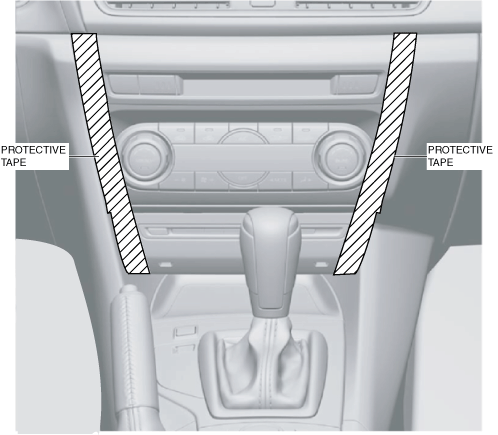
3. To prevent scratches or damage, affix protective tape to the position shown in the figure of the dashboard.
am3zzw00019654
|
4. Shift the selector lever from the P position to the D position (ATX).
5. Remove the following parts:
6. Detach the clip.
am3zzw00018547
|
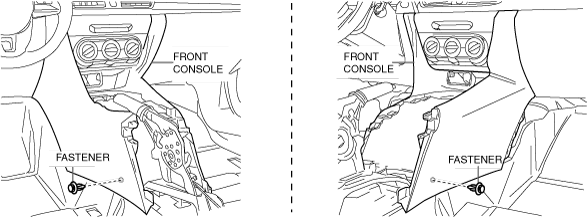
7. Remove the fasteners.
am3zzw00018548
|
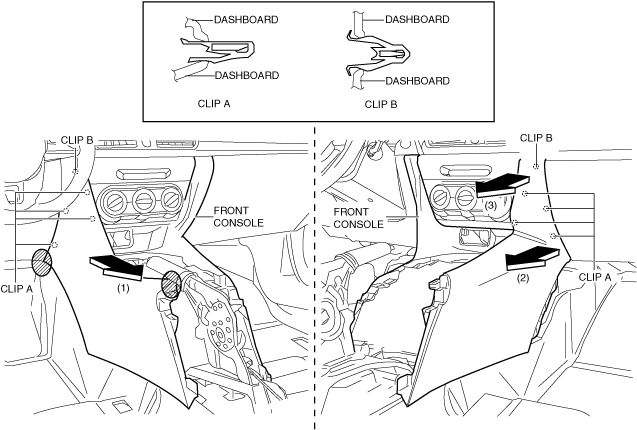
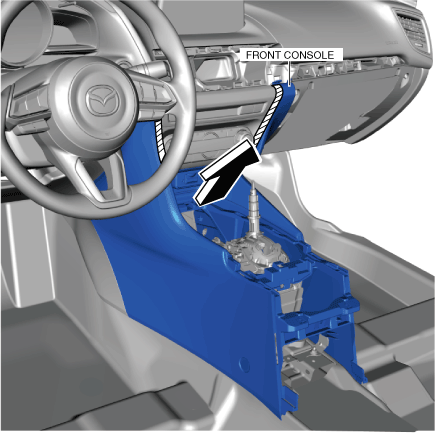
8. Hold the shaded areas shown in the figure, move the front console in the direction of the arrow (1), and detach the clips A and clips B from the dashboard.
am3zzw00020694
|
9. Move the front console in the order of the arrows (2) and (3) shown in the figure, and detach the clips A and clip B from the dashboard.
10. Operate the parking brake lever to a position where the front console can be removed.
11. Move the front console in the direction of the arrow shown in the figure and remove it while avoiding contact with the shift lever (MTX)/selector lever (ATX).
am3zzw00018550
|
12. Disconnect the auxiliary jack/USB port connector. (without center display and without CD player)
13. Disconnect the SD card slot hub connector. (with center display and without CD player or DVD/CD player)
14. Disconnect the front accessory socket connector. (without center display and without CD player)
15. Install in the reverse order of removal.
With Electric Parking Brake
1. Disconnect the negative battery cable. (See NEGATIVE BATTERY CABLE DISCONNECTION/CONNECTION [SKYACTIV-G 1.5, SKYACTIV-G 2.0, SKYACTIV-G 2.5].) (See NEGATIVE BATTERY CABLE DISCONNECTION/CONNECTION [SKYACTIV-D 1.5].) (See NEGATIVE BATTERY CABLE DISCONNECTION/CONNECTION [SKYACTIV-D 2.2].)
2. To prevent scratches or damage, affix protective tape to the position shown in the figure of the dashboard.
am3zzw00019655
|
3. Shift the selector lever from the P position to the D position (ATX).
4. Remove the following parts:
5. Detach the wiring harness clips.
am3zzw00018552
|
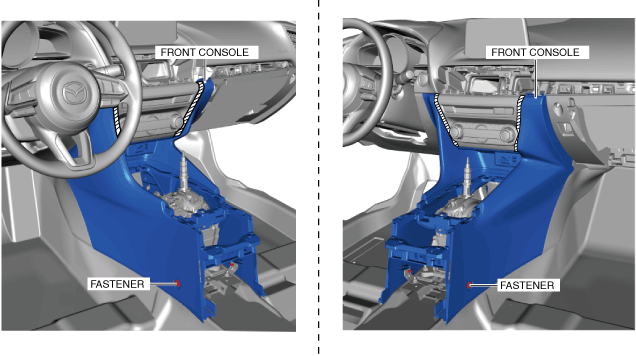
6. Remove the fasteners.
am3zzw00019656
|
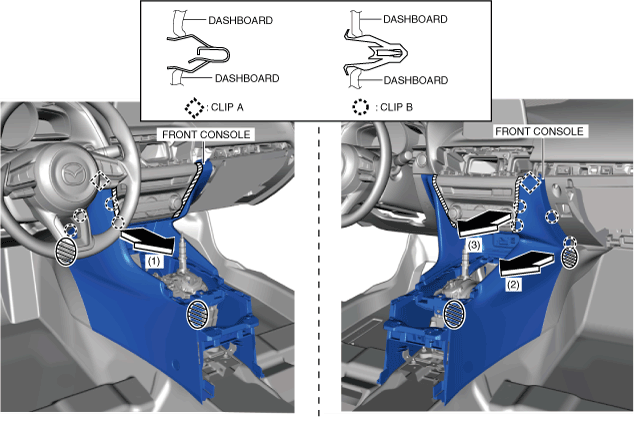
7. Hold the shaded areas shown in the figure, move the front console in the order of the arrows (1),(2),(3), and detach the clips A and clips B from the dashboard.
am3zzw00020695
|
8. Disconnect the SD card slot hub connector. (with center display and without CD player or DVD/CD player)
9. Move the front console in the direction of the arrow shown in the figure and remove it while avoiding contact with the shift lever (MTX)/selector lever (ATX).
am3zzw00019658
|
10. Install in the reverse order of removal.