|
am3uuw00003358
WINDSHIELD INSTALLATION
id091200417900
1. Remove the sealant along the perimeter of the glass using a utility knife. (When reusing the glass)
2. Clean and degrease an approx. 50 mm {2.0 in} wide strip along the perimeter of the windshield.
3. Inspect the glass for cracks. If it is cracked, chamfer it using sandpaper.
4. Align the alignment marks made before removal and install the pin to the windshield referring to the figure. (Reusing glass, pin removed)
am3uuw00003358
|
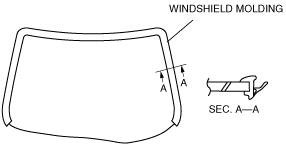
5. Install the windshield molding.
am3zzw00006761
|
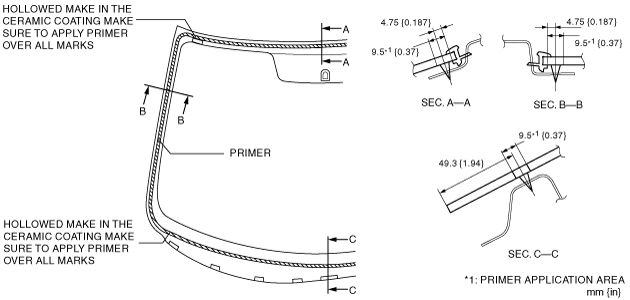
6. Apply glass primer on the glass as shown in the figure, then allow it to dry for approx. 30 min.
am3uuw00003359
|
7. Cut away the old sealant using a utility knife so that 1—2 mm {0.04—0.07 in} thickness of sealant remains along the perimeter of the frame.
avejjw00001067
|
8. If the sealant has come off completely in any one place, apply some primer after degreasing, and allow it approx. 30 min to dry. Then apply 2 mm {0.08 in} thickness of new sealant.
9. Clean and degrease along the perimeter of the bonding area on the body.
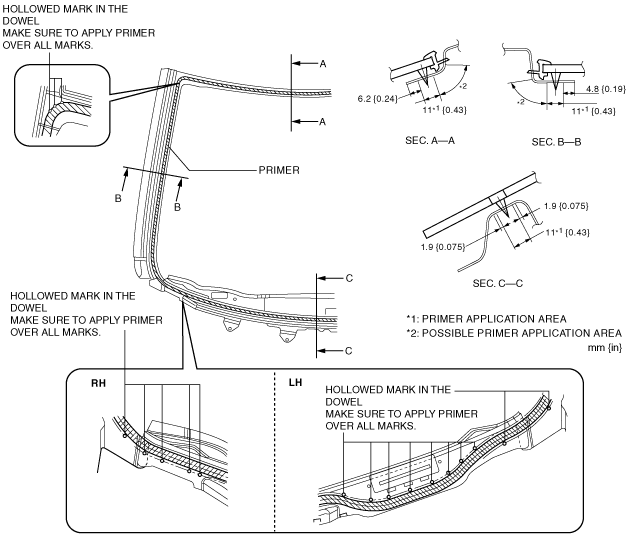
10. Apply body primer on the body as shown in the figure, then allow it to dry for approx. 30 min.
am3uuw00003360
|
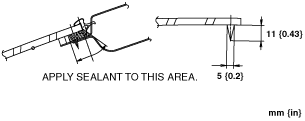
11. Apply sealant to the area of the glass surface as shown in the figure.
am2zzw00002476
|
12. Insert the positioning pins to the body and install the windshield.
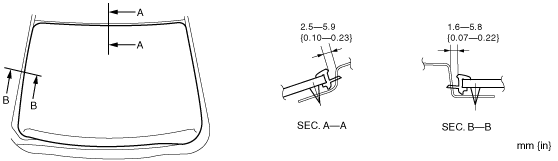
13. Verify that the clearance between the A-pillar and the roof is within the range shown in the figure, and press along the perimeter of the glass.
am3uuw00003361
|
14. Install the headliner.
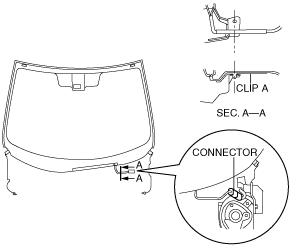
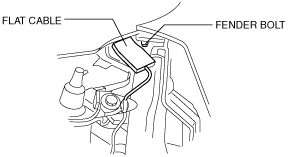
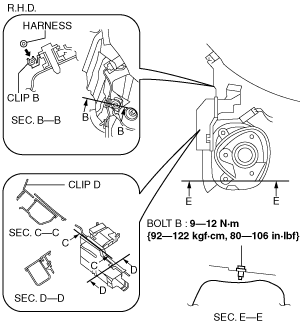
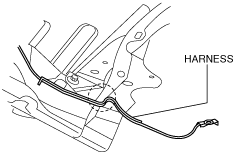
15. Install the following parts (vehicles with heated windshield):
am3zzw00006762
|
am3zzw00012339
|
am3zzw00006764
|
am3zzw00006765
|
am3zzw00008810
|
am3zzw00006766
|
am3zzw00006767
|
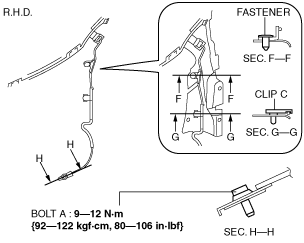
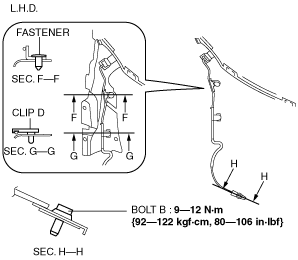
16. Install the following parts:
17. Connect the negative battery cable. (See BATTERY REMOVAL/INSTALLATION [MZR 2.0, MZR 2.5].) (See BATTERY REMOVAL/INSTALLATION [MZR 2.3 DISI Turbo].) (See BATTERY REMOVAL/INSTALLATION [MZR 2.0 DISI i-stop].) (See BATTERY REMOVAL/INSTALLATION [MZ-CD 1.6].) (See BATTERY REMOVAL/INSTALLATION [MZR-CD 2.2].) (See BATTERY REMOVAL/INSTALLATION [SKYACTIV-G 2.0].) (See BATTERY REMOVAL/INSTALLATION [MZR 1.5, MZR 1.6].)
18. Allow the sealant to harden completely.