|
am3uuw00002599
INSTRUMENT CLUSTER DISASSEMBLY/ASSEMBLY
id092200010500
1. Perform the instrument cluster configuration when replacing it. (See INSTRUMENT CLUSTER CONFIGURATION.)
2. Disconnect the negative battery cable.
(See BATTERY REMOVAL/INSTALLATION [MZR 2.0, MZR 2.5].)
3. Remove the column cover. (upper) (See COLUMN COVER REMOVAL/INSTALLATION.)
4. Remove the instrument cluster. (See INSTRUMENT CLUSTER REMOVAL/INSTALLATION.)
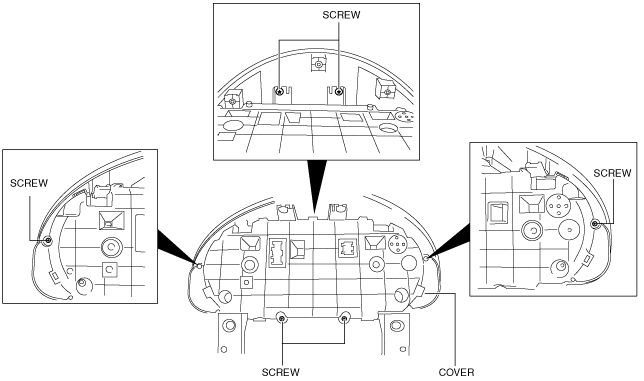
5. Remove the screws and clips.
am3uuw00002599
|
6. Remove the screws.
am3uuw00002598
|
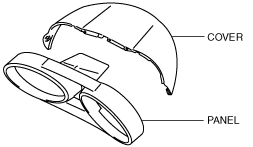
7. Remove the cover.
8. Remove the screws from the cover.
am3uuw00002600
|
am3uuw00002601
|
9. Remove the instrument cluster rubber.
am3uuw00004268
|
10. Remove the rings.
am3uuw00004264
|
11. Detach the tabs
am3uuw00004267
|
12. Detach the tabs.
am3uuw00004437
|
13. Remove the lens.
am3uuw00004266
|
14. Assemble in the reverse order of disassembly.