 |
am6zzw00001317
REAR BUMPER REMOVAL/INSTALLATION
id091000405300
4SD, 5HB
1. Disconnect the negative battery cable.
2. Peel off the seaming welt.
3. Remove the follwing parts:
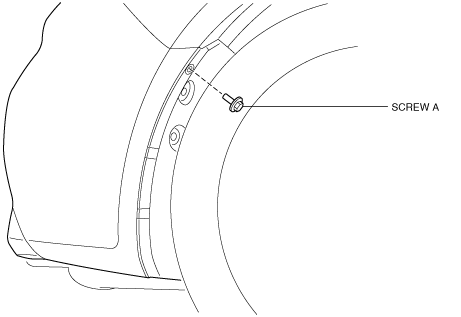
4. Remove the screws A.
am6zzw00001317
|
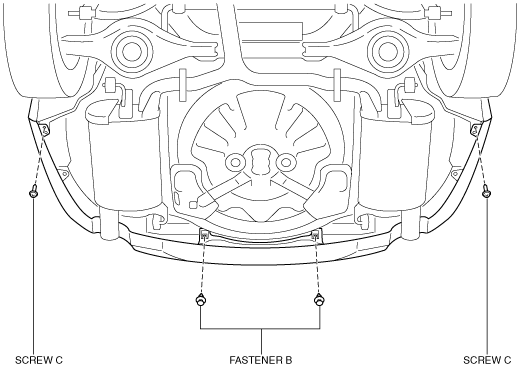
5. Remove the fasteners B and screws C.
am6zzw00001318
|
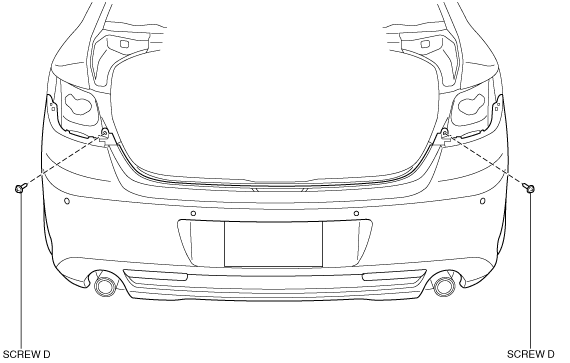
6. Remove the screws D.
am6zzw00001319
|
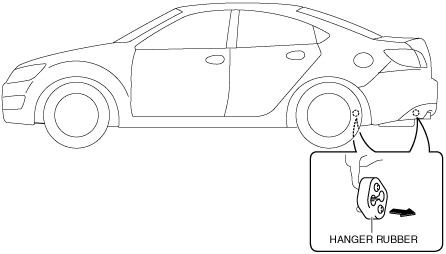
7. Remove the hanger rubber.
am6zzw00004040
|
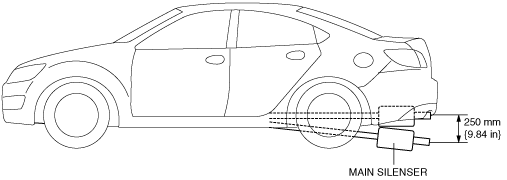
8. Lower the main silencer to the position shown in the figure.
am6zzw00004041
|
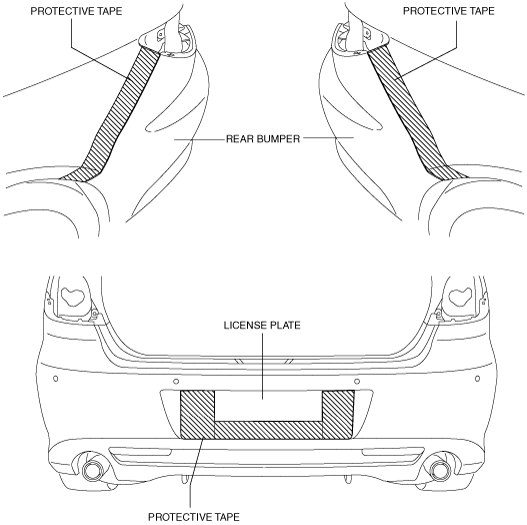
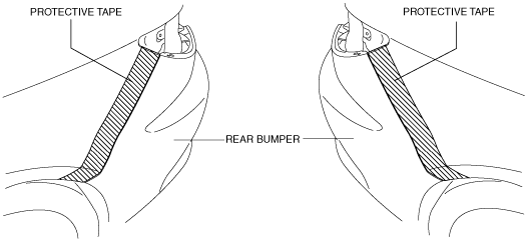
9. Affix the protective tape to the position shown in the figure.
am6zzw00004042
|
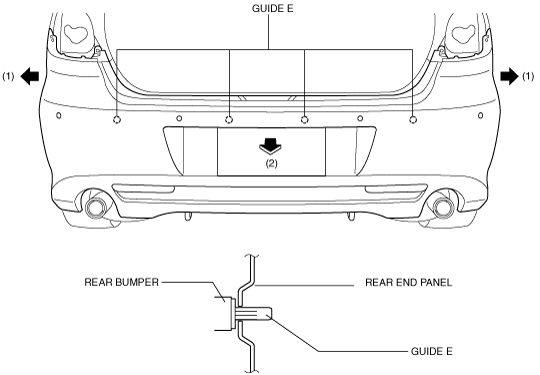
10. Pull the rear bumper in the direction of arrow (1) shown in the figure to disengage the bumper from the rear bumper slider, then remove the rear bumper in the direction of arrow (2) while detach the guide E.
am6zzw00001320
|
11. Disconnect the rear fog light connector. (Vehicles with rear fog light)
12. Disconnect the license plate light connector.
13. Disconnect the ultrasonic sensor connector. (Vehicles with parking sensor)
14. Remove the guide E form the rear bumper.
15. Install in the reverse order of removal. (See Rear Bumper Installation Note) (See Guide E Installation Note)
Wagon
1. Disconnect the negative battery cable.
2. Peel off the seaming welt.
3. Remove the follwing parts:
4. Remove the screws A.
am6zzw00001317
|
5. Remove the fasteners B and screws C.
am6zzw00001318
|
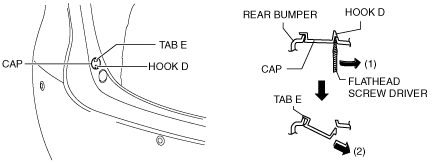
6. Use the tape-wrapped flathead screw driver, detaching hook D in the direction of the arrow(1) shown in the figure.
am6zzw00004602
|
7. Pull the cap in the direction of the arrow(2) shown in the figure and remove it while remove the tab E.
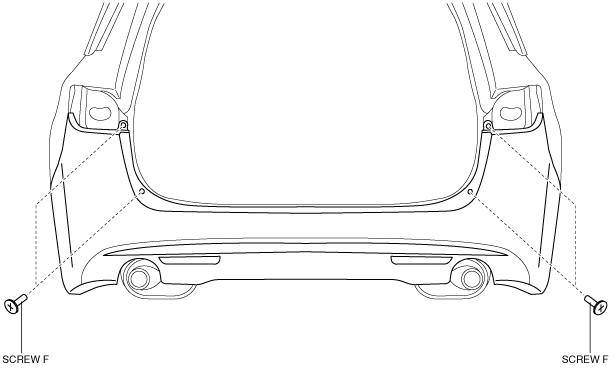
8. Remove the screws F.
am6zzw00003680
|
9. Affix the protective tape to the position shown in the figure.
am6zzw00004043
|
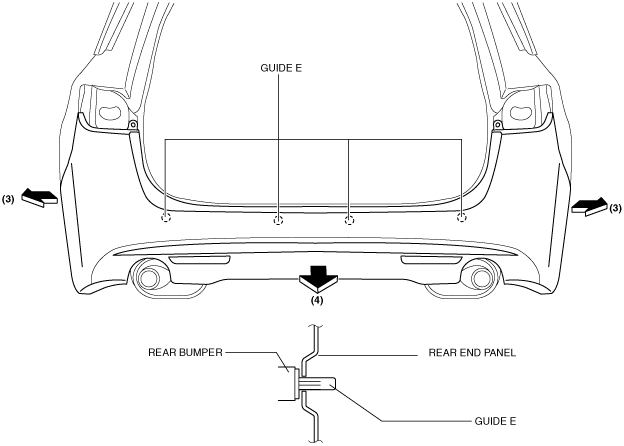
10. Pull the rear bumper in the direction of arrow (3) shown in the figure to disengage the bumper from the rear bumper slider, then remove the rear bumper in the direction of arrow (4) while detach the guide E.
am6zzw00006787
|
11. Disconnect the rear fog light connector. (Vehicles with rear fog light)
12. Disconnect the ultrasonic sensor connector. (Vehicles with parking sensor)
13. Install in the reverse order of removal. (See Rear Bumper Installation Note) (See Guide E Installation Note)
Rear Bumper Installation Note
1. Spread the rear bumper ends apart.
2. Assemble the rear bumper to the body.
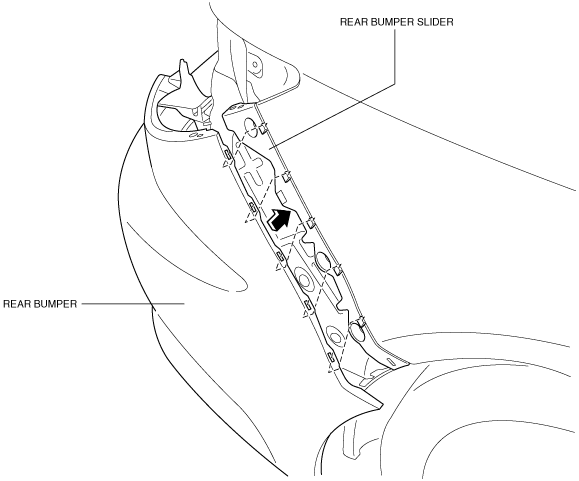
3. Press the rear bumper connecting area in the direction of the arrow shown in the figure to engage with the bumper slider.
am6zzw00001321
|
Guide E Installation Note
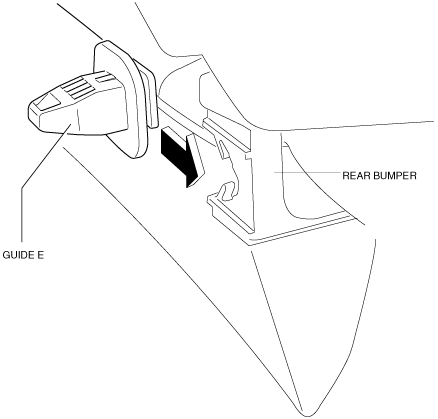
1. Insert the license plate, and install the guide E indication in the arrow shown in the figure.
am6zzw00004044
|