DASHBOARD UPPER GARNISH REMOVAL/INSTALLATION
id091700997600
-
Warning
-
-
Note
-
• When replacing the passenger-side air bag module after the deployment, replace it together with the mid-wiring harness.
• When installing the mid-wiring harness, install it along the vehicle wiring harness using bands or tape.
1. Switch the ignition to off.
2. Disconnect the negative battery cable and wait for 1 min or more.
3. Remove the following parts:
- (1) Glove compartment (See GLOVE COMPARTMENT REMOVAL/INSTALLATION.)
- (2) Center panel upper (See CENTER PANEL UPPER REMOVAL/INSTALLATION.)
- (3) Upper panel (See UPPER PANEL REMOVAL/INSTALLATION.)
- (4) Decoration panel (See DECORATION PANEL REMOVAL/INSTALLATION.)
- (5) Passenger-side front scuff plate (See FRONT SCUFF PLATE REMOVAL/INSTALLATION.)
- (6) Passenger-side front side trim (See FRONT SIDE TRIM REMOVAL/INSTALLATION.)
- (7) Side panel (See SIDE PANEL REMOVAL/INSTALLATION.)
- (8) Shift knob (MTX) (See MANUAL TRANSAXLE SHIFT MECHANISM REMOVAL/INSTALLATION [G35M-R].) (See MANUAL TRANSAXLE SHIFT MECHANISM REMOVAL/INSTALLATION [G66M-R].) (See MANUAL TRANSAXLE SHIFT MECHANISM REMOVAL/INSTALLATION [A26M-R].)
- (9) Shift panel (See SHIFT PANEL REMOVAL/INSTALLATION.)
- (10) Center panel lower (See CENTER PANEL LOWER REMOVAL/INSTALLATION.)
- (11) Audio unit (Vehicles with audio system) (See AUDIO UNIT REMOVAL/INSTALLATION.)
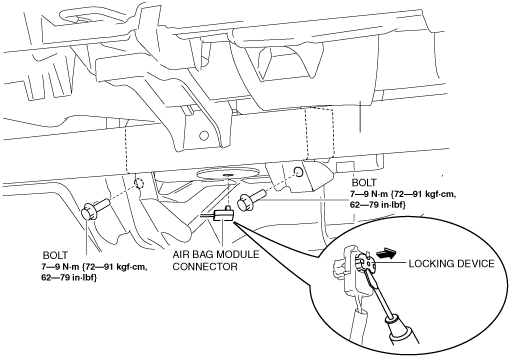
4. Remove the bolts.
L.H.D.
R.H.D.
5. Using a flathead screwdriver, lift the locking device carefully, however do not remove it.
6. Disconnect the air bag module connector.
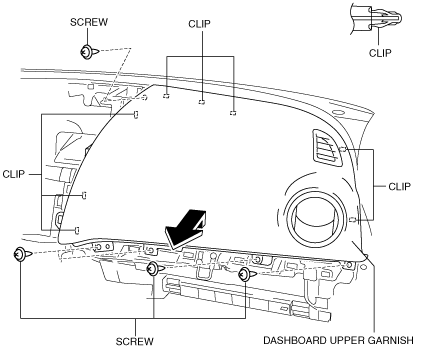
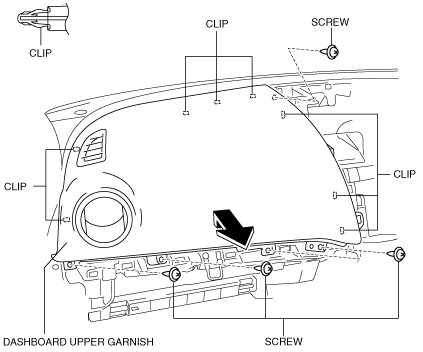
7. Remove the screws.
L.H.D.
R.H.D.
8. Pull the dashboard upper garnish in the direction of the arrow shown in the figure and remove it while detaching the clips.
9. Install in the reverse order of removal.