ac8wzw00001438
|
SELECTOR LEVER COMPONENT REMOVAL/INSTALLATION
id051800297600
1. Disconnect the negative battery terminal. (See NEGATIVE BATTERY TERMINAL DISCONNECTION/CONNECTION.)
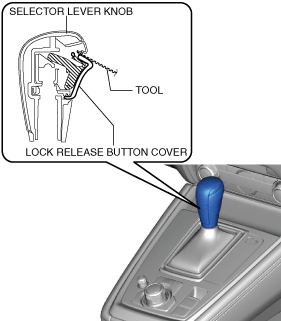
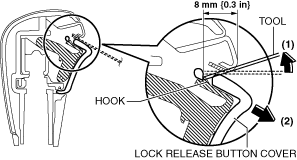
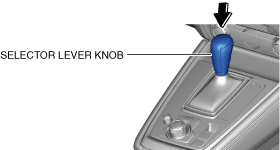
2. Perform the following procedure and remove the selector lever knob.
ac8wzw00001438
|
ac8wzw00001439
|
ac8wzw00001440
|
ac8wzw00001441
|
3. Remove the following parts.
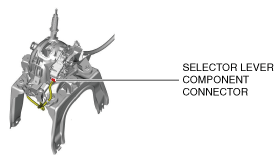
4. Disconnect the selector lever component connector.
ac8wzw00001442
|
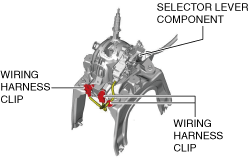
5. Disconnect the wiring harness clip from the selector lever component.
ac8wzw00001443
|
6. Disconnect the selector cable (selector lever side). (See SELECTOR CABLE REMOVAL/INSTALLATION.)
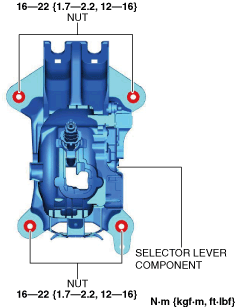
7. Remove the nuts.
ac8wzw00001444
|
8. Remove the selector lever component.
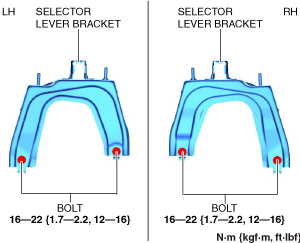
9. Remove the selector lever bracket.
ac8wzw00001445
|
10. Install in the reverse order of removal. (See Selector Lever Knob Installation Note.)
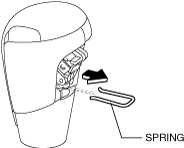
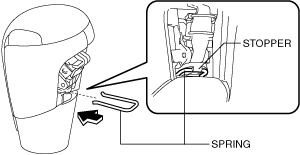
Selector Lever Knob Installation Note
1. Install the spring to the selector lever knob.
ac8wzw00001446
|
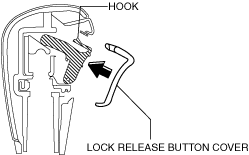
2. Install the lock release button cover to the selector lever knob and verify that the lock release button cover is attached to the hook.
ac8wzw00001447
|
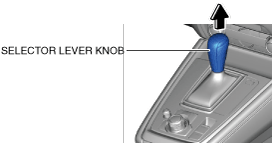
3. Install the selector lever knob to the selector lever component.
ac8wzw00001448
|