 |
a30zzw00004605
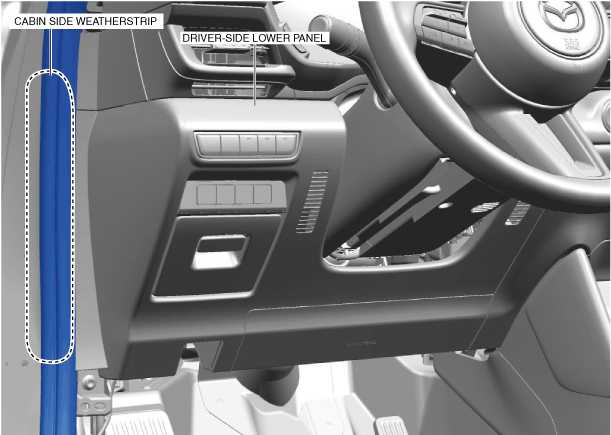
DRIVER-SIDE LOWER PANEL REMOVAL/INSTALLATION
id091700052800
1. Remove the select lever knob. (See SELECTOR LEVER REMOVAL/INSTALLATION [A71M].)
2. Disconnect the negative lead-acid battery terminal. (See NEGATIVE LEAD-ACID BATTERY TERMINAL DISCONNECTION/CONNECTION.)
3. Remove the following parts:
4. Partially peel back the cabin side weatherstrip.
a30zzw00004605
|
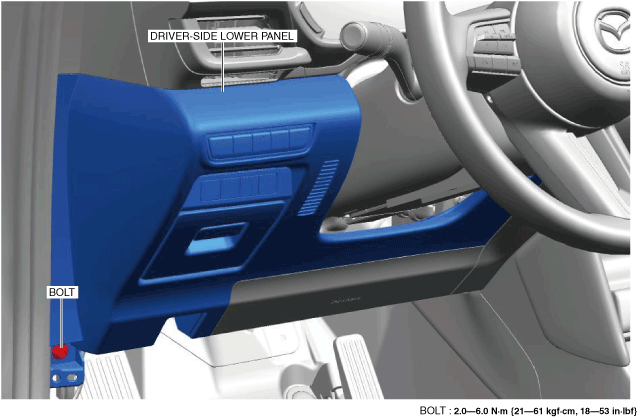
5. Remove the bolt.
a30zzw00000083
|
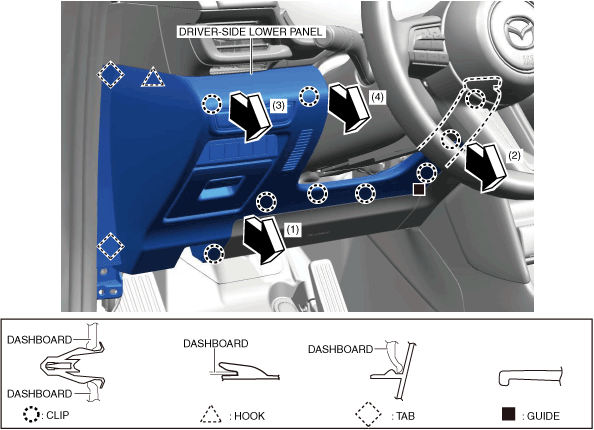
6. Move the driver-side lower panel in the order of arrows (1), (2), (3), and (4) shown in the figure, and remove it while detaching the clips, hook, tabs, and guide.
a30zzw00000084
|
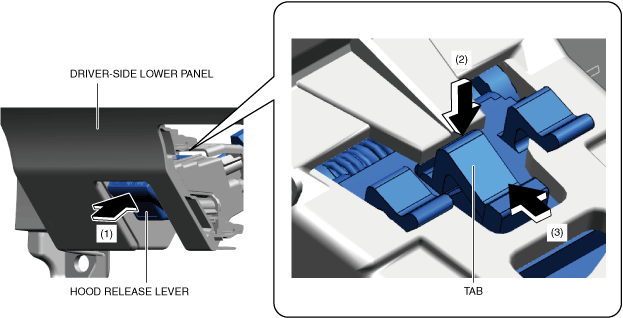
7. While pressing the hood release lever in the direction of arrow (1) shown in the figure, press the tab in the direction of arrow (2) and detach the tab from the driver-side lower panel.
a30zzw00002445
|
8. Remove the hood release lever in the direction of arrow (3) shown in the figure.
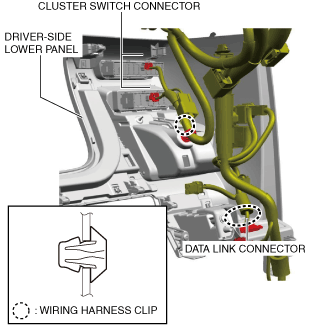
9. Disconnect the cluster switch connector.
a30zzw00000085
|
10. Remove the data link connector.
11. Remove the wiring harness clip.
12. Install in the reverse order of removal.