 |
a30zzw00000092
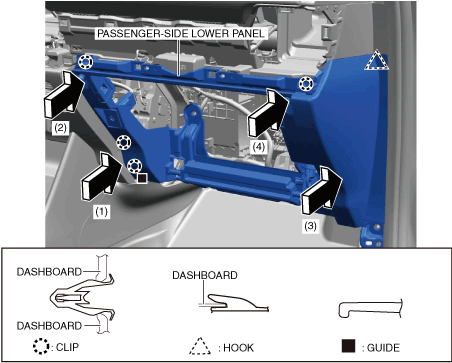
PASSENGER-SIDE LOWER PANEL INSTALLATION [(E)]
id0917000532x2
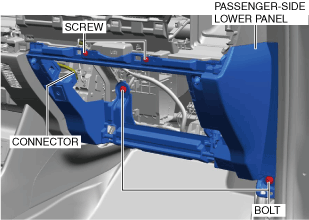
1. While pushing the passenger-side lower panel in the order of arrows (1), (2), (3), and (4) shown in the figure, attach the clips, hook, and guide.
a30zzw00000092
|
2. Assemble the passenger-side lower panel to the dashboard and tighten the bolts and screws temporarily.
a30zzw00000090
|
3. Install the glove compartment. (See GLOVE COMPARTMENT REMOVAL/INSTALLATION [(E)].)
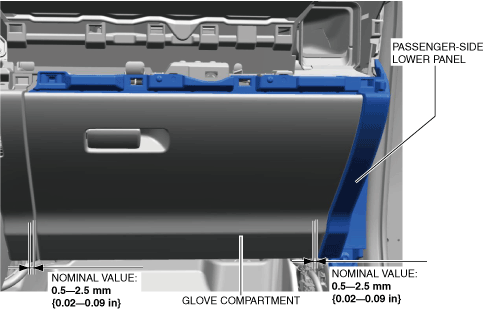
4. Measure the gap between the glove compartment and the passenger-side lower panel and verify that the measured value is within the nominal value.
a30zzw00000093
|
5. Remove the glove compartment. (See GLOVE COMPARTMENT REMOVAL/INSTALLATION [(E)].)
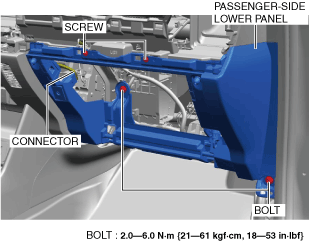
6. Tighten the bolts and screws completely.
a30zzw00000094
|
7. Connect the connectors. (With passenger air bag deactivation (PAD) switch)
8. Install the following parts:
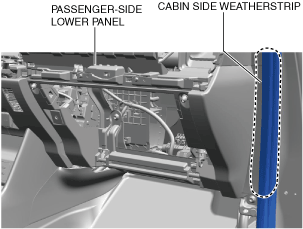
9. Install the cabin side weatherstrip.
a30zzw00004607
|
10. Connect the negative lead-acid battery terminal. (See NEGATIVE LEAD-ACID BATTERY TERMINAL DISCONNECTION/CONNECTION.)