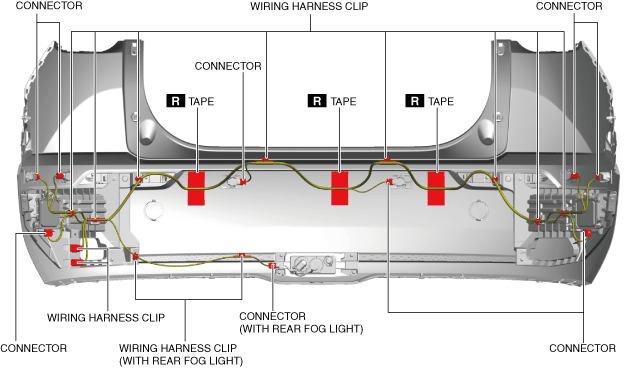
 |
a30zzw00006741
REAR ULTRASONIC SENSOR SHORT-CORD REMOVAL/INSTALLATION [(E)]
id0922007017x2
Replacement parts
|
Tape
Quantity: 3
Location of use: Rear ultrasonic sensor short cord
|
1. Disconnect the negative lead-acid battery terminal. (See NEGATIVE LEAD-ACID BATTERY TERMINAL DISCONNECTION/CONNECTION.)
2. Remove the following parts.
3. Partially peel back the trunk side trim. (See TRUNK SIDE TRIM REMOVAL/INSTALLATION.)
4. Remove the following parts.
5. Remove the tape.
a30zzw00006741
|
6. Disconnect the connectors.
7. Detach the wiring harness clips.
8. Remove the rear ultrasonic sensor short cord.
9. Install in the reverse order of removal.
10. Perform rear side radar sensor aiming. (See REAR SIDE RADAR SENSOR AIMING.)