1. Remove the following parts:
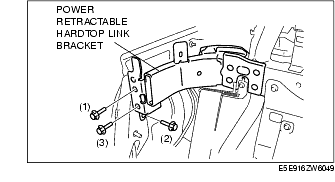
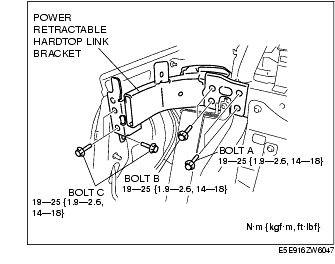
2. Remove the bolts A, B and C.(See Bolt B, C Install Note.)
3. Remove the junction.(See SEAT BACK CROSSMEMBER ASSEMBLY REMOVAL/INSTALLATION.)
4. Loosen the installation bolts and nuts of the seat back crossmember component, and tilt the seat back crossmember component towards the vehicle front.(See SEAT BACK CROSSMEMBER ASSEMBLY REMOVAL/INSTALLATION.)
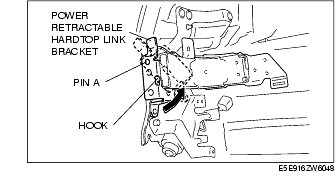
5. Rotate the power retractable hardtop link bracket in the direction shown by the arrow at the pivot fulcrum of pin A and set the hook out of the way.
6. Remove the power retractable hardtop link bracket.
7. Install in the reverse order of removal.
1. Temporarily tighten all the bolts, then tighten the bolts in the order indicated in the figure.