|
amxzzw00004116
SEAT BACK CROSSMEMBER ASSEMBLY REMOVAL/INSTALLATION
id091000197956
1. Using the retractable hardtop switch, keep the front roof half-open. (retractable hardtop)
amxzzw00004116
|
2. Disconnect the negative battery terminal. (See NEGATIVE BATTERY TERMINAL DISCONNECTION/CONNECTION.)
3. Remove the following parts:
4. Remove the seat belt retractor installation bolts and set aside the seat belt retractor. (See SEAT BELT REMOVAL/INSTALLATION.)
5. Remove the retractable hardtop control module from the seat back crossmember assembly and set it aside so that it does not interfere with the servicing. (retractable hardtop)
6. Remove the lock bracket. (See LOCK BRACKET REMOVAL/INSTALLATION.)
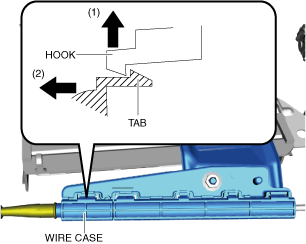
7. While pulling the hookin the direction of arrow (1) shown in the figure, move the wire case in the direction of arrow (2) and open the wire case. (retractable hardtop)
amxzzw00004240
|
8. Disconnect the wire. (retractable hardtop)
amxzzw00004241
|
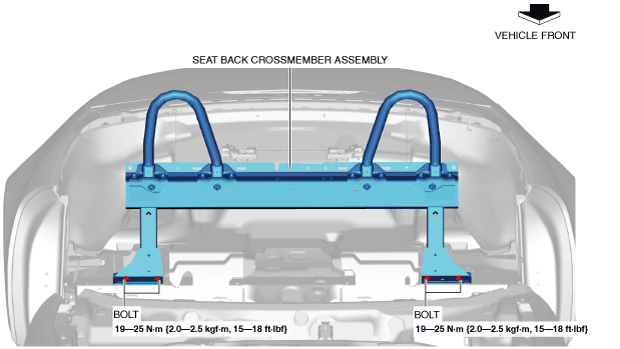
9. Remove the bolts.
amxuuw00003110
|
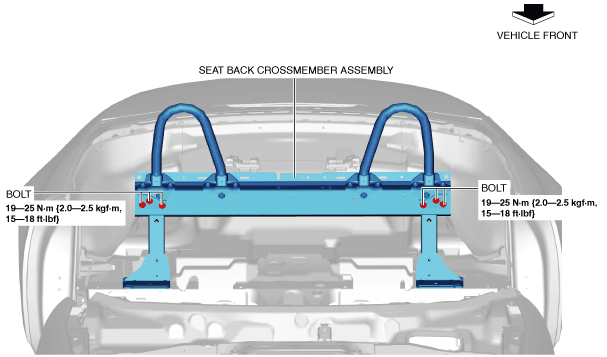
10. Remove the bolts.
amxuuw00003111
|
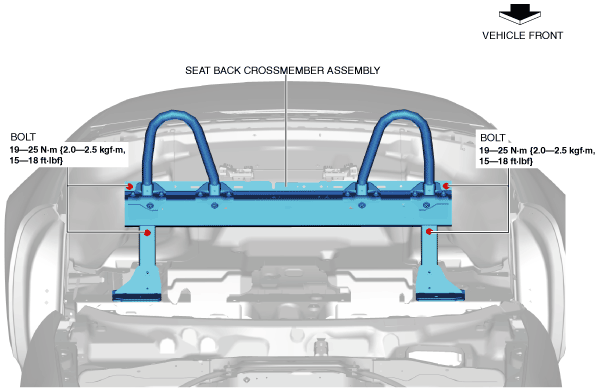
11. Remove the bolts.
amxzzw00003855
|
12. Remove the seat back crossmember assembly.
13. Install in the reverse order of removal.