 |
CLUTCH DISC INSPECTION [A26M-R (MZR-CD 2.2)]
id0510008009c5
1. Disconnect the negative battery cable. (See BATTERY REMOVAL/INSTALLATION [MZR-CD 2.2].)
2. Remove the engine cover. (See ENGINE COVER REMOVAL/INSTALLATION [MZR-CD 2.2].)
3. Drain the engine coolant. (See ENGINE COOLANT REPLACEMENT [MZR-CD 2.2].)
4. Remove the following parts:
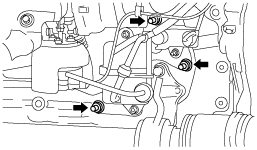
5. Cut off the vacuum chamber installation bolt and set the vacuum chamber aside so that it does not interfere with the servicing.
am3zzw00005917
|
6. Remove the front pipe bracket No.2. (See EXHAUST SYSTEM REMOVAL/INSTALLATION [MZR-CD 2.2].)
7. Remove the front auto leveling sensor. (See AUTO LEVELING SENSOR REMOVAL/INSTALLATION.)
8. Drain the transaxle oil into a suitable container.
9. Remove the manual transaxle. (See MANUAL TRANSAXLE REMOVAL/INSTALLATION [A26M-R (MZR-CD 2.2)].)
10. Remove the clutch cover. (See CLUTCH UNIT REMOVAL/INSTALLATION [A26M-R (MZR-CD 2.2)].)
11. Remove the clutch disk. (See CLUTCH UNIT REMOVAL/INSTALLATION [A26M-R (MZR-CD 2.2)].)
12. Using vernier calipers, measure the thickness of the lining at a rivet head on both sides.
am3zzw00006224
|
13. Measure the clutch disc runout using a dial gauge.
am6uuw00001269
|
14. Install in the reverse order of removal.
15. Perform the auto leveling system initialization. (See AUTO LEVELING SYSTEM INITIALIZATION.)
16. Add the specified amount of specified transaxle oil. (See TRANSAXLE OIL REPLACEMENT [A26M-R].)
17. Warm up the engine and transaxle, inspect for oil leakage, and inspect the transaxle operation.