 |
am3uuw00011460
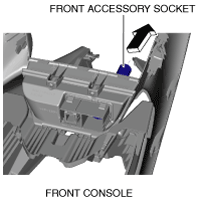
FRONT ACCESSORY SOCKET REMOVAL/INSTALLATION
id092100900500
1. Disconnect the negative battery cable. (See NEGATIVE BATTERY CABLE DISCONNECTION/CONNECTION [SKYACTIV-G 1.5, SKYACTIV-G 2.0, SKYACTIV-G 2.5].) (See NEGATIVE BATTERY CABLE DISCONNECTION/CONNECTION [SKYACTIV-D 2.2].) (See NEGATIVE BATTERY CABLE DISCONNECTION/CONNECTION [MZR 1.6].)(See NEGATIVE BATTERY CABLE DISCONNECTION/CONNECTION [SKYACTIV-D 1.5].)
2. Remove the following parts:
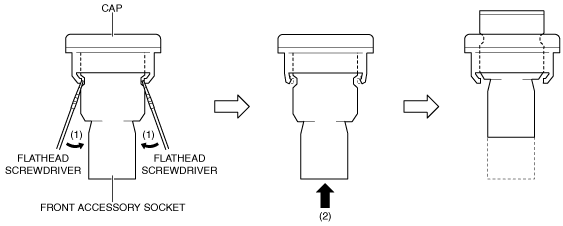
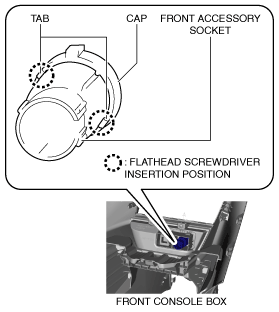
3. Insert a tape-wrapped flathead screwdriver into the gap between the cap tab and socket.
am3uuw00011460
|
4. Move the flathead screwdriver in the direction of the arrows (1) shown in the figure, and press the front accessory socket in the direction of the arrow (2) shown in the figure to detach the cap tabs from the socket.
am6zzw00008300
|
5. Pull the front accessory socket in the direction of the arrow shown in the figure and remove it.
am3uuw00011461
|
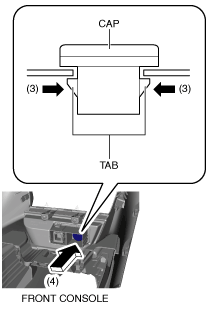
6. While pressing the cap tabs in the direction of arrows (3) shown in the figure, press the cap in the direction of arrow (4) shown in the figure to detach the cap tabs from the front console.
am3uuw00011462
|
7. Remove the cap.
8. Install in the reverse order of removal.