 |
am3zzw00012876
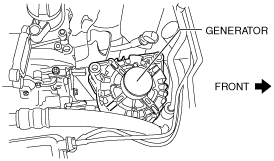
GENERATOR REMOVAL/INSTALLATION [MZ-CD 1.6]
id011744800200
1. Remove the battery cover. (See BATTERY REMOVAL/INSTALLATION [MZ-CD 1.6].)
2. Disconnect the negative battery cable. (See BATTERY REMOVAL/INSTALLATION [MZ-CD 1.6].)
3. Remove the aerodynamic under cover No.2 and splash shield as a single unit. (See AERODYNAMIC UNDER COVER NO.2 REMOVAL/INSTALLATION.) (See SPLASH SHIELD REMOVAL/INSTALLATION.)
4. Remove the engine cover. (See ENGINE COVER REMOVAL/INSTALLATION [MZ-CD 1.6].)
5. Remove the drive belt. (See DRIVE BELT REMOVAL/INSTALLATION [MZ-CD 1.6].)
6. Remove the A/C compressor with the cooler hose still connected and secure it using wire or rope so that it is out of the way. (See A/C COMPRESSOR REMOVAL/INSTALLATION.)
7. Remove the charge air cooler hose (inlet and outlet), intake air pipe NO.1, intake shutter valve and intake air pipe NO.2 component.(See INTAKE-AIR SYSTEM REMOVAL/INSTALLATION [MZ-CD 1.6].)
8. Remove the drive belt auto tensioner. (See TIMING BELT REMOVAL/INSTALLATION [MZ-CD 1.6].)
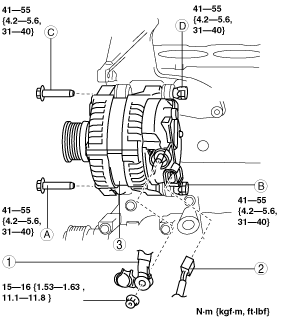
9. Remove in the order indicated in the table.
10. Install in the reverse order of removal.
am3zzw00012876
|
|
1
|
Terminal B cable
|
|
2
|
Generator connector
|
|
3
|
Generator
(See Generator Removal Note.)
(See Generator Installation Note.)
|
Generator Removal Note
1. Disconnect the oil pressure switch connector and A/C compressor magnet clutch connector.
2. Set the wiring harness and wiring harness bracket out of the way.
3. Remove the generator fitting bolts.
4. Remove the generator from above the engine compartment.
am2zzw00004023
|
Generator Installation Note
1. Match the generator fixing hole and engine side hole, then temporarily tighten the generator installation bolts in the order A, B, C, and D.
2. Securely tighten the generator installation bolts in the order A, C, B, and D.