 |
am3zzw00010332
FRONT DOOR MODULE PANEL REMOVAL/INSTALLATION
id091100520200
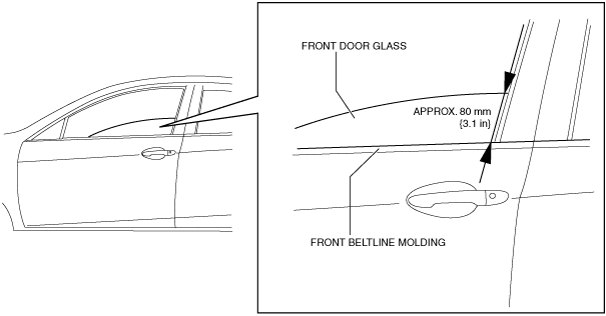
1. To access the glass installation bolt, position the front door glass so that the distance from the top of the front door glass to the upper part of the front beltline molding is approx. 80 mm {3.1 in}.
am3zzw00010332
|
2. Disconnect the negative battery cable. (See BATTERY REMOVAL/INSTALLATION [MZR 2.0, MZR 2.5].) (See BATTERY REMOVAL/INSTALLATION [MZR 2.3 DISI Turbo].) (See BATTERY REMOVAL/INSTALLATION [MZR 2.0 DISI i-stop].) (See BATTERY REMOVAL/INSTALLATION [MZ-CD 1.6].) (See BATTERY REMOVAL/INSTALLATION [MZR-CD 2.2].) (See BATTERY REMOVAL/INSTALLATION [MZR 1.5, MZR 1.6].) (See BATTERY REMOVAL/INSTALLATION [SKYACTIV-G 2.0].)
3. Remove the following parts:
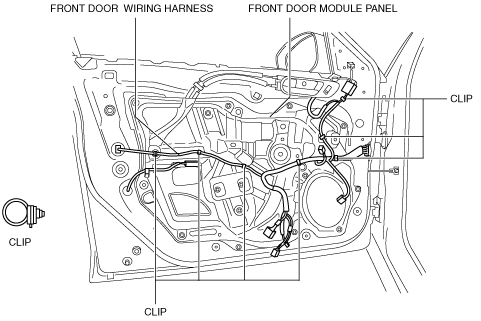
4. Disconnect the front door wiring harness connector.
5. Remove the clips securing the front door wiring harness from the front door module panel.
am3uuw00007076
|
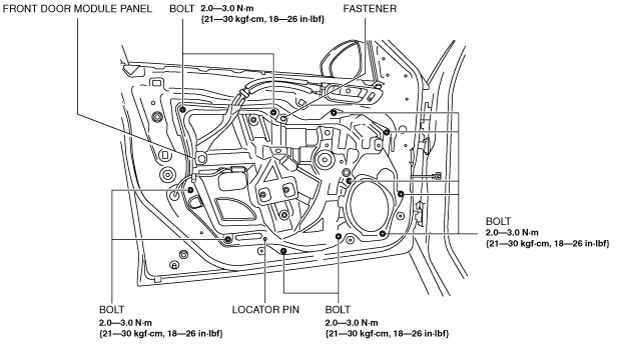
6. Remove the bolts.
am3uuw00007077
|
7. Remove the fastener.
8. Remove the front door module panel.
9. Remove the front power window motor. (See POWER WINDOW MOTOR REMOVAL/INSTALLATION.)
10. Remove the front power window regulator. (See FRONT POWER WINDOW REGULATOR REMOVAL/INSTALLATION.)
11. Install in the reverse order of removal.