|
am3uuw00008098
LIFTGATE REMOVAL/INSTALLATION
id091100521200
1. Disconnect the negative battery cable. (See BATTERY REMOVAL/INSTALLATION [MZR 2.0, MZR 2.5].) (See BATTERY REMOVAL/INSTALLATION [MZR 2.3 DISI Turbo].) (See BATTERY REMOVAL/INSTALLATION [MZR 2.0 DISI i-stop].) (See BATTERY REMOVAL/INSTALLATION [MZ-CD 1.6].) (See BATTERY REMOVAL/INSTALLATION [MZR-CD 2.2].) (See BATTERY REMOVAL/INSTALLATION [MZR 1.5, MZR 1.6].) (See BATTERY REMOVAL/INSTALLATION [SKYACTIV-G 2.0].)
2. Remove the following parts:
3. Peel back the seaming welt to the point indicated by the arrow in the figure.
am3uuw00008098
|
4. Remove the fasteners.
am3uuw00002640
|
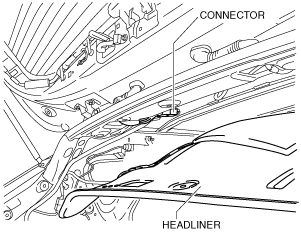
5. Disconnect the connector while partially peeling back the headliner.
am3uuw00002641
|
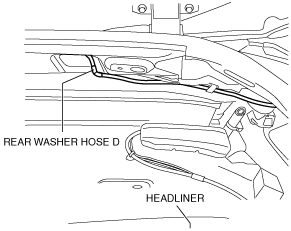
6. Disconnect the rear washer hose D while partially peeling back the headliner.
am3uuw00008099
|
7. Remove the stay damper band using a tape-wrapped flathead screwdriver.
am3uuw00007989
|
8. Remove the stay damper.
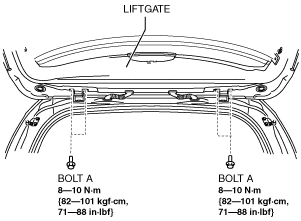
9. Remove the stud bolts.
10. Remove the bolts A.
am3uuw00008100
|
11. Remove the liftgate.
12. Remove the bolts B.
am3uuw00008101
|
13. Remove the bracket.
14. Install in the reverse order of removal.
15. Adjust the liftgate. (See LIFTGATE ADJUSTMENT.)