|
am3zzw00006557
CONSOLE REMOVAL/INSTALLATION
id091700801200
1. Disconnect the negative battery cable. (See BATTERY REMOVAL/INSTALLATION [MZR 2.0, MZR 2.5].) (See BATTERY REMOVAL/INSTALLATION [MZR 2.3 DISI Turbo].) (See BATTERY REMOVAL/INSTALLATION [MZR 2.0 DISI i-stop].) (See BATTERY REMOVAL/INSTALLATION [MZ-CD 1.6].) (See BATTERY REMOVAL/INSTALLATION [MZR-CD 2.2].) (See BATTERY REMOVAL/INSTALLATION [SKYACTIV-G 2.0].) (See BATTERY REMOVAL/INSTALLATION [MZR 1.5, MZR 1.6].)
2. Remove the following parts:
3. Remove the bolts.
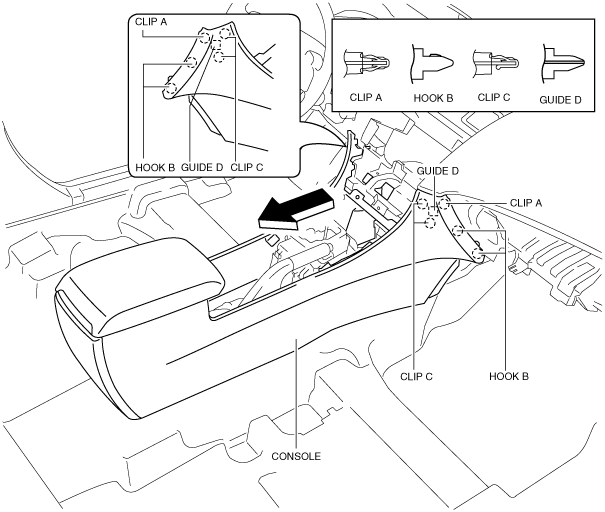
am3zzw00006557
|
4. Remove the screws.
am3uuw00004765
|
5. Pull the console in the direction of the arrow shown in the figure, then detaching clips A, C hooks B and guides D.
am3zzw00006558
|
6. Pull up the console in the direction of the arrow (1) shown in the figure, move the rear console in the direction of the arrow (2), and remove it avoiding the parking brake lever.
am3uuw00004767
|
7. Install in the reverse order of removal.