 |
ac8wzw00002149
REAR FINISHER REMOVAL/INSTALLATION
id091600446100
1. Disconnect the negative battery terminal. (See NEGATIVE BATTERY TERMINAL DISCONNECTION/CONNECTION.)
2. Remove the following parts:
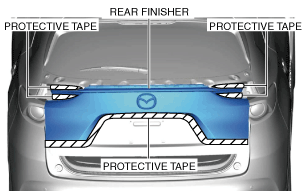
3. To prevent scratches or damage, apply protective tape to the position shown in the figure.
ac8wzw00002149
|
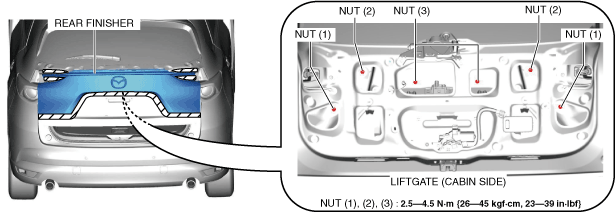
4. Remove the nuts in the order of (1), (2), and (3).
ac8wzw00002150
|
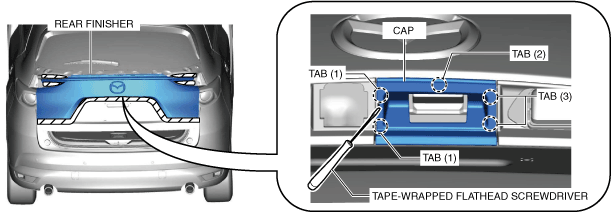
5. Insert a tape-wrapped flathead screwdriver into the position shown in the figure.
ac8wzw00002151
|
6. Remove the cap while detaching the tabs in the order of (1), (2), and (3) using a tape-wrapped flathead screwdriver.
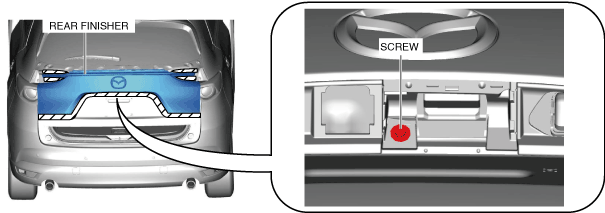
7. Remove the screw.
ac8wzw00002152
|
8. Insert a tape-wrapped flathead screwdriver into the position shown in the figure.
ac8wzw00002153
|
9. Move the tape-wrapped flathead screwdriver in the direction of the arrow shown in the figure and detach clips A.
10. Detach all the clips A and B the same as in Steps 8 and 9.
11. Detach the clips using the tape-wrapped flathead screwdriver.
ac8wzw00002154
|
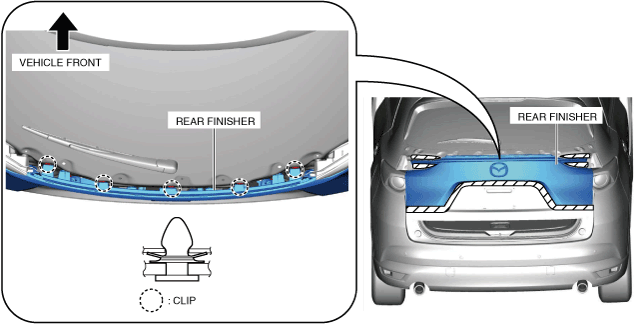
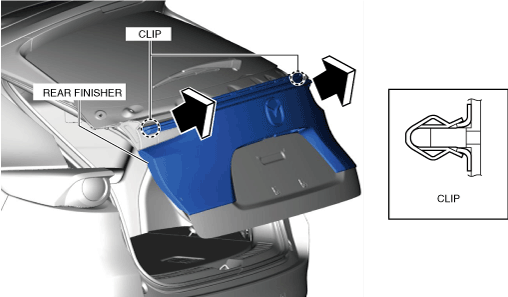
12. Move the rear finisher in the direction of the arrows shown in the figure and remove it while detaching the clips.
ac8wzw00002155
|
13. When removing the rear finisher molding, perform the following procedure.
ac8wzw00002156
|
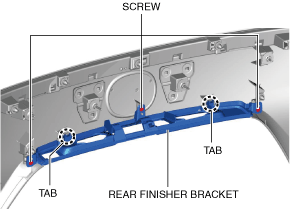
14. When removing the rear finisher bracket, perform the following procedure.
ac8wzw00002157
|
15. Install in the reverse order of removal.
16. Perform 360° view monitor system aiming. (with 360° view monitor system) (See 360°VIEW MONITOR SYSTEM AIMING.)