 |
ac8wzw00001711
D-PILLAR TRIM REMOVAL/INSTALLATION
id091700802300
Replacement part
|
Clip (with grommet)
Quantity: 1
Location of use: D-pillar trim
|
1. Disconnect the negative battery terminal. (See NEGATIVE BATTERY TERMINAL DISCONNECTION/CONNECTION.)
2. Remove the following parts:
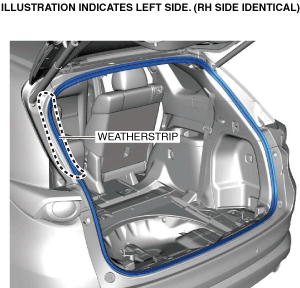
3. Partially peel back the weatherstrip.
ac8wzw00001711
|
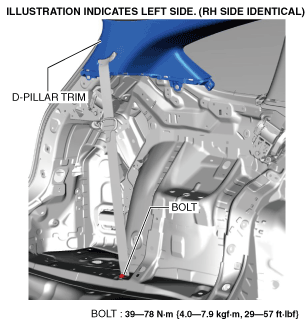
4. Remove the third-row seat belt installation bolt.
ac8wzw00001712
|
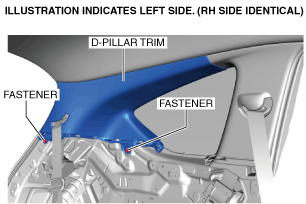
5. Remove the fasteners.
ac8wzw00001713
|
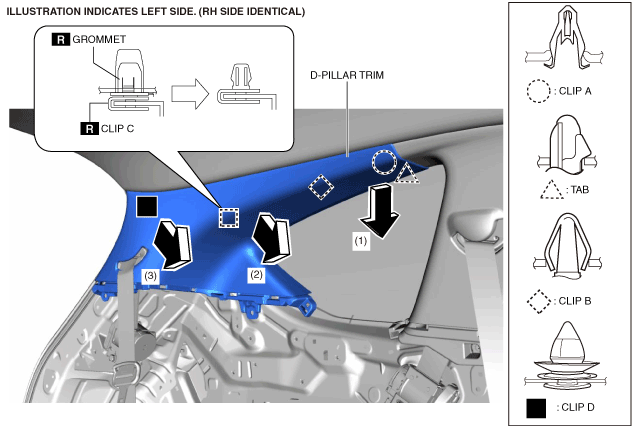
6. Move the D-pillar trim in the order of arrows (1), (2), and (3) shown in the figure and detach clips A, B, C, and D, and the tab.
ac8wzw00001714
|
7. Cut the lead wire connecting clip C and the grommet using a nipper.
ac8wzw00003173
|
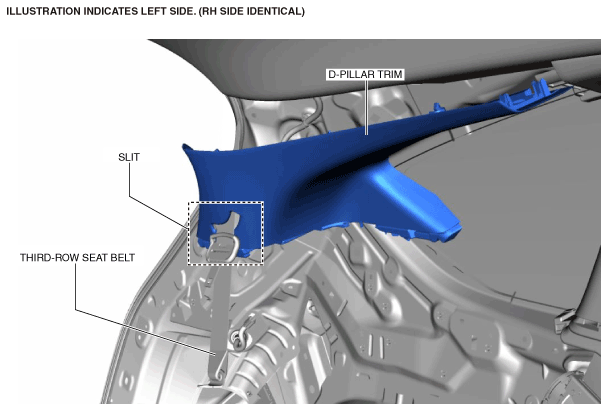
8. Pull the third-row seat belt out of the slit and remove the D-pillar trim.
ac8wzw00001716
|
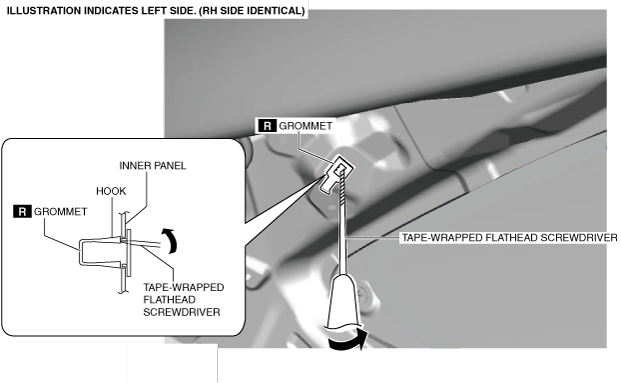
9. Insert a tape-wrapped flathead screwdriver into the position shown in the figure, move it in the direction of the arrow, and then detach the hook.
ac8wzw00001717
|
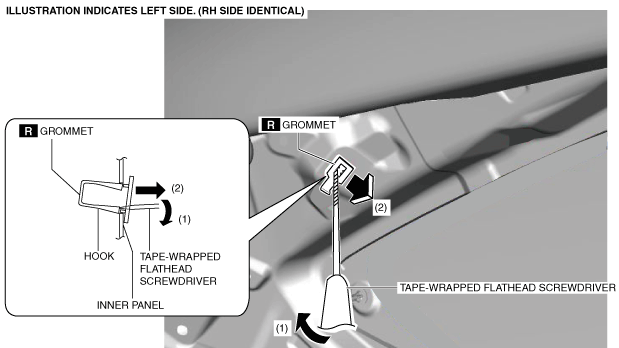
10. Insert the tape-wrapped flathead screwdriver into the position shown in the figure, and while moving it in the direction of arrow (1) to detach the hook, then pull the grommet in the direction of arrow (2) and remove it from the body panel.
ac8wzw00001718
|
11. Install in the reverse order of removal.