|
ac8wzw00001737
TRUNK SIDE TRIM REMOVAL/INSTALLATION
id091700803100
Trunk Side Trim Removal/Installation
1. Disconnect the negative battery terminal. (See NEGATIVE BATTERY TERMINAL DISCONNECTION/CONNECTION.)
2. Remove the following parts:
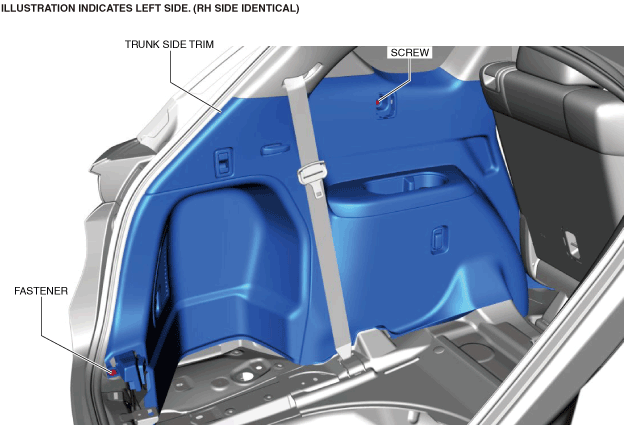
3. Remove the cover.
ac8wzw00001737
|
4. Remove the screw.
ac8wzw00001738
|
5. Remove the fastener.
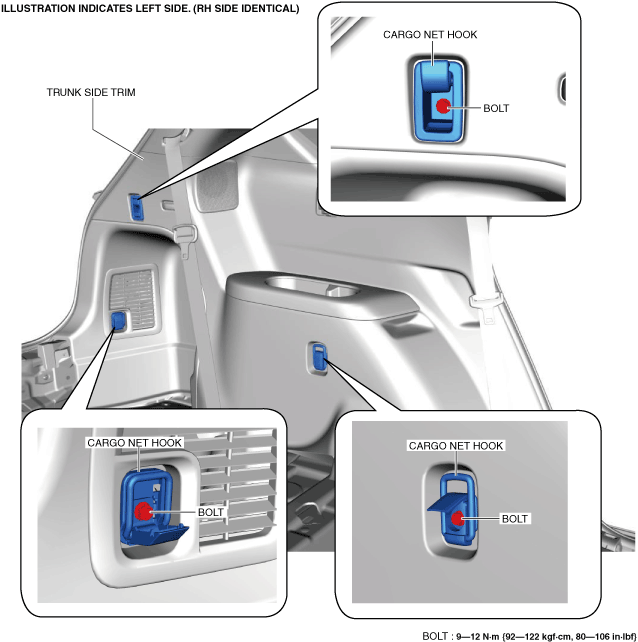
6. Open the cargo net hook cover and remove the bolt.
ac8wzw00001739
|
7. Remove the cargo net hooks.
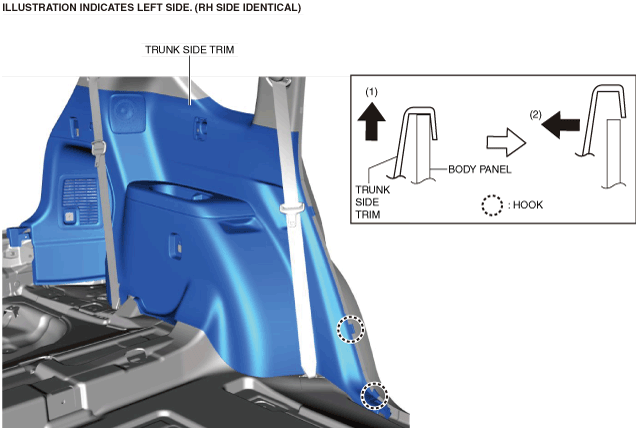
8. Peel back the seaming welt and weatherstrip.
ac8wzw00001740
|
9. Move the trunk side trim in the order of arrows (1) and (2) shown in the figure and detach the hooks from the body panel.
ac8wzw00001741
|
10. Move the trunk side trim in the order of arrows (1), (2), (3), (4), and (5) shown in the figure and remove it while detaching the clips and hooks.
ac8wzw00001742
|
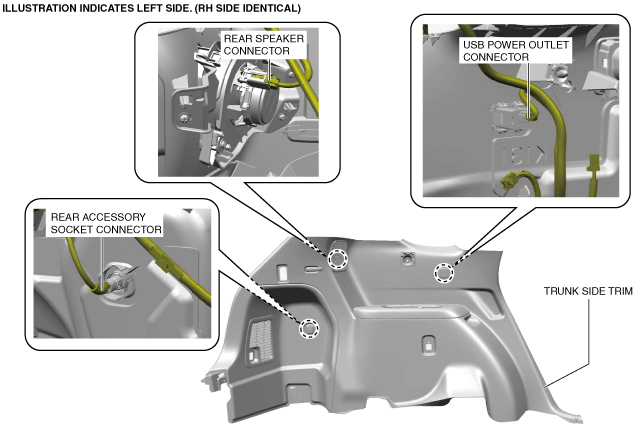
11. Disconnect the rear accessory socket connector. (RH side only)
ac8wzw00004122
|
12. Disconnect the USB power outlet connector. (with USB power outlet)
13. Disconnect the rear speaker connector. (with Bose ®)
14. Install in the reverse order of removal.
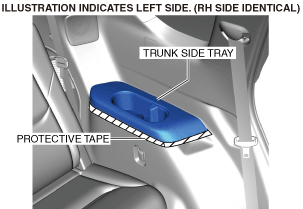
Trunk Side Tray Removal/Installation
1. To prevent scratches or damage, apply protective tape to the position shown in the figure.
ac8wzw00001744
|
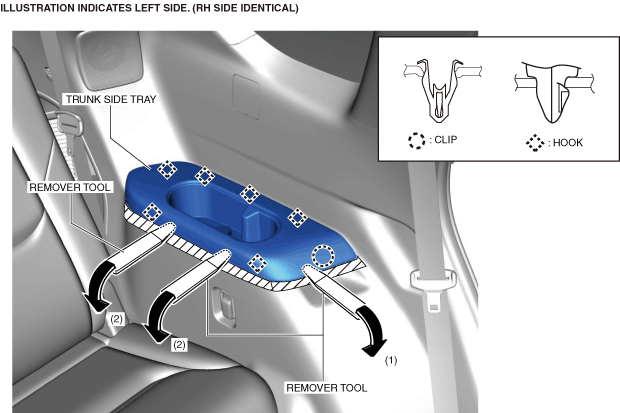
2. Insert a remover tool into the position shown in the figure, move it in the direction of arrow (1), and then detach the clip.
ac8wzw00001745
|
3. Insert the remover tool into the position shown in the figure, move it in the direction of arrow (2), and then remove the trunk side tray while detaching the hooks.
4. Install in the reverse order of removal.
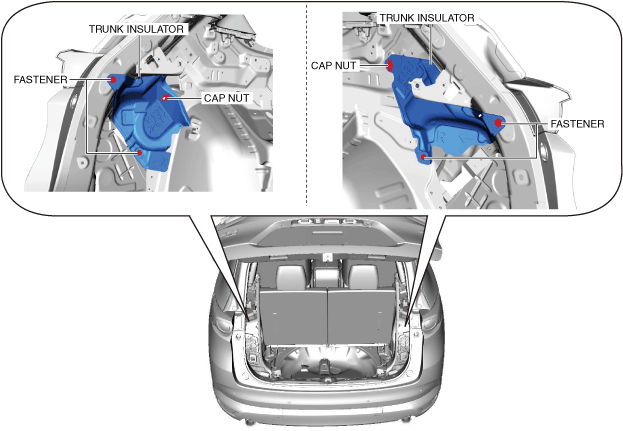
Trunk Insulator Removal/Installation
1. Disconnect the negative battery terminal. (See NEGATIVE BATTERY TERMINAL DISCONNECTION/CONNECTION.)
2. Remove the following parts:
3. Perform the procedure from Step 3 to 9 for the trunk side trim removal/installation. (See Trunk Side Trim Removal/Installation.)
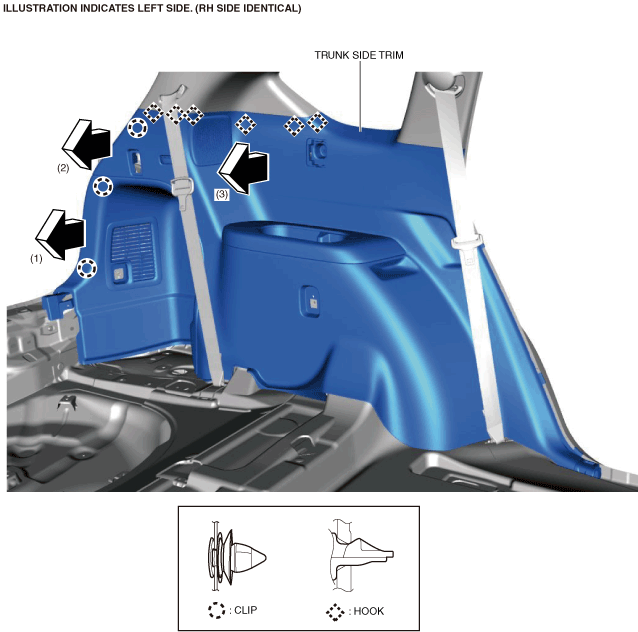
4. Move the trunk side trim in the order of arrows (1), (2), and (3) shown in the figure and detach the clips and hooks.
ac8wzw00002252
|
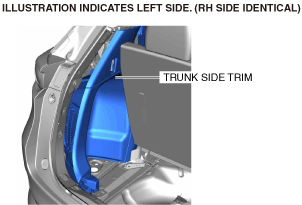
5. Partially peel back the trunk side trim to a position where the trunk insulator can be removed.
ac8wzw00002253
|
6. Remove the fastener.
ac8wzw00002254
|
7. Rotate the cap nut and pull it out of the stud bolt.
8. Remove the trunk insulator.
9. Install in the reverse order of removal.