|
a30zzw00005502
SHROUD PANEL REMOVAL/INSTALLATION
id091000042500
1. Disconnect the negative battery terminal. (See NEGATIVE BATTERY TERMINAL DISCONNECTION/CONNECTION.)
2. Lift up the vehicle.
3. Remove front under cover No.2.(See FRONT UNDER COVER No.2 REMOVAL/INSTALLATION.)
4. Remove front under cover No.1.(See FRONT UNDER COVER No.1 REMOVAL/INSTALLATION.)
5. Lower the vehicle.
6. Remove the following parts:
7. Support the shroud panel using a floor jack.
a30zzw00005502
|
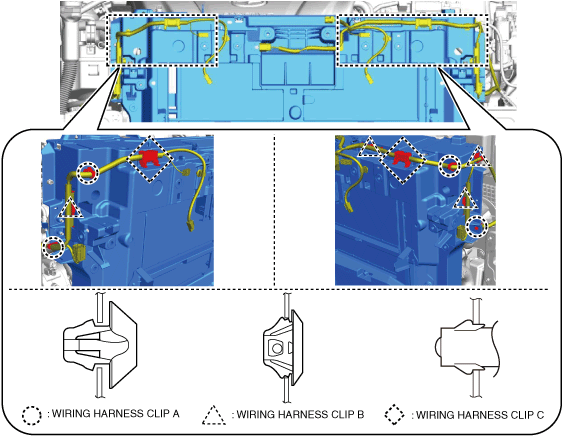
8. Remove the following parts:
9. Remove wiring harness clips A, B, and C.
a30zzw00005503
|
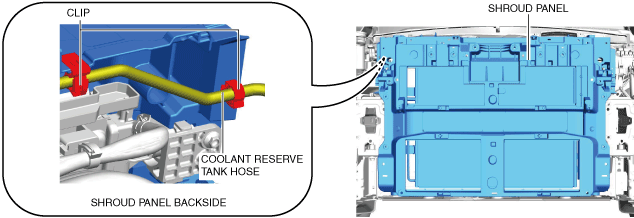
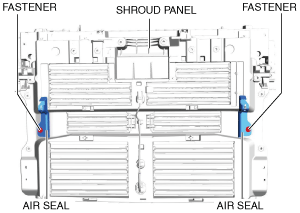
10. Remove the clip from the shroud panel.
a30zzw00005504
|
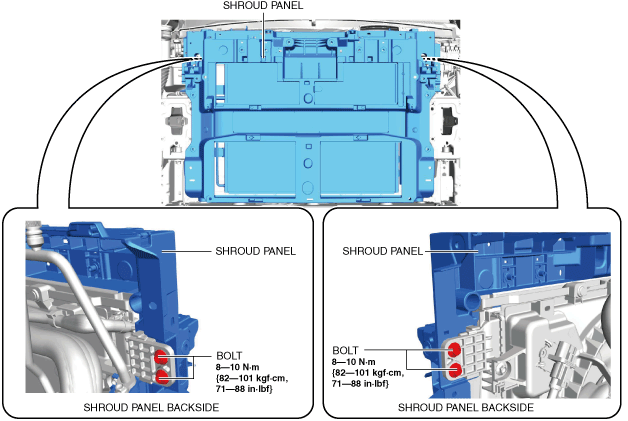
11. Remove the bolts.
a30zzw00005505
|
12. Remove the floor jack which was supporting the shroud panel.
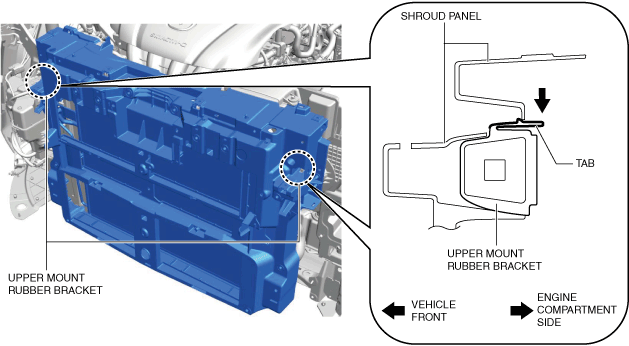
13. Press down the tabs shown in the figure in the direction of the arrow, pull out the upper mount rubber bracket toward the vehicle rear, and remove it.
a30zzw00005506
|
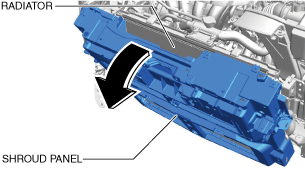
14. Hold the upper part of the radiator by hand and tilt the shroud panel toward the vehicle front.
a30zzw00005507
|
15. Move the shroud panel to the lower side with the radiator held by hand, detach it from the radiator mount guide, and remove the shroud panel toward the vehicle front.
a30zzw00005508
|
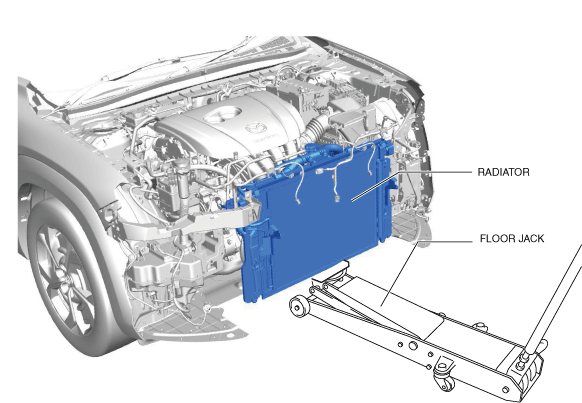
16. Set the floor jack in the position shown in the figure to support the radiator.
a30zzw00005509
|
a30zzw00005510
|
17. Install in the reverse order of removal.
18. Perform the headlight aiming adjustment. (See HEADLIGHT AIMING.)
19. Perform the 360° view monitor system aiming. (With 360° view monitor system) (See 360°VIEW MONITOR SYSTEM AIMING.)
20. Perform the front radar sensor/front side radar sensor aiming. (With front side radar sensor) (See FRONT RADAR SENSOR/FRONT SIDE RADAR SENSOR AIMING.)
21. Perform the front radar sensor aiming. (Without front side radar sensor) (See FRONT RADAR SENSOR AIMING.)