 |
e5u916zw5012
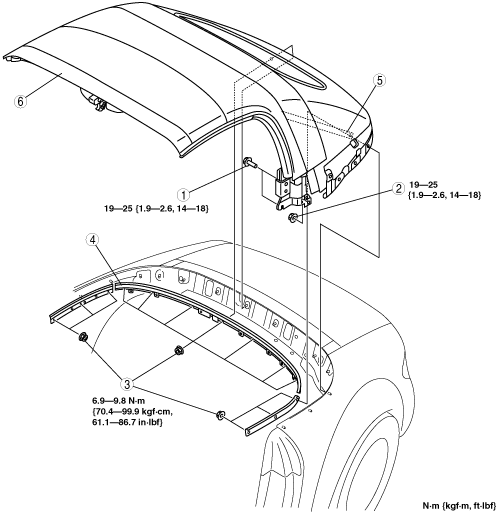
CONVERTIBLE TOP REMOVAL/INSTALLATION
id091600807700
1. Cover both sides of the rear window glass with thick cloth to protect the window.
2. Remove the following parts:
3. Disconnect the rear window defroster connector.
4. Remove in the order indicated in the table.
5. Install in the reverse order of removal.
e5u916zw5012
|
|
1
|
Bolt A
|
|
2
|
Nut A
|
|
3
|
Nut B
|
|
4
|
Set plate
|
|
5
|
Band
|
|
6
|
Convertible top
|
Convertible Top Removal Note
1. Unlock the top lock.
Convertible Top Installation Note
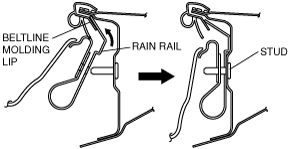
1. Insert the rain rail into the beltline molding lip, and install it over the studs.
e5u916zw5013
|
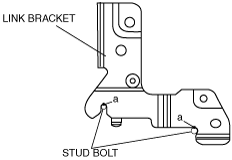
2. Install the link bracket to the stud bolts with no gaps (a) on the mating surfaces, then tighten the bolts and nut.
amxzzw00000909
|
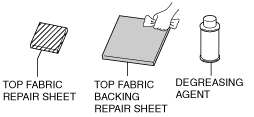
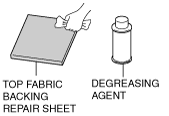
Top Fabric Repair Procedure
Hole repair
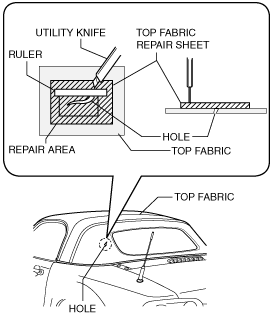
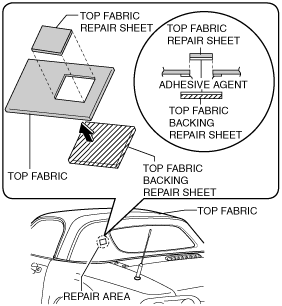
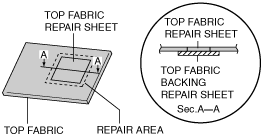
1. Place the top fabric repair sheet on the repair area of the top fabric from the top.
2. Set the ruler on the repair area and cut the top fabric repair sheet and the top fabric simultaneously using the utility knife.
amxzzw00002722
|
3. Using scissors, remove fraying on the top fabric repair sheet and the repair area where the damaged area was cut out.
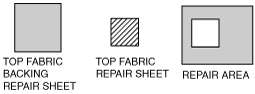
4. Cut the top fabric backing repair sheet so that it is larger than the cut area.
amxzzw00002723
|
5. Using degreasing agent, degrease the top and back of the top fabric repair sheet and the top of the top fabric backing repair sheet.
amxzzw00002724
|
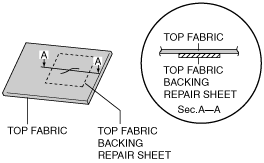
6. Apply adhesive agent to the back of the top fabric repair sheet and the repair area, and the top of the top fabric backing repair sheet.
7. Affix the top fabric backing repair sheet to the repair area.
amxzzw00002725
|
8. Affix the top fabric repair sheet to the repair area.
amxzzw00002726
|
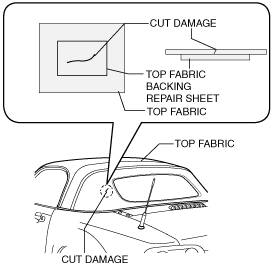
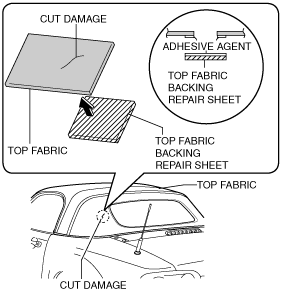
Repair for cut damage
1. Cut the top fabric backing repair sheet so that it is larger than the cut damage.
amxzzw00002727
|
2. Using degreasing agent, degrease the back of the cut damage repair area and the top of the top fabric backing repair sheet.
amxzzw00002728
|
3. Apply adhesive agent to the back of the cut damage repair area and the top of the top fabric backing repair sheet.
amxzzw00002729
|
4. Affix the top fabric backing repair sheet to the repair area.
amxzzw00002730
|