 |
am3zzw00008972
BLOWER MOTOR INSTALLATION
id074000807200
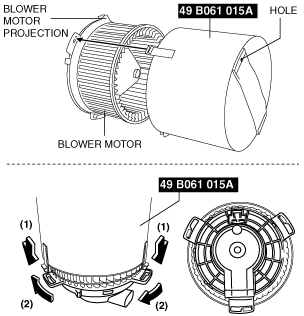
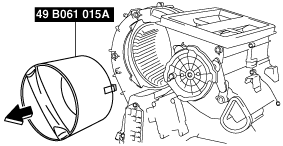
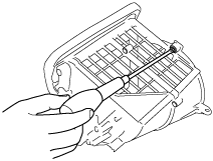
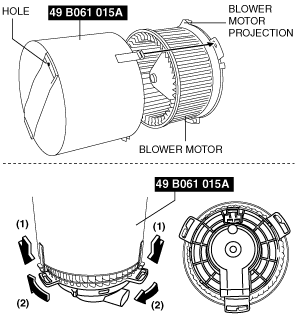
1. Install the SST (49 B061 015A or 49 B061 015) to the blower motor.
L.H.D.
am3zzw00008972
|
R.H.D.
am3zzw00008973
|
am3zzw00009041
|
2. Install the blower motor with the SST (49 B061 015A or 49 B061 015) installed, to the A/C unit. (See Blower Motor Installation Note.)
3. Install the blower motor cover from the driver’s side. (See Blower Motor Cover Installation Note.)
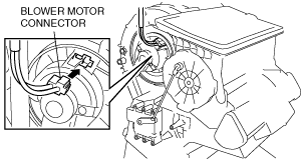
4. Connect the blower motor connector as shown in the figure.
L.H.D.
am3zzw00000770
|
R.H.D.
am3zzw00000771
|
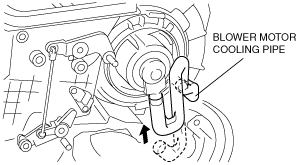
5. Install the blower motor cooling pipe.
L.H.D.
am3zzw00000772
|
R.H.D.
am3zzw00000773
|
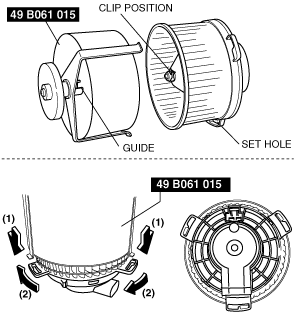
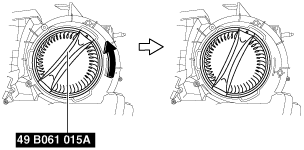
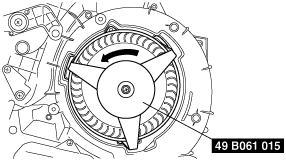
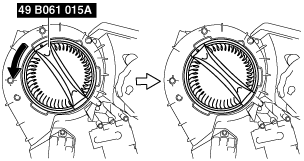
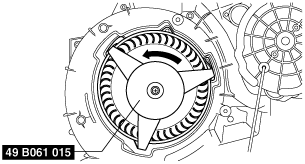
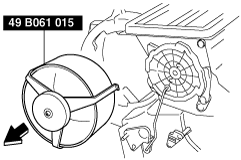
6. Rotate the SST (49 B061 015A or 49 B061 015) in the direction shown by the arrow.
L.H.D.
am3zzw00009042
|
am3zzw00009043
|
R.H.D.
aaxjjw00008396
|
aaxjjw00008393
|
7. Remove the SST (49 B061 015A or 49 B061 015) from the blower motor.
L.H.D.
am3zzw00008979
|
am3zzw00009044
|
R.H.D.
abatjw00003609
|
am3zzw00009045
|
8. Install the airflow mode actuator. (L.H.D.) (See AIRFLOW MODE ACTUATOR REMOVAL/INSTALLATION.)
9. Install the air guide.
10. Connect the resistor connector. (L.H.D.) (Manual air conditioner)
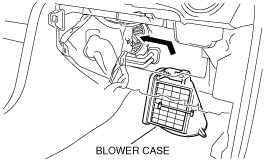
11. Install the blower case. (See Blower Case Installation Note.)
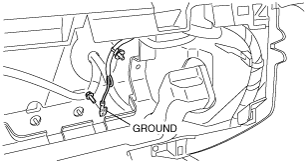
12. Install the ground. (R.H.D.)
am3zzw00003755
|
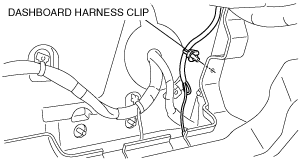
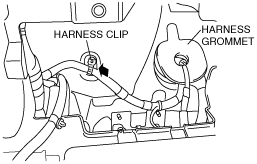
13. Install the dashboard harness clip. (R.H.D.)
am3zzw00003756
|
14. Install the dashboard harness clip. (R.H.D.)
am3zzw00003453
|
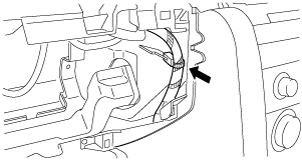
15. Install the harness clip and harness grommet. (MZR-CD (RF Turbo))
am3zzw00003789
|
16. Connect the air intake actuator connector.
17. Install the following parts:
Blower Motor Installation Note
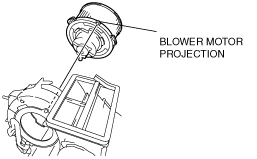
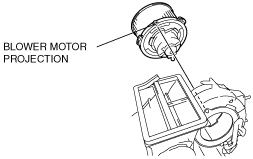
1. Position the blower motor projection upward and install the blower motor to the A/C unit.
L.H.D.
am3zzw00009046
|
R.H.D.
am3zzw00009047
|
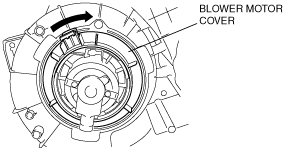
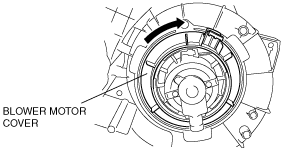
Blower Motor Cover Installation Note
1. To install, rotate the blower motor cover until a click is heard.
L.H.D.
am3zzw00000775
|
R.H.D.
am3zzw00000776
|
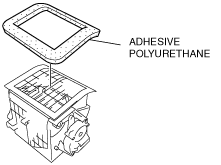
Blower Case Installation Note
1. If not replacing the blower case, replace the adhesive polyurethane on the fresh-air inlet of the blower case.
am3zzw00000777
|
2. Insert the screw into the blower case and install the case to the A/C unit.
L.H.D.
am3zzw00000778
|
R.H.D.
am3zzw00000779
|
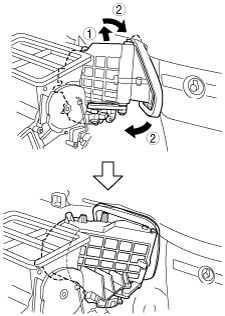
3. Insert the blower case in the direction shown in the figure.
L.H.D.
am3zzw00001434
|
R.H.D.
am3zzw00000781
|
4. Install the blower case by inserting and rotating it in the directions of the arrows shown in the figure.
L.H.D. (Except L3 Turbo, MZR-CD (RF Turbo))
am3zzw00004423
|
L.H.D. (L3 Turbo, MZR-CD (RF Turbo))
am3zzw00004424
|
R.H.D.
am3zzw00004425
|